

Introduction: Make Better Solar Garden Lights


These solar lights are really inexpensive to make and theyll last much longer than any other store bought light. They are a lot brighter than they were before.
Plus most of the components i had were used which keeps the cost down.
Brand new this project would cost $5. However it only costed $2 for me as i reused the jar and reused the solar garden light.
This project restored a lot of old solar lights for me.
Step 1: Materials


You will need an old or new solar light
Silicone
And a jar
However to make the solar lamp better a nimh aa battery and some brighter leds are required. Preferably at least 2 leds.
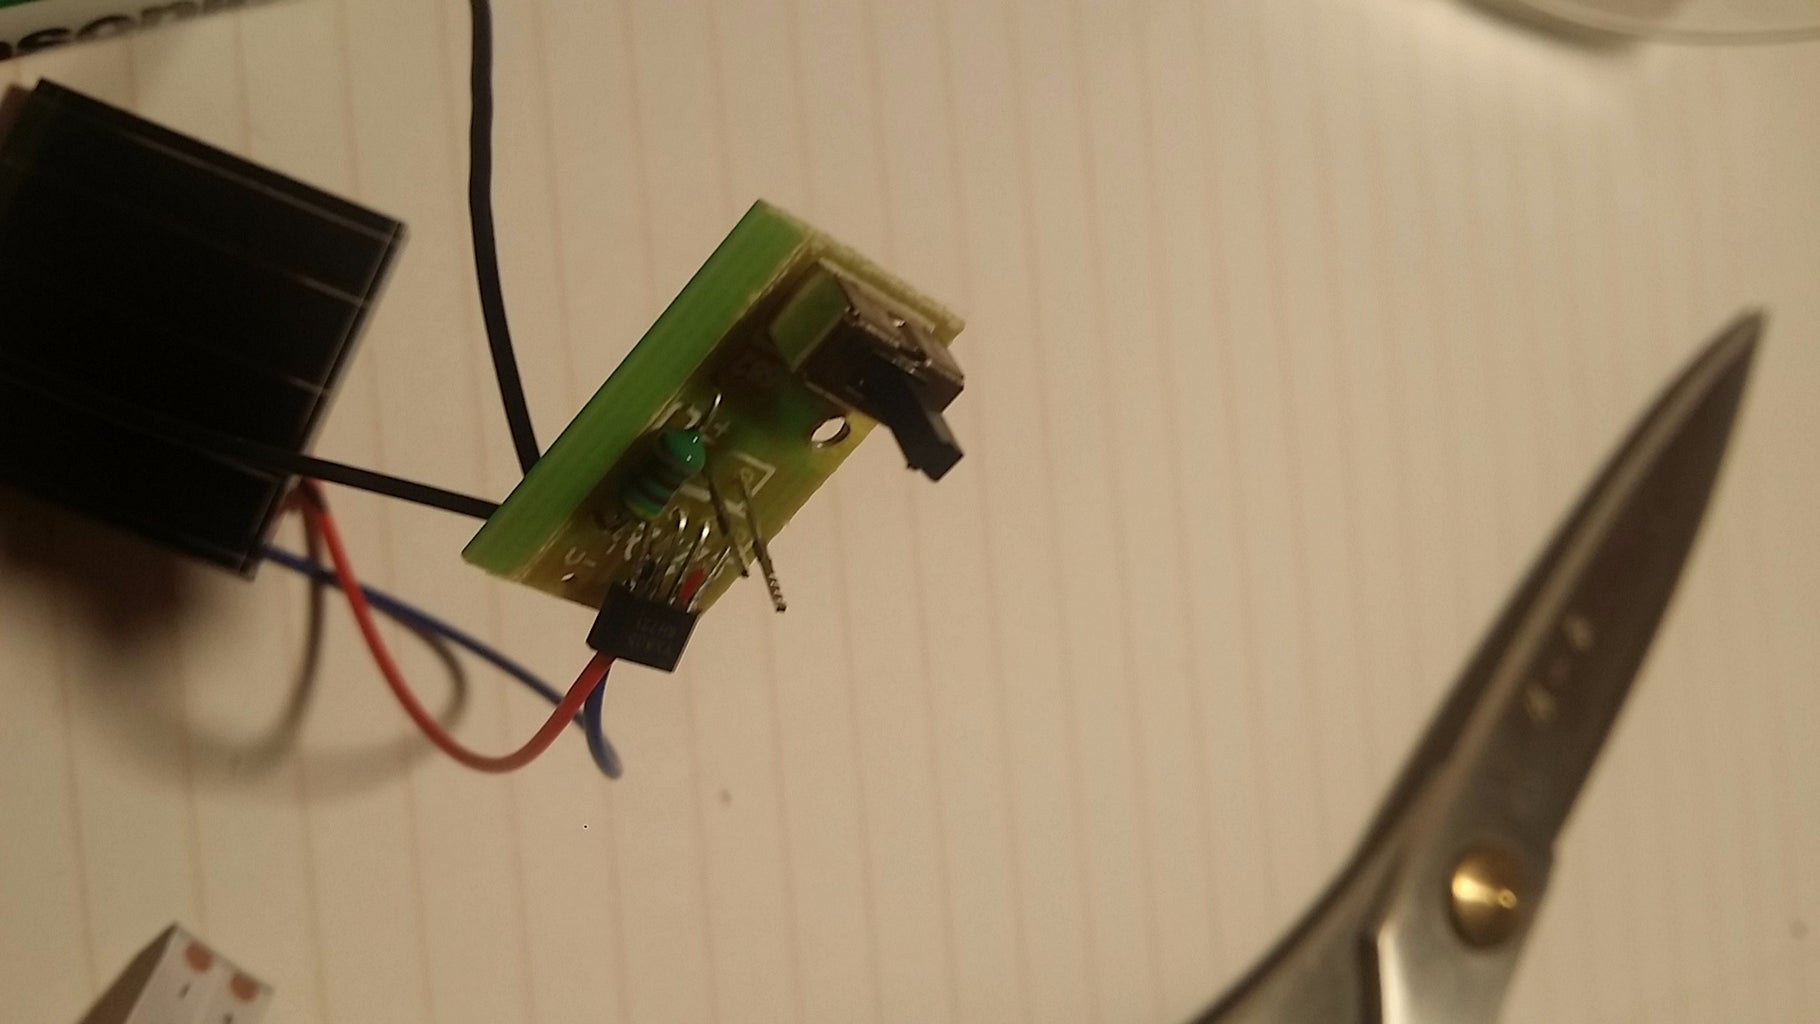
Step 2: Taking It Apart


This step is simple enough:
Remove all the screws and pop out the circuit board then desolder it from the circut.
To remove the solar panel use a lighter to heat up the solar panel. Or pop it out from the back with a screwdriver.
However do not pry off the solar panel when it is cold. If done so the solar panel would crack.
Step 3: Batteries (optional)


batteries supplied with these solar lights are pretty terrible as they are low capacity and can decay quite quickly. I've noticed that with nimhs they lose %50 battery life every 2 years meaning 50%.25% etc. So by upgrading to a 1000 mAh cell the capacity is vastly improved from 40 mAh. This also makes it have a higher capacity than the stock battery when this battery is decayed. This shall help this garden lights last a long long time. If your solar lights are used than you need to swap these batteries.
To attach the battery the old battery is desolderd and a new one is solder on with wires.
Step 4: LEDs (optional)
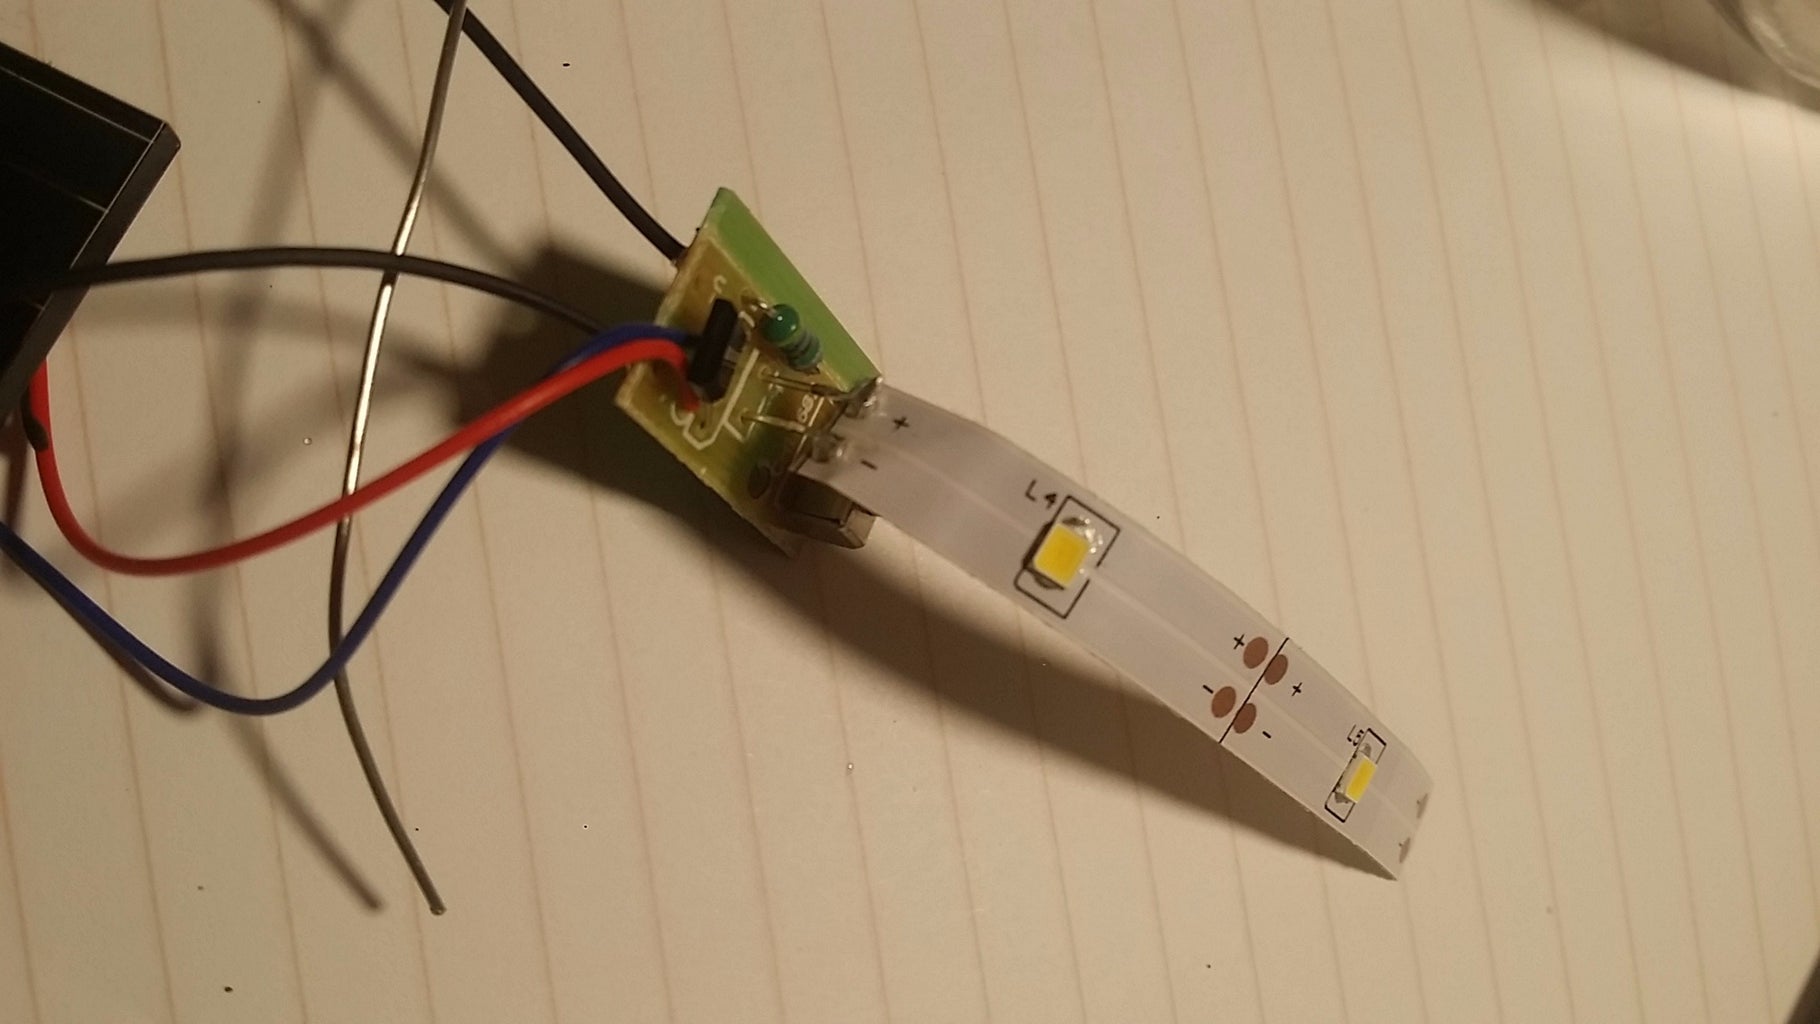

Leds supplied with the solar lights are pretty much garbage. They produce a dim blue light that is barely visible. These are really inefficient and waste a lot of energy. So to make the solar lights brighter without using more electricity is to switch the LEDs to more efficient LEDs. I used 2 SMD LEDs from a LED strip. These are really efficient and having to means that each is getting less power. This makes it slightly more efficient and slightly brighter.
So I snipped off the old led as far towards the led as I could. This made it easier for me to solder to. Then the led was soldered on and tested to work. (Make sure the on off switch is on)
You can see in the picture that the ones I had swapped are a lot warmer and brighter. They are even brighter in real life.
Step 5: Assembly


I used an old salt jar to contain the solar light. Be sure to clean out all the salt and moisture. A paper towel can be added to absorb moisture. Clear Silicone is used to house the solar panels in place. If you haven't already solder in the solar panel. Then once placing everything in and making sure it works used silicone to seal the jar. Now it will be watertight and ready to use.
Now it is no longer scrap
Thanks for reading
If you liked this please give a like or a vote. Thanks

Participated in the
Before and After Contest 2017

Participated in the
Lights Contest 2017


