

Introduction: Total Recall- Arduino Simon Says on Steroids!


The 1 Player game is your basic Simon Game. I added 4 levels of difficulty to it by giving you options for how many rounds you want to play. Your then given a sequence of flashing lights to mimic. Each round adding an extra flash to the sequence. If you can complete the number of turns you win.
The 2 Player game puts you head to head against a friend. The game starts with player one entering the first button into the sequence. The Sequence is then played back for player 2 to see. Then player 2 gets to mimic the sequence. If he gets it correct he gets the opportunity to add a button to the sequence. Then Player 1 gets the play back and tries to mimic the sequence. The game goes back and forth like this with the sequence getting increasingly longer till one player gets it wrong or you reach 99 turns in which case you've hit the max length of the sequence and the game is a draw.
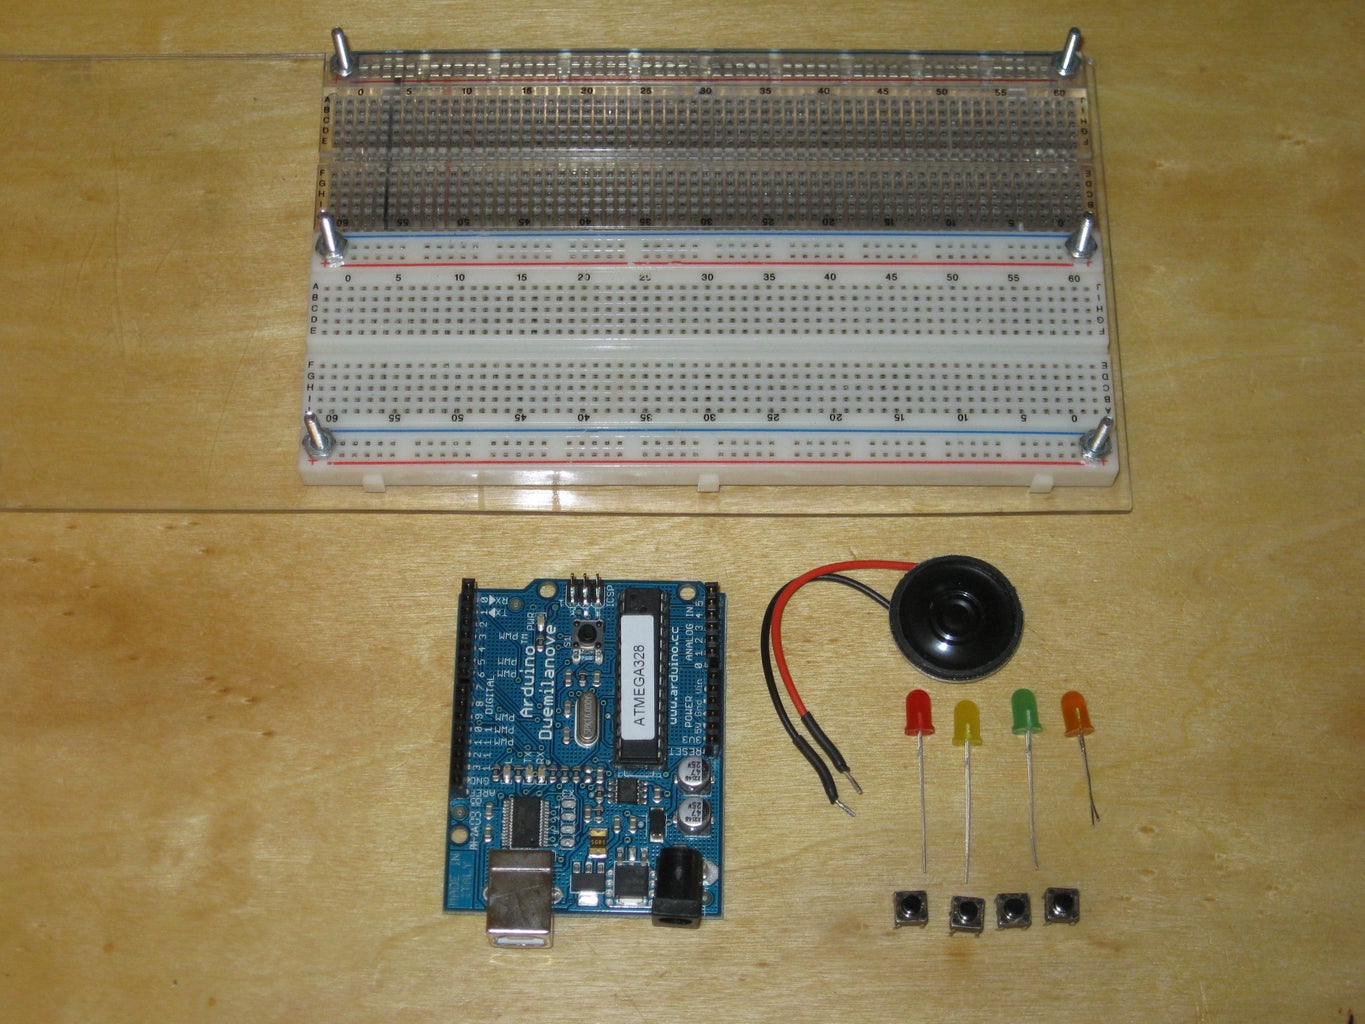
Materials Needed:
- Arduino (I used a Nove)
- Bread Board
- Jumper Wires/Ribbon cables
- Red, Yellow, Green and Blue LEDs
- 4x 100 Ohm Resistors
- 4x Push Buttons
- Small Speaker
- Hitachi HD44780 based 16x2 LCD
- 5K Potentiometer
Step 1: Background

Then i started thinking how i could make the game play even better. And what better way to make a game more fun then to play it with a friend. So i would need to come up with a menu system allowing you to choose between the 2 game types. I also wanted to make the original Simon game more interesting as well. So i decided it would be good to give people the option of how many turns they could shoot for. Nothing like giving people a goal to shoot for to make things more interesting.
Now a checklist of ideas was starting to come together.
- Add LCD display
- Create difficulty options for single player game
- create 2 player game
Step 2: Adding the LCD


Now i was ready to figure out where to connect my LCD. Considering most of my Digital I/O pins where taken i had to figure out where i was going to connect the LCD. I wanted to keep as many of the LCD wires as close together as possible. This makes it a bit easier to troubleshoot any problem. I also didn't want to move the LEDs and Buttons around. This would just add to the headach of updating the code. So i decided to place the LCD on the Analog In pins. The Analog Pins can be used as Digital I/O pins. The are designated as follows:
- Analog 0 = Digital 14
- Analog 1 = Digital 15
- Analog 2 = Digital 16
- Analog 3 = Digital 17
- Analog 4 = Digital 18
- Analog 5 = Digital 19
- RS pin to D13
- E pin to D12
- D4 pin to D16
- D5 pin to D17
- D6 pin to D18
- D7 pin to D19
- V0 tied to a pot to control brightness
- Grd and R/W tied to ground
- Vcc to +5V
Attachments

Step 3: Menu Coding


Many ideas where tried and failed. Ultimately this is what i came up with. below is just a snippet of the code showing you how the menu works.
The void Menu() is the start of the menu system. The game's Name display happens in the void setup(). When the setup is complete it calls directly to void Menu() then starts in on the void loop(). In the void loop() i used several variables to keep track of the state of the code. Like which game is being played. So that everything else can be bypassed and the current game can continue. If the single player game is selected it jumps down to void play1menu() where your given the difficulty option. The difficulty is set by the number of turns you want to play and stored as turnlimit.void Menu() //menu display
{
lcd.clear();
lcd.print(" Sellect number");
lcd.setCursor(3,1);
lcd.print("of players");
delay(1500);
}
void loop()
{ //menu system for selecting 1 or 2 player game
if (game == 0) //no game selected
{
lcd.clear();
for(int y=0; y<4; y++)
{
lcd.setCursor(0,0);
lcd.print("1 Player: RED");
lcd.setCursor(0,1);
lcd.print("2 Player: YELLOW");
buttonstate = digitalRead(button[y]);
if (buttonstate == LOW && button[y] == 2)
{
button1(); //calls for the RED button's LED to light and tone to play
game = 1; //1 player game
}
if (buttonstate == LOW && button[y] == 3)
{
button2(); //calls for the Yellow button's LED to light and tone to play
game = 2; //2 player game
}
}
}
if (game == 1 && turnlimit > 1) //as long as 1 turn has been taken in the 1 player game
{
play1(); //calls to the 1 player game
}
if (game ==1 && turnlimit < 1) //no turns have been taken in the 1 player game
{
play1menu(); //calls to the menu to select number of turns for 1 player game
}
if (game == 2)
{
play2(); //calls to 2 player game
}
}
void play1menu() //menu for selecting 1 player difficulty
{
lcd.clear();
lcd.print("Red=10 Yellow=20");
lcd.setCursor(0,1);
lcd.print("Green=30 Blue=40");
delay(100);
for(int y=0; y<4; y++)
{
buttonstate = digitalRead(button[y]);
if (buttonstate == LOW && button[y] == 2)
{
button1(); ////calls for the RED button's LED to light and tone to play
turnlimit = 10; //sets number of turns
}
if (buttonstate == LOW && button[y] == 3)
{
button2();
turnlimit = 20;
}
if (buttonstate == LOW && button[y] == 4)
{
button3();
turnlimit = 30;
}
if (buttonstate == LOW && button[y] == 5)
{
button4();
turnlimit = 40;
}
}
}
Step 4: Coding the 2 Player Game.
I decided to go ahead and include the code from the 2 player standalone game. The code isn't as refined and may be a bit buggy. But it was only meant as a template for getting the 2 player option up and running. There was no point in refining it when it was going to be copied over to the main code anyway. I started out with the Simon Says game from my other Instructable and built the 2 player game up from there after removing unneeded code like most of the audio side of the code and serial calls.
#include <Tone.h> //call to tone library
#include <LiquidCrystal.h> //call to LiquidCrustal library
Tone speakerpin; //enables the speaker
LiquidCrystal lcd(13, 12, 16, 17, 18, 19); //pins for LCD display
boolean button[] = {2, 3, 4, 5}; //The four button input pins
boolean ledpin[] = {8, 9, 10, 11}; // LED pins
int turn = 0;
int buttonstate = 0; // button state checker
int randomArray[100]; //Intentionally long to store up to 100 inputs (doubtful anyone will get this far)
int inputArray[100]; //used for checking button pushes against the array
int player = 1;
int progress = 0;
void setup()
{
lcd.begin(16, 2);
speakerpin.begin(6); // speaker is on pin 13
for(int x=0; x<4; x++) // LED pins are outputs
{
pinMode(ledpin[x], OUTPUT);
}
for(int x=0; x<4; x++)
{
pinMode(button[x], INPUT); // button pins are inputs
digitalWrite(button[x], HIGH); // enable internal pullup; buttons start in high position; logic reversed
}
lcd.clear();
}
void loop()
{
lcd.clear();
if (player == 1)
{
lcd.setCursor(0,0);
lcd.print("Player 1!");
}
if (player == 2)
{
lcd.setCursor(0,0);
lcd.print("Player 2!");
}
lcd.setCursor(0,1);
lcd.print("Choose a Button");
delay(150);
for(int v=0; v<4; v++)
{
buttonstate = digitalRead(button[v]);
if (buttonstate == LOW && button[v] == 2)
{ //Checking for button push
digitalWrite(ledpin[0], HIGH);
speakerpin.play(NOTE_G3, 100);
delay(500);
digitalWrite(ledpin[0], LOW);
randomArray[progress] = 1;
if (player == 1)
{
player++;
progress++;
delay(500);
output();
return;
}
if (player == 2)
{
player--;
progress++;
delay(500);
output();
return;
}
}
if (buttonstate == LOW && button[v] == 3)
{
digitalWrite(ledpin[1], HIGH);
speakerpin.play(NOTE_A3, 100);
delay(200);
digitalWrite(ledpin[1], LOW);
randomArray[progress] = 2;
if (player == 1)
{
player++;
progress++;
delay(500);
output();
return;
}
if (player == 2)
{
player--;
progress++;
delay(500);
output();
return;
}
}
if (buttonstate == LOW && button[v] == 4)
{
digitalWrite(ledpin[2], HIGH);
speakerpin.play(NOTE_B3, 100);
delay(200);
digitalWrite(ledpin[2], LOW);
randomArray[progress] = 3;
if (player == 1)
{
player++;
progress++;
delay(500);
output();
return;
}
if (player == 2)
{
player--;
progress++;
delay(500);
output();
return;
}
}
if (buttonstate == LOW && button[v] == 5)
{
digitalWrite(ledpin[3], HIGH);
speakerpin.play(NOTE_C4, 100);
delay(200);
digitalWrite(ledpin[3], LOW);
randomArray[progress] = 4;
if (player == 1)
{
player++;
progress++;
delay(500);
output();
return;
}
if (player == 2)
{
player--;
progress++;
delay(500);
output();
return;
}
}
}
}
void output()
{
lcd.clear();
if (player == 1)
{
lcd.setCursor(0,0);
lcd.print("Player 1");
}
if (player == 2)
{
lcd.setCursor(0,0);
lcd.print("Player 2");
}
lcd.setCursor(0,1);
lcd.print("Watch the lights");
delay(1000);
for (int x=0; x <= turn; x++)
{
for(int y=0; y<4; y++)
{
if (randomArray[x] == 1 && ledpin[y] == 8)
{ //if statements to display the stored values in the array
digitalWrite(ledpin[y], HIGH);
speakerpin.play(NOTE_G3, 100);
delay(400);
digitalWrite(ledpin[y], LOW);
delay(100);
}
if (randomArray[x] == 2 && ledpin[y] == 9)
{
digitalWrite(ledpin[y], HIGH);
speakerpin.play(NOTE_A3, 100);
delay(400);
digitalWrite(ledpin[y], LOW);
delay(100);
}
if (randomArray[x] == 3 && ledpin[y] == 10)
{
digitalWrite(ledpin[y], HIGH);
speakerpin.play(NOTE_B3, 100);
delay(400);
digitalWrite(ledpin[y], LOW);
delay(100);
}
if (randomArray[x] == 4 && ledpin[y] == 11)
{
digitalWrite(ledpin[y], HIGH);
speakerpin.play(NOTE_C4, 100);
delay(400);
digitalWrite(ledpin[y], LOW);
delay(100);
}
}
}
input2();
}
void input2() { //Function for allowing user input and checking input against the generated array
lcd.clear();
if (player == 1)
{
lcd.setCursor(0,0);
lcd.print("Player 1");
}
if (player == 2)
{
lcd.setCursor(0,0);
lcd.print("Player 2");
}
lcd.setCursor(0,1);
lcd.print("Repeat sequence");
delay(150);
for (int x=0; x <= turn;)
{ //Statement controlled by turn count
for(int y=0; y<4; y++)
{
buttonstate = digitalRead(button[y]);
if (buttonstate == LOW && button[y] == 2)
{ //Checking for button push
digitalWrite(ledpin[0], HIGH);
speakerpin.play(NOTE_G3, 100);
delay(200);
digitalWrite(ledpin[0], LOW);
inputArray[x] = 1;
delay(250);
if (inputArray[x] != randomArray[x]) { //Checks value input by user and checks it against
fail(); //the value in the same spot on the generated array
} //The fail function is called if it does not match
x++;
}
if (buttonstate == LOW && button[y] == 3)
{
digitalWrite(ledpin[1], HIGH);
speakerpin.play(NOTE_A3, 100);
delay(200);
digitalWrite(ledpin[1], LOW);
inputArray[x] = 2;
delay(250);
if (inputArray[x] != randomArray[x]) {
fail();
}
x++;
}
if (buttonstate == LOW && button[y] == 4)
{
digitalWrite(ledpin[2], HIGH);
speakerpin.play(NOTE_B3, 100);
delay(200);
digitalWrite(ledpin[2], LOW);
inputArray[x] = 3;
delay(250);
if (inputArray[x] != randomArray[x]) {
fail();
}
x++;
}
if (buttonstate == LOW && button[y] == 5)
{
digitalWrite(ledpin[3], HIGH);
speakerpin.play(NOTE_C4, 100);
delay(200);
digitalWrite(ledpin[3], LOW);
inputArray[x] = 4;
delay(250);
if (inputArray[x] != randomArray[x])
{
fail();
}
x++;
}
}
}
delay(500);
turn++; //Increments the turn count, also the last action before starting the output function over again
loop();
}
void fail() { //Function used if the player fails to match the sequence
lcd.clear();
if (game == 2 && player == 1)
{
lcd.setCursor(0,0);
lcd.print("Player 1!");
}
if (game == 2 && player == 2)
{
lcd.setCursor(0,0);
lcd.print("Player 2!");
}
lcd.setCursor(0,1);
lcd.print("YOU LOOSE!");
delay(150);
for (int y=0; y<=2; y++)
{ //Flashes lights for failure
digitalWrite(ledpin[0], HIGH);
digitalWrite(ledpin[1], HIGH);
digitalWrite(ledpin[2], HIGH);
digitalWrite(ledpin[3], HIGH);
speakerpin.play(NOTE_G3, 300);
delay(200);
digitalWrite(ledpin[0], LOW);
digitalWrite(ledpin[1], LOW);
digitalWrite(ledpin[2], LOW);
digitalWrite(ledpin[3], LOW);
speakerpin.play(NOTE_C3, 300);
delay(200);
}
delay(500);
for (int x=0; x<100; x++) //clears array
{
randomArray[x] = 0;
}
progress = 0;
player = 1;
turn = -1; //Resets turn value so the game starts over without need for a reset button
}
If you decide to try this code out be aware there may be some bugs. The tones for the Buttons/LEDs are there but all other music and tones are not.
Attachments
Step 5: Tightening the Code
Next i went through the code to find other ways to tighten it. I realized that any time a button was hit or an LED needed to be light the same basic lines of code where used. So i created 4 functions to call to whenever a button was pressed or the game was lighting the LEDs for you to memorize.
void button1() //LED displayed and tone sounded for RED LED and Button 1
{
digitalWrite(ledpin[0], HIGH);
speakerpin.play(NOTE_G3, 100);
delay(200);
digitalWrite(ledpin[0], LOW);
delay(300);
}
void button2()
{
digitalWrite(ledpin[1], HIGH);
speakerpin.play(NOTE_A3, 100);
delay(200);
digitalWrite(ledpin[1], LOW);
delay(300);
}
void button3()
{
digitalWrite(ledpin[2], HIGH);
speakerpin.play(NOTE_B3, 100);
delay(200);
digitalWrite(ledpin[2], LOW);
delay(300);
}
void button4()
{
digitalWrite(ledpin[3], HIGH);
speakerpin.play(NOTE_C4, 100);
delay(200);
digitalWrite(ledpin[3], LOW);
delay(300);
}
All that was need is one function per Button/LED color. Any time an LED lights or the button is pressed the LED lights up, the same note is played, and the LED is turned off. These functions are used 22 time throughout the code. Reducing the code by about 1000 bytes.
Many other little tweaks and changes where made throughout the coding process that help to tighten the code and make it more efficient.
Step 6: Final Code


Important Note: Just like the Arduino Simon Says game this one uses the Tone library. As mentioned in the other Instructable the library hasn't been updated to be compatible with Arduino 1.0. So i'm including the library here. Alternately you can Download it from the creator and update the code yourself. All you need to do is open the Tone.cpp file and change #include <wiring.h> to #include <arduino.h>
The Next step may take some time and money. The idea is to put this into a permanent enclosure. Well not everything. I'd like to move the Atmega328 chip to its own PCB. I want to turn this into a nice electronic game my kids can play with. So while i'm trying to pull the money together i can at least start designing the PCB for it. Weather i actually have any produced, or etch one myself is still up in the air. Though it will likely end up on a perf board. I'll still design the PCB anyway. Gotta have something to do with my time. ;)
Parts list for final build:
- 4x back lighted arcade style buttons.
- new Hitachi HD44780 based 16x2 LCD
- 6 AA or 6AAA Battery pack
- Smallest enclosure possible to fit everything into
I look forward to any comments and suggestions you might have.
UPDATE:
I've just added an update to the game. Total Recall 1.04 has had a few changes made.
- Added sounds to indicate player 1 and player 2 in 2 player game.
- New option to select speed of game
- Changed single player winning tune
- Menu spelling fixes
I've included previews of the final game layout in both breadboard and PCB views. Better images and the full Fritzing file will be made available at a later date.

Participated in the
Arduino Challenge


