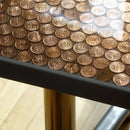
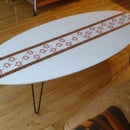
Introduction: ** VINTAGE AD COFFEE TABLE **
Continuing on with the Herman Miller surfboard table concept, we decided to make a new modern version with a twist. Using ads from a calendar, they were decoupaged onto the plywood and then later covered in epoxy resin.
Step 1: Cut the Shape
Using a template from previous projects, we used the router to cut out the table from Baltic birch plywood (not shown in pic)
Baltic birch is used for its stability - it's comprised of 13 layers.
Step 2: Selecting the Layout
First we needed to select which ads we wanted for the table. We chose a mix of famous brands as well as cool/funny ones. We also needed to figure out the layout of the ads - random, straight lines vertically,horizontally, or offset.
Step 3: Decoupage
After establishing a horizontal reference line for the ads to follow - we decoupaged each ad into place.
We used 3 tops coats - and found the usual issues of wrinkling. We found that putting a plastic bag down over the semi-dry ad, then running the laminate roller over it worked the best.
Step 4: Epoxy Time
We have found that heating the epoxy in hot water before mixing breaks down the viscosity and makes for a better and much easier pour.
Step 5: Adding Laminate
We cut and glued laminate onto the underside of the table to add stability. To prevent warping of the wood, you must balance it out.
Here's how it's done:
Spread glue onto table bottom and laminate.
Let it 'tack' (~15-20 minutes).
Lay out wood dowels onto the table.
Placed the laminate onto the dowels, then removed one at a time (from the center outward) while pressing the laminate into the glue.
Once all dowels were removed, we took a laminate roller and pressed out the bubbles.
Once dry, I put the template onto the table and used the router to get the finished edge shown.
Step 6: Finished Product
And here's the finished product.
Hope you like it....enjoy:~)

Participated in the
Woodworking Contest
25 Comments
8 years ago on Introduction
love the idea!
Reply 8 years ago on Introduction
Thank you :~)
I like that dog and cat diary.....funny.
9 years ago on Introduction
Step 5 is lacking some imagery. The part involving dowels is hard to make sense of
Reply 9 years ago on Introduction
Sorry, I didn't want to overwhelm people with too much info :~)
Ok, I have update it with more pics.
Send me a private message if you need more info.
9 years ago on Introduction
the table looks awesome!!!!!!
Reply 9 years ago on Introduction
Thank you :~)
Check out my other Instructables of different tables I made.
9 years ago on Introduction
One question... how did you contain the epoxy from going over the edges? Did you have to build something for that - or did it drip and you sanded?
Reply 9 years ago on Introduction
I built a dam around it - you can use duct tape or Frog tape (painters tape). It is too difficult to sand, and very hard if not impossible to get out once it soaks in.
OR you can let it flow over the edge and wipe the drips from the sides+bottom every 15min. or so, just after you pour the epoxy. This way, it reduces the amount of sanding and/or damage to the bottom. Put painters tape around the bottom surface as well.
9 years ago on Introduction
Beautiful!!! Thanks for the tips!
9 years ago on Introduction
it's beautiful! I just wish you had put more step by step pics in!! I'd like to try to make it someday but don't want to mess things up!! This whole process is new to me.
Reply 9 years ago on Introduction
Thank you so much for the kind words Moon-Pie :~)
I shortened the write up because I felt maybe it was a bit long and people would lose interest.
If you want some help on the steps, just send me a private message here and I will help you out. I have tons more pics that I can show you too, it's no problem....
Reply 9 years ago on Introduction
Me too, Craig!
MGA
9 years ago on Introduction
That's really nice!!
Reply 9 years ago on Introduction
Thank you so much :~)
Dont forget to vote for me ;~)
Reply 9 years ago on Introduction
Already voted! Good luck!
9 years ago
its so cool, i like it. worth thousands of votes.
Reply 9 years ago on Introduction
Thank you so much...Im glad you like it :~)
Thx for the votes too....
9 years ago on Introduction
where do you get the vintage photos?
Reply 9 years ago on Introduction
Photos came from a calendar I bought last year. Since it was last years, I don't know if it is still available. The company that makes the calendar is: www.pageaday.com
Thanks
9 years ago on Introduction
Thanks. It was a calendar bought from a bookstore. The link to the company is shown below. We had to cut the dates of each and every one of those pics - very tedious.