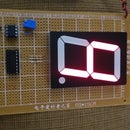
Introduction: 4-Digit Arduino Counter
This project is ideal to understand the logic of work of a counter by utilizing Arduino code since you have available 4 programs: 1 for 1-digit, 1 for 2-digit, 1 for 3-digit, and other for 4-digit counter with one single 4-digit panel. Here, you can upload the code from 1, 2, 3, or 4 digits according to what you want to use. The main components to this kit are a 4-digit panel and 7 resistors while the star that produces the magical result is an Arduino Uno.. Video for this project in the following link: http://www.youtube.com/watch?v=RrAq_A7OJ94
Step 1: Bill of Materials
Components of your project:
1 Arduino Photo Shield (PCB only)
1x4 Digit LED Display Panel
1x40 pin male headers pins
7 Resistors of 220 Ohm
1 Arduino Uno
1 USB-A male to USB-B male cable
What you will need to construct this project:
Soldering Iron
Solder
Helping Hands
Wire Cutters/Strippers
Needle Nose Pliers
1 meter of wire #22
Step 2: Project's Diagram
Checking the project's diagram, you can realize what you really need for this project. Also, it's necessary to revise the pins of connection to your 1x4 LED Display Panel so that you can work without any problem with the project.
Step 3: Separate 5 and 6 Pins
Take 1x40 pin headers pins and cut 5 & 6 pins for using them later.
Step 4: Insert the Pins Reserved Inside the Arduino Socket
Insert the Pins Reserved Inside the Arduino Sockets those of 1x5 (A1-A5) and 1x6 pins (2-7)
Step 5: Mount the PCB on Your Arduino
Once you have mounted the PCB on your Arduino, proceed to solder the tips of each pin you will be seeing in the PCB.
Step 6: Dismount the PCB of Your Arduino
Dismounting the PCB of your Arduino, you can see how it looks.
Step 7: Mount the 1X4 Digit Display Panel
Mounting the 1x4 digit display panel, you can proceed to solder its ends of connection to the PCB.
Step 8: Installing the Resistors of 220 Ohm
Install the resistors of 220 Ohm so that you can complete all of electrical connections of this project.
Step 9: Mount the Done PCB on Your Arduino
Once mounted the done PCB on your Arduino, connect USB-A male to USB-B male cable between your project and your computer.
Step 10: Uploading One Digit Arduino Counter Code
Upload one digit Arduino counter in the following link:
http://pastebin.com/YfywF6jD
http://pastebin.com/YfywF6jD
Step 11: Uploading Two Digit Arduino Counter Code
Upload two digit Arduino counter code in the following link:
http://pastebin.com/bqmjhHgX
http://pastebin.com/bqmjhHgX
Step 12: Uploading Three Digit Arduino Counter Code
Upload three digit Arduino counter code in the following link:
http://pastebin.com/8WEvm1tW
http://pastebin.com/8WEvm1tW
Step 13: Uploading Four Digit Arduino Counter Code
Upload four digit Arduino counter code in the following link:
http://pastebin.com/Wm1DPSwc
http://pastebin.com/Wm1DPSwc


