Introduction: 10 Common Plumbing DIYer Mistakes, and How to Fix Them!
Learn how to avoid costly mistakes by following this article and video!
Step 1: Teflon Tape
Putting teflon tape on the wrong way. Teflon tape can be installed correctly or incorrectly. The incorrect way of doing it is installing it in a counter-clockwise fashion. If installed this way, when tightening your fitting, it’ll tend to wanna unravel itself, thus removing it and potentially creating a small leak, so always install it in a clockwise manner.
Step 2: Improper Venting
Number 2 is improper venting. A lot of DIYers aren’t aware that a plumbing system needs to be well vented. Just like the straw phenomenon, if you don’t allow air in back of the waste going down a pipe, it’ll wanna find air somewhere such as a ptrap and it could cause unpleasant odors to appear from the system so always make sure to inform yourself when attempting to do this kind of work.
Step 3: When to Stop Tightening
Number 3, Over-tightening a fitting. Fittings aren’t made to be over tightened, if you over tighten one, you may have a risk of leaks or even break a fitting as I’ve already seen before. The trick to knowing when to stop is to measure the threads inside the fitting, for example, a 1/2” of threads indicates it shouldn’t go in more than ½”.
Step 4: Saddle Valves
Number 4, installing a saddle valve on a potable water system. These valves are really ingenious but are very prone to leaking and are banned in most places. You’ll still see them in your local hardware stores but it’s highly recommended not to install them. The correct way of branching off a water line is to cut the pipe and solder or crimp a Tee fitting and you are sure to never have any problems this way.
Step 5: Don't Use Drano!
Number 5, is using harsh chemicals to unclog a drain. Most times, the first step for a DIYer to unclog a drain is to use chemicals such as Drano or Drain-Aid. This is a viable solution but it can damage your pipes in the long run if you abuse of it. The solution, pour 2 parts vinegar and 1 part baking soda into the drain, it’ll sizzle and might just loosen the clog enough to unblock it and plus it won’t damage your pipes!
Step 6: Don't Forget to Shut the Water Off!
Number 6, cutting a live pipe without shutting off the water. Most repairs need the water shutoff and a lot of people tend to skip this part and get a big surprise when cutting into the pipe, yikes! The solution is to always make sure the section you are working on is properly isolated before attempting to cut it. If there is no valve nearby, close the main water valve and drain all the water before proceeding to any kind of repair.
Step 7: Transitioning From Steel to Copper
Number 7 is connecting a copper line to a steel pipe. Often, you’ll need to transition from steel to copper and there is a right and wrong way to do it. If you join these two dissimilar materials together, they’ll corrode and eventually fail, causing water damage. To resolve this, you need to either use what they call a di-electric union, or just a brass nipple to join them together, this way you’re sure it’ll last for many years, and you don’t have to worry about anything.
Step 8: Wipe Your Flux Or...
Number 8, is soldering and not wiping the left over flux. Flux is basically an acid that prevents oxidation when soldering a joint. This so called acid is strong enough to eat thru a copper pipe if not wiped off, again, creating a pin hole and wreaking havoc on your property. The fix? Always wipe any excess flux after soldering, it takes 5 seconds to do and can save you a lot of trouble in the long run.
Step 9: Overheating When Soldering
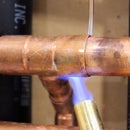
Number 9 is overheating a joint when soldering. Like I mentioned above, your flux will prevent any oxidation while soldering. However, if it’s overheated as such, the solder won’t flow properly into the joint and could cause a leak. To prevent this, don’t overheat the joint, before the flux becomes black and burns off, move the heat away from the joint and apply your solder.
Step 10: Using a Pipe Cutter the Wrong Way
And number 10 is tightening a pipe cutter too fast. I often see apprentices cinching down on it on the first turn just like this. This could result in 2 things, 1, a broken cutting wheel and 2 a deformed pipe which isn’t good. So in order for this not to happen, you should only turn the knob ¼ turn for each complete rotation, this way you’re not applying too much force on the wheel and you won’t get an out of round pipe.


