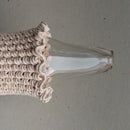
Introduction: 3D Print Complex Overhangs With Meshmixer
In this Instructable we will walk through how to take any shape from a modeling software and 3D print it successfully using an FDM 3D printer. There are many free browser based and software modeling programs available, any of them will work, but the programs used here are Modo, which has a 30 day free trial, and Meshmixer which is free to download.
Other tools to complete this tutorial are a slicing software of your choice and a 3D printer.
Step 1: Choose a 3D Model to Print
Using Modo, a subdivision surface modeling software, this shape was created. It is an almost impossible shape to print without some serious supports due to the amount and depth of the overhangs. Luckily we can use a program that helps to analyze how best to print this shape called Meshmixer.
Step 2: Import Into Meshmixer
Meshmixer, an Autodesk product, is an amazing tool when working with 3D printing and modeling in general. There is a long list of buttons to click on the side bar but the first one we want to focus on today is under the "Analyze" tab, called "Orientation". Once clicked the object will go through an analysis to show which orientation of the object has the least amount of overhangs.
The orientation can be manipulated to address certain areas of the model, but in the end the longest arrow from the model will show the best vertical orientation the model should be in, based on the inputs. Once chosen, click accept.
With the proper orientation now in place, the next step is to generate support. Again, under the "Analyze" tab, choose "Overhangs". This will present hotspots where overhangs are present, again based on inputs. With the proper inputs in place, click "Generate Support" and the program will establish supports to print these overhangs properly in the most efficient way. These settings can be manipulated for individual printing and output, and fine tuning might require a print or two to test each change. Using the basic settings we will move forward onto printing.
Step 3: Preparing the Print
While the Meshmixer interface does have a direct line of communication to a 3D printer, using a program like Simplify 3D allows for greater control. There are also other slicing softwares to use depending on the machine, its up to you to decide which is best.
A note, since Meshmixer has already generated the support necessary to print, even from the print bed, make sure to turn off support in the print settings!...otherwise you might end up with two sets of support
Step 4: Print!
While the first print was unsuccessful, some settings were changed to allow the model to survive the next print. Thanks to some small adjustments in the support configuration in Meshmixer the consecutive prints were a success. At this point the supports can be removed, but were kept on in this model to act as a base.
Cutting the model in half shows how the slicing software handles intersecting volumes, which can be seen in the slicing stage but is not seen in the final model unless the piece is cut into. A cast of the object shows the overhangs in relief, highlighting the need for supports if printed in this orientation. Hope this helps with your work, good luck and happy printing!


