Introduction: 3D Printed Goldeneye Remote Mine (with Arduino)
Years ago, I stumbled upon Shane Blomberg's Instructables for remote mine props from Goldeneye. Being a big fan of the movie and Nintendo 64 game, I thought they looked so cool. Completely unnecessary, but I wanted one. One day. With the purchase of a 3D printer, I finally made that happen.
Original Remote Mine Prop Instructable
3D Printed Remake of the Original Instructable
The original versions made use of an LED chaser kit and a panel mount, active piezo buzzer that's synchronized with one of the lights. This version, instead, utilizes an Arduino Nano to control the frequencies of the lights and buzzer in order to get as close as possible to the movie's version.
Supplies
(8) 3/8" diameter x 1/4" height neodymium magnets
(6) 220 Ohm resistors
(1) 150 Ohm resistor
(1--optional) SPDT slider switch
Acrylic paint
I also used miscellaneous tools and consumables such as a soldering iron, wire, small gauge heat shrink, sand paper, and brushes.
Step 1: Prototype and Program Circuit
One hour 49 minutes and 37 seconds into the movie, Treveylyan's nameless henchmen have James surrounded within Alec's secret lair. But, James has a trick up his sleeves--dual remote mines, which he arms before surrendering. The henchmen escort James from the area as the camera pans to a mine beeping away. Why would a hidden bomb beep? Who knows, but it beeps at a frequency of 4100 Hz with a period of 200 milliseconds and duty cycle of 75 percent. I wanted the same sound in my project, and a spectrogram of the audio provided that information. Additionally, the LEDs cycle clockwise with one light on at a time and switching every ~180 milliseconds.
The circuit could have been implemented with some timers, counters and other discrete components, but that would have been way more trouble than it was worth. A microcontroller can do all the work with a couple dozen lines of code and less components. Also, 3rd party Arduino Nanos are less than $10 now, so buying one is cheaper than ordering all the components.
It may be worth noting that the pins used for the breadboard are different than the final pins. The pins for the LEDs were moved later on to make a tidier circuit when soldered. Also, I added an optional slider switch, which turns the sound off or on, since the beeping can get quite annoying to others...
Attachments
Step 2: 3D Print Parts
I first printed the original 3D parts from Shane Blomberg's design, but the LED holders I purchased fell through the holes in the top shell, and the posts that were meant to hold a buzzer and LED chaser board in the bottom shell weren't needed for my project. I brought the models into Fusion 360, reduced the size of the LED holes in the top shell to 6.5 mm diameters, removed the posts in the bottom shell, and reexported.
3D Printing Settings:
Upper shell: 20% Infill, needs support (support density 10%), 0.2 mm layer height
Lower shell: 20% Infill, no support, 0.2 mm layer height
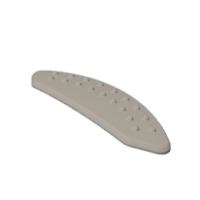
Grip pads: 20% Infill, needs support (support density 20%), 0.12 mm layer height
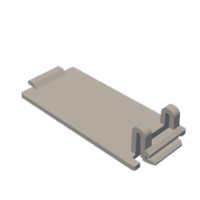
Battery cover: 20% Infill, no support, 0.2 mm layer height
Step 3: Sand and Prime Parts
To sand the parts, I initially used a Dremel tool with a sanding drum attachment at low speed. It worked well to quickly remove layer lines but left a rough surface. After most of the layer lines were removed, I used a regular clamp-on sander with 120 grit and then 180 grit sandpaper. I didn't have anything finer than 180, so I stopped there. In retrospect, I think the parts would have benefited from some finer sanding. After sanding, I primed with Rust-Oleum's 2-in-1 filler and sandable primer. I sanded a bit more, wiped with a damp cloth, and they were ready for paint.
The above technique worked well for the upper and lower shells but couldn't be used for the textured pads. The surface area couldn't be sanded without sanding away the bumps. Instead, I used many layers of the filler/primer and didn't worry about sanding. After 5 or 6 passes, the layer lines were filled in.
Step 4: Paint and Clear Coat Parts
For painting, I chose 2 tones of grey acrylic paint to match the video game's color scheme. I spent far too much time in the craft paint aisle of Michael's trying to find the correct colors. I even got out of the check out line to swap "Storm Grey" for "Dark Grey."
Since the craft paint I used has less pigment than more expensive paints, it required 5 coats until brush strokes weren't visible and I was happy with the coverage.
After painting, I waited for a low humidity day, and added 3 coats of clear coat.
Step 5: Bond Textured Pads
To bond the 2 textured pads to the upper shell, I mixed up some JB Weld, applied it to the pads and a little to the shell. I weighed the shell down with some Ziploc bags of rice and waited 24 hours.
Step 6: Bond Magnets
To bond the magnets to the shells, I again mixed up some JB Weld and placed each of the magnets in the holders with a bit of epoxy. The bottom shell's magnets all need the same polarity, and the upper shell's two magnets need the opposite polarity (in the installed condition.) I placed the bottom shell on top of something ferromagnetic (a deep freezer) to apply some force between the magnet and shell while the epoxy cured.
Step 7: Solder Components
I hadn't soldered anything in years, so don't be too judgmental about my irregular solder joints. The important thing is there were no shorts, and the circuit worked as intended.
Step 8: Put It All Together
Finally, everything could be put together. The push button switch was added to the upper shell, and the positive lead from the battery connector was spliced in and connected to the switch with a small piece of wire and some solder.
The LEDs were pushed into the holders. A dab of superglue was added to each to keep them from being accidentally pushed into the housing.
Step 9: Choose Target
As you can tell from the pictures, I made 2 mines. One I gifted to my brother, who similarly is a fan of the game and movie. The other is on the side of my fridge. Everyone loves pressing it.


