Introduction: 3D Printed Loom
Posted as an entry in the 3D Printed Student Design Challenge. I am a third year Western Michigan University student pursuing a bachelor's in mechanical engineering. This object was fully designed in Fusion360 and printed with PLA plastic.
The goal of this project was to design an object that had a purpose or function. I struggled with a couple of ideas before finally landing on a small-scale fabric loom for the design contest. This is a perfect gift to give to someone to introduce them to a fun and rewarding hobby. A few items you could make include tapestries, bracelets, or charms.
This is my first project on the platform, and I am excited to share my ideas with the community. It was a fun project and the bracelet I made looked great.
The STL files are provided below.
Supplies
Materials for Assembly and Creation
- Two different kinds of yarn or string
- Glue (or screw if feeling impatient)
- Scissors
Step 1: The Design Process
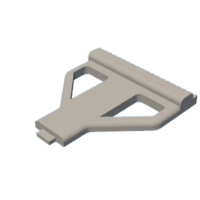
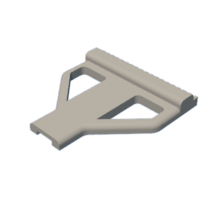
I decided to break the loom into two pieces due to the size of the printer bed that I was working with. The size of my bed is 6 inches by 9 inches, and I wanted the loom to be at least 11 inches long. If you want to make a loom to your specific dimensions, the only component I would worry about is the number of teeth that you place on each side of the loom. I would stick to a ratio of about 4 teeth for every inch. This specific design came out slightly under 5 inches and had 19 teeth in total.
In fusion 360 I was able to design it with only two sketches on the left and right side. One for the main body and another for the divot/protrusion used in connecting the sides.
Step 2: Printing and Assembly
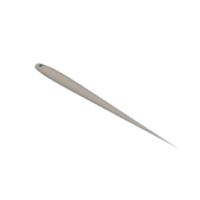
I printed using orange PLA at 200 degrees Celsius. The loom body was printed at 5% infill to save on time and material and the needle was printed at 50% infill to increase durability. The estimated print time is about 5.5 hours total.
After gathering the components, glue together the left and right side and let it sit overnight.
Alternatively, take a soldering iron and a screw and melt it into the plastic of both sides and let it harden. This results in a secure bond and the ability to change the design in the future.
Step 3: Tips for Weaving
The first step is to loop the warp threads (vertical threads) on the top and bottom of the loom, make sure it is tight, so the string doesn't pull as much when weaving. The next step is to choose an appropriate amount of thread to become the weft of the fabric (horizontal threads). For this project I went with only one type of gradient yarn which turned out great. You can mix and match any kind of thread as the weft by tying it to the new thread that you chose. The weaving consists of tying the weft thread to the needle and pushing it through the warp while alternating from above and below. On the way back you reverse this process, after doing it for some time and pushing the weft together you can create fabric tapestries or bracelets. If you use the provided 3D printed needle, hold it with the flat side perpendicular to the loom, this will increase the stability of the plastic when weaving. In my bracelet, since I didn't tie the warp tight enough it began to warp or become thinner as I continued down.
If you are a more visual learner I would recommend looking up "how to weave on a tiny loom" on YouTube, there are some great step by step videos that clearly explain the process on weaving with a similar looking loom.
Step 4: Final Product
After tying the ends of the weave into simple knots and then tying it together, I created a nice earthen color bracelet that looks quite good.
Overall, this was an entertaining and useful project that allowed me to discover the joy of weaving. The loom worked great and I'm excited to see what I can make with it next.
Thank you for visiting and for your vote.

Runner Up in the
3D Printed Student Design Challenge


