

Introduction: 3D Printed Piano


Hello, my name is Alex Wos', and I am a Year 11 at Kuranui College in NZ. I recently made a piano using Fusion 360 for a friend. I looked around to try to find one, but there just wasn't one that looked or felt right. So I decided to make one myself! In this Instructable I will guide you through how to make you own 3D printed piano. Hope you enjoy.
Supplies
Materials you will need:
- 3D Printer
- Filament
- Super glue
- Fusion 360 or similar
- Your imagination!
For all of the materials, you can use any variation depending on what you like, and what you have! For this, I have used a Creality Ender 3 printer, black and white PLA filament, and Autodesk Fusion 360.
Step 1: Inspiration

The friend that I wanted a gift for is piano mad, so a model of a piano seemed like an easy option. I had a look online and ended up using the cover image for one of the books I was using at the time. Take the time to find the right object you are looking to replicate - you can't change it once it is printed!
Step 2: Design the Main Body


Once you have your model you are ready to start. I broke the piano down into easy printable pieces - the body, the lid, the white keys, the music stand and the legs. Each piece needed to print flat on the printer surface and be able to fit together easily. Once you have got a plan of what you would like it to look like, you can start putting it into Fusion or what ever you are using.
I started with designing the main body of the piano. I used the sketch function to get the main shape, and adjusted it until it feels right. For the connector between the body and the top, I put a tube along the side of the body, by putting a circle sketch where I wanted it to go, then extruded it, so that it made the tube.
Step 3: Detail in the Body


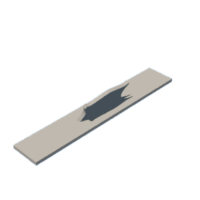
I added the soundboard inside the piano itself. The soundboard is the structure inside the piano with all the wires and hammers. This took a bit of time, and looking back on it, was probably something that I could have skipped, as you can't really see it! You can use any method you like to add the detail, I personally used the line tool to make the bars, and the circle to make the rounds on it. The details that I used can be seen in the first image. Another bit of detail that I added was my name on the front, to make it more personalized. I started with a sketch, put my name onto it, changed the font, and extruded it into the body of the piano
Step 4: Design the Keys


The keys had to be done in two stages - the black and the white. I started the black keys and made them part of the body. I did this by making a sketch, which is seen in the first image on this step, and used the rectangle tool, with the duplicate tool, to make all of the keys, and put them in the right places. From there, I extruded the black keys up so that they looked the right height compared to the rest of the body.
Now for the white keys. I started with making a new sketch using the keys that I had just done, then moved them all up, so that they were separate from the rest of the body, as can be seen in the third image. To get the dips and spacing around the keys, I pushed all of the keys in a small bit, so that they would slide onto the black keys well, and so that there was some spacing between each of the white keys. Finally, you can extrude the insides of keys and the dividers, to get your keys finished.
Step 5: Design the Music Stand


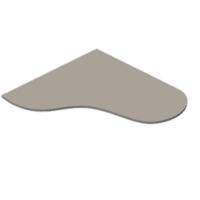
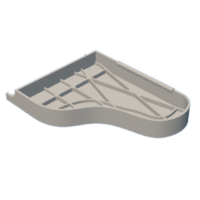
For the basic shape of the stand, I used the fine point spline tool to make the outline of the board, then fine tuned it to my personal liking. Then I extruded it, put it on an angle, and put a rectangle onto it for when it goes onto the body. One issue with this is that you get a small lip underneath, as seen in image 3. The way that I dealt with this was to take the two main bits of it apart, the base and the stand, and print them separately.
Step 6: Design the Top and Holder


For the lid, I made a new sketch, and used the base for the body for the shape, and extended it out, so that it hangs over the edge. After that, I extruded it, and to finish it off, put the clip for it to slide onto the base. The sketch for the clip can be seen in the 4th image. The inner circle is the diameter of the tube on the base, and the outer circle is that plus about half a millimeter. I then set some boundaries for how far the top would be able to open by putting some lines onto the sketch as well. from there, I extruded the section between the two circles the same distance as the tube on the base.
For the holder, I thought about how it would work, and settled with the design in image 5, with the left hand side being what goes onto the side of the piano. I then extruded it all, then filleted all the sides, except for the inside and the other end, as seen in images 6 and 7.
Step 7: Design the Legs and Pedals


For the pedals, I started by making two sketches, the first one being the base, and the second being the top. The reason that I did it in two parts is so that the top could have a block as well. On the base, I put two smaller rectangles inside of it, so that they could be extruded as the frame for it, as seen in image 2. I extruded all of the shapes on the sketch, and used the fillet tool again to curve off the tops of the pedals.
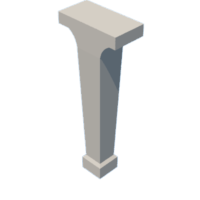
For the legs, I designed one, and just used that design for all three of them. I used the same idea as in the pedals, making 2 sketches, one above the other, and working in between them. When making it, I used the loft tool to get the change in diameter. I also used the fillet tool again, but backwards, to get it to curve inwards.
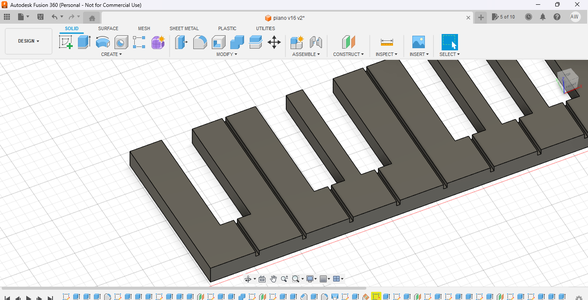
Step 8: Print, and Put It All Together!


Now that you have all of your pieces designed, you can print them off. As you can see in the images, most of the piano was printed with black PLA filament, but the white keys were printed, well, white. You can also see the detail of the soundboard inside, but in the cover image, and the third image on the introduction, you can't see it as clearly. You can chose to change this, as it is your piano! For this, I have used Ultimaker Cura for slicing it. The settings that I used might not work for where you are, or what printer you used. I used the standard quality, 0.2 mm on Cura, with a brim, to stop the print from warping. As said before, the settings that we used could not be what is best for your printer, or climate. I printed each piece individually, and some pieces twice, due to errors, such as deciding what skirting to put onto the print. After all of the pieces were printed, I stuck them all together with some super glue, although you can use what ever you feel is best/necessary. The files below are what I have made, and used.
The piano turned out really well and both me and my buddy were really pleased with it!


Participated in the
3D Printing Student Design Challenge


