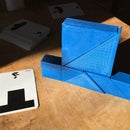
Introduction: 3D Printing With Zotebook
I love 3D printing with Zotebook, an iPad app that turns rough sketches into precise drawings. The design features of Zotebook app operate in 2D, but Zotebook also has some great tools to extrude 2D shapes and create STL files to print, and it's really fun, and since I am making some 3D cheese anyway (for a math project, that's another story), I thought I'd share some 3D printing tips.
Why I like 3D print with 2D shapes
Printing extruded 2D shapes is sometimes all you need, and it's easy. You never need support material or tons of attention to detail, and the prints almost always come out. No fuss, just making stuff. And I while 3D design is essential sometimes, I enjoy the challenge of making 3 D objects from flat shapes (flatpack anyone?)
I also teach intro classes about 3D printing for kids and adults, and starting out by designing 2D shapes is usually easier. It also lets folks try some real design, not just download files from Thingiverse.
In this Instrucable, I just want to show how to do simple and satisfying 3D prints from 2D shapes in Zotebook.
Step 1: What You Need:
An iPad with the Zotebook app from the app store (you will be able see the 3D renderings in the free version, but you will need to upgrade at https://zotebook.io to down load stl files).
A 3D printer.
Step 2: Open Any Image File You Have in Zotebook.
Or make a new one.
I need some 3D "cheese slice" models for a math project, so I start out by making a variety of triangles. You can see I have equilateral, isosceles, and scalene triangles, here.
Make sure the file is named, saved, and scaled. This file is in cm.
(If you haven't tried Zotebook, check out this tutorial https://www.instructables.com/id/Learn-Zotebook-Wi...)
Step 3: Preview the Shapes
I press the little hammer in the upper right corner of the screen to preview the 3D shape.
In the pop-up screen I can set the extrude depth, or height of the pieces.
I can also rotate to see how they look at different angles.
7 cm seems a bit steep for cheese slices, so I reduced them to 3 cm, and they look better.
Step 4: Go to Zotebook.io to Get Stl File
At Zotebook.io I can see all my files in "My Sketches," and I select Cheeses.
If I sort by "newest," Cheese will be right at the top.
Step 5: Select STL(3D Printer)
To download the STL file.


