Introduction: A Comprehensive Guide to Soldering: Techniques, Tools, and Tips
Whether you're a DIY enthusiast, an aspiring electronics hobbyist, or someone looking to repair household electronics, mastering the art of soldering is an essential skill. This blog post, and accompanying YouTube tutorial video, will guide you through the essentials of soldering, ensuring you create strong and reliable connections every time.
This tutorial was originally published on my personal website blog.
Supplies
At its core, soldering involves a soldering iron, solder, and some wire. However there are a few additional tools that are beneficial in optimizing your workflow. Below is a list of my personal recommendations (that I own and use). Note the these are affiliate links and help support me create more educational content like this tutorial!
- Hakko Soldering Iron: https://amzn.to/42e3QIZ
- Pinecil Soldering Iron: https://amzn.to/3UOXEXZ
- Irwin VISE-GRIP Wire Stripper: https://amzn.to/43fHnwr
- Lead Free Solder: https://amzn.to/3uJt2wg
- Exhaust Fan: https://amzn.to/3uHZaAp
- Helping Hands: https://amzn.to/48rlMCQ
- Helping Hands Alternative: https://amzn.to/49mHwkU
- Heat Shrink Tubing: https://amzn.to/3uLV0rd
- Soldering Mat: https://amzn.to/4bPx7zC
- 16 AWG Wire: https://amzn.to/3uF2oon
- 18 AWG Wire: https://amzn.to/48H9MO5
- Lead Free Tip Tinner: https://amzn.to/3wrXz2c
- Solder Wick Braid: https://amzn.to/3SGAmR6
- Hakko T18 Tips: https://amzn.to/3uPuey3
- Heat Sink Copper Alligator Clips: https://amzn.to/49Au38K
- Safety Glasses: https://amzn.to/3UQoiQ6
- Multimeter: https://amzn.to/3UOMe6g
Step 1: Strip, Twist, and Splice
Strip the Wires:
Traditional wire strippers suck! When stripping wires I can’t recommend any other tool other than automatic wire strippers. Start by using the tool to expose about one inch of material on 2 pieces of wire.
Twist the Strands:
Wires are made of multiple, thin strands, we want to start by twisting these strands into a single core. Ensure they're tightly twisted to prevent weak joints and that there are no loose wires sticking up that may later puncture through insulation after soldering.

Splice Wires Together:
While you could solder by laying two wires parallel, on-top of each other, there will be a small air gap between them and we will be relying entirely on the solder to hold them together. This isn’t the strongest connection, instead we want to twist the wires around each other. There are 2 methods to achieve this, as shown below.

X-Shape Twist
- Cross the stripped wires creating an x-shape.
- Use your two index fingers to twist the ends around each other, ensuring snug wraps.
V-Shaped Twist
- Pinch the end of one stripped wire at the base of the insulation of the other wire, creating a v-shape.
- Using your free hand, twist the two wires around each other.
Ultimately the method you use is a personal preference, so I encourage you to try them both. There are three steps to ensuring a good spliced wire connection:
- Are the wires twisted end to end? You don’t want untwisted sections or unequal cable lengths.
- Are the wires laying flat? You don’t want any strands sticking that could later puncture through insulation.
- Is it a snug fit? You should be able to apply a little bit of tension without it coming apart.
Step 2: How to Clean the Iron
Now that the wires are prepared, we can solder! But first and foremost we need to ensure we maintain a clean tip.
Without regular cleaning, the tip will begin corroding and it will be ineffectual at transferring heat onto our wires.
Types of Solder
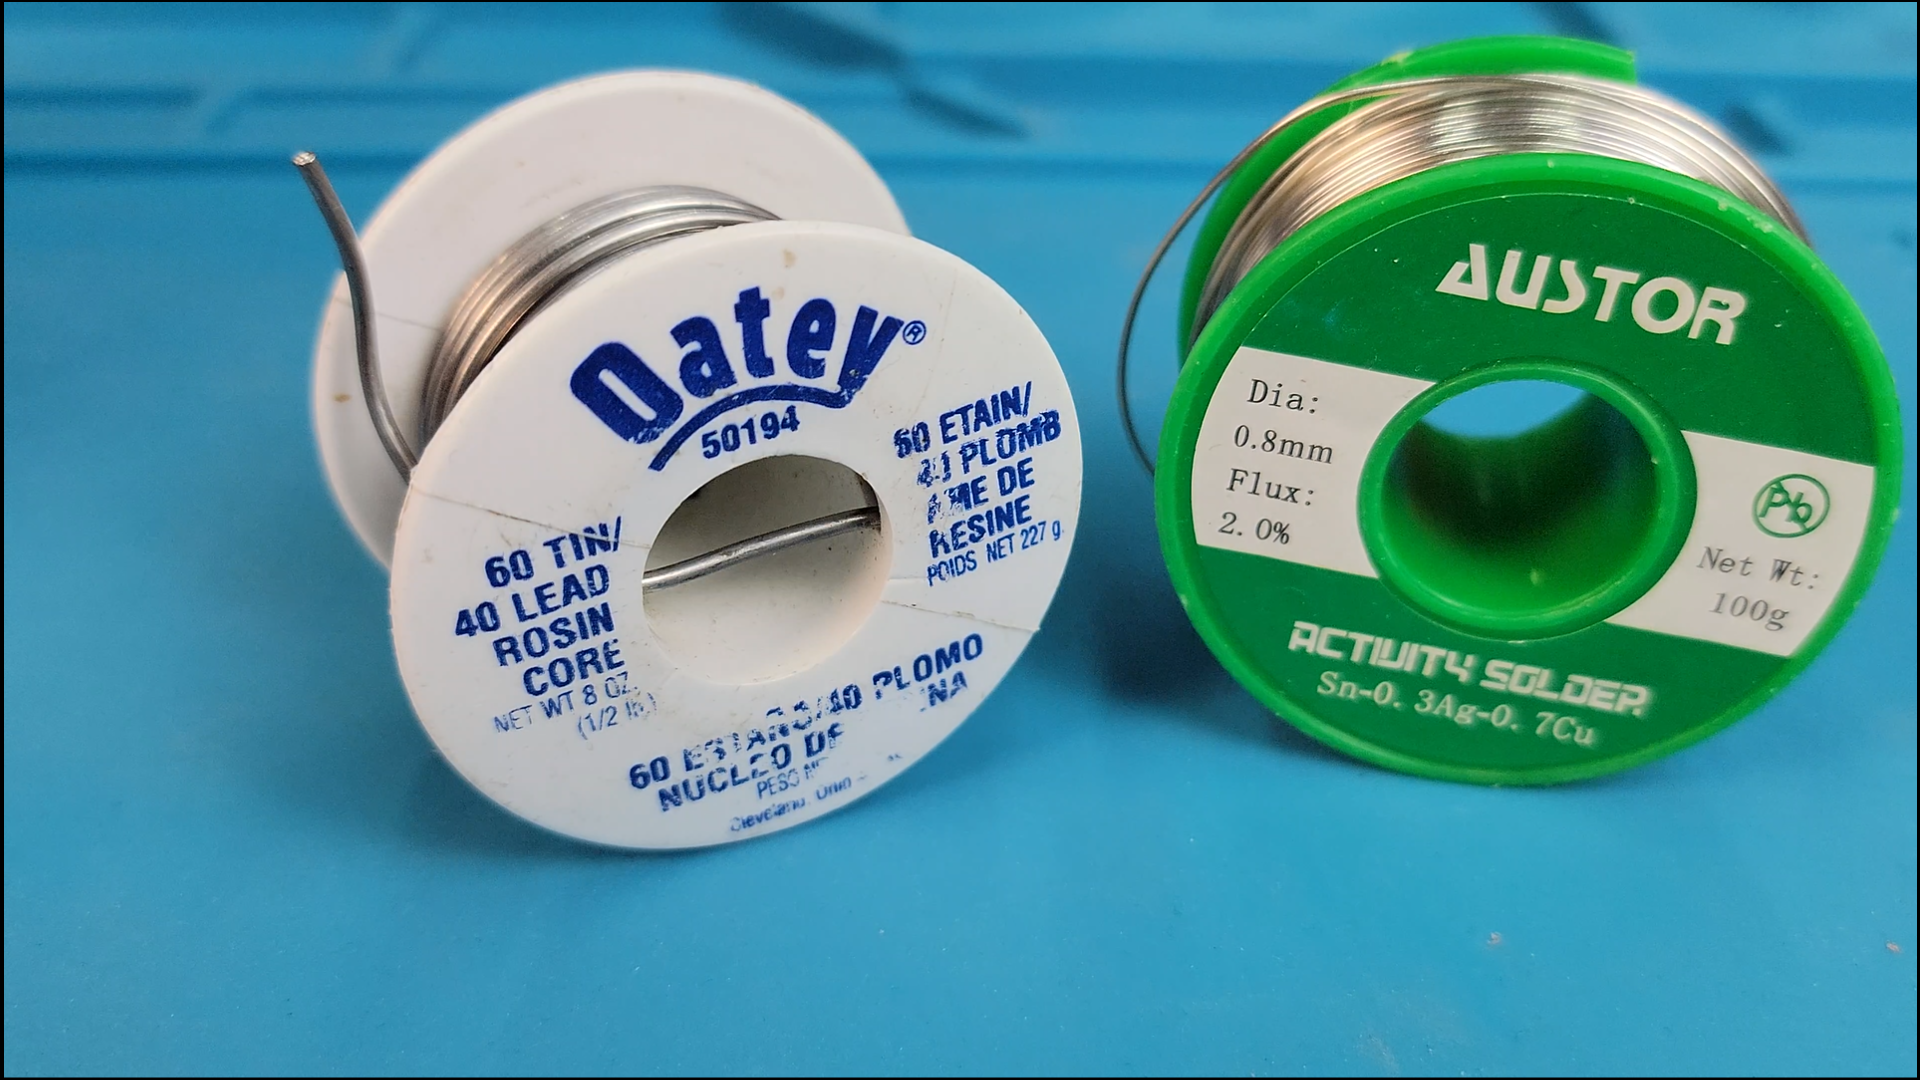
- Lead-based solder: flows easier, lower soldering temperature of 600°-650°F (316°-343°C), carcinogenic!
- Lead-free solder: a little harder to work with, but safer for human health, higher soldering temperature of 650°-700°F (343°-371°C).
I generally prefer working with lead-free solder for the safety concerns around lead-based products. If working with leaded solder, please ensure you don’t eat or drink at the same time and wash your hands after soldering.
What is Flux?
Solder used for electronics is actually a hollow metal tube filled with a substance called flux, also referred to as a rosin core. Flux is a material that improves the solder flow and adhesion by reducing oxidation. Without flux the solder would oxidize rapidly, not flow efficiently, and result in poorer joints. It’s a super important ingredient in all electronic solder!
Some people will say you also need to add extra flux paste to the wires but honestly this is a redundant step, with the right technique there’s already more than enough flux in the solder to make effective connections. Anyone that insists you use extra flux has spent too long soldering copper pipes together.
Cleaning the Soldering Iron
Without regular cleaning excess solder builds up, the tip oxidizes, and corrodes. Once this occurs it will be a lot harder to effectively heat up a surface and solder.
To prevent this, I clean the tip when I first turn on the soldering iron, then every couple of minutes while working, and once more before turning the machine off.
The cleaning process involves applying fresh solder to both sides of the soldering iron (known as tinning) then lightly brushing off the excess solder in a brass sponge. Don’t be too aggressive when brushing off excess solder as you can flick hot, molten solder toward your face. You may choose to wear safety glasses. After cleaning, the tip should come out smooth and shiny.
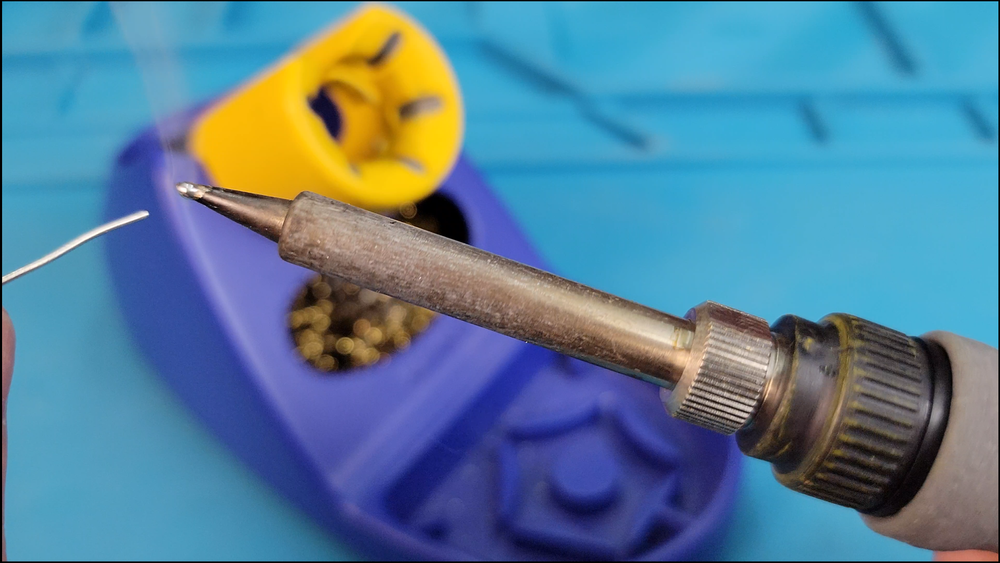
An alternative to brushing off in brass sponge is using a damp paper towel or sponge, but I personally don’t like this method as it’s a hassle to go wet, it drops the surface temperature of the tip, and if the sponge is too dry it will melt onto the tool, making an even bigger mess to clean up. Additionally, while you could use regular water, it would be better to use distilled water without the additional minerals found in tap water. All round, it's more hassle than a simple brass sponge.
For more aggressive cleaning, you can plunge the hot tip directly into tip tinner, this will really help strip away the excess build up of material and oxidation. However, this is overkill in all but the most extreme cases and you will probably want a fume extractor running.
Whatever you do, never ever use steel wool or a metal file to clean off the tip of the iron. I have seen some videos on YouTube recommending this but they are both too abrasive and will destroy the protective coating on the tip of the iron leading to an even faster deterioration.
Step 3: What NOT to Do!
It’s easy to make a bad solder joint. So easy that I actually want to teach you the wrong method first, so that we can see what to correct through proper soldering technique.
The incorrect method is as follows:
- Apply a substantial ball of solder to the tip of the iron
- Wait several seconds as smoke is released from the solder on the iron (this is the flux evaporating away)
- Then attempt to paint the solder onto cold wires, depositing small, heaped balls on the surface.
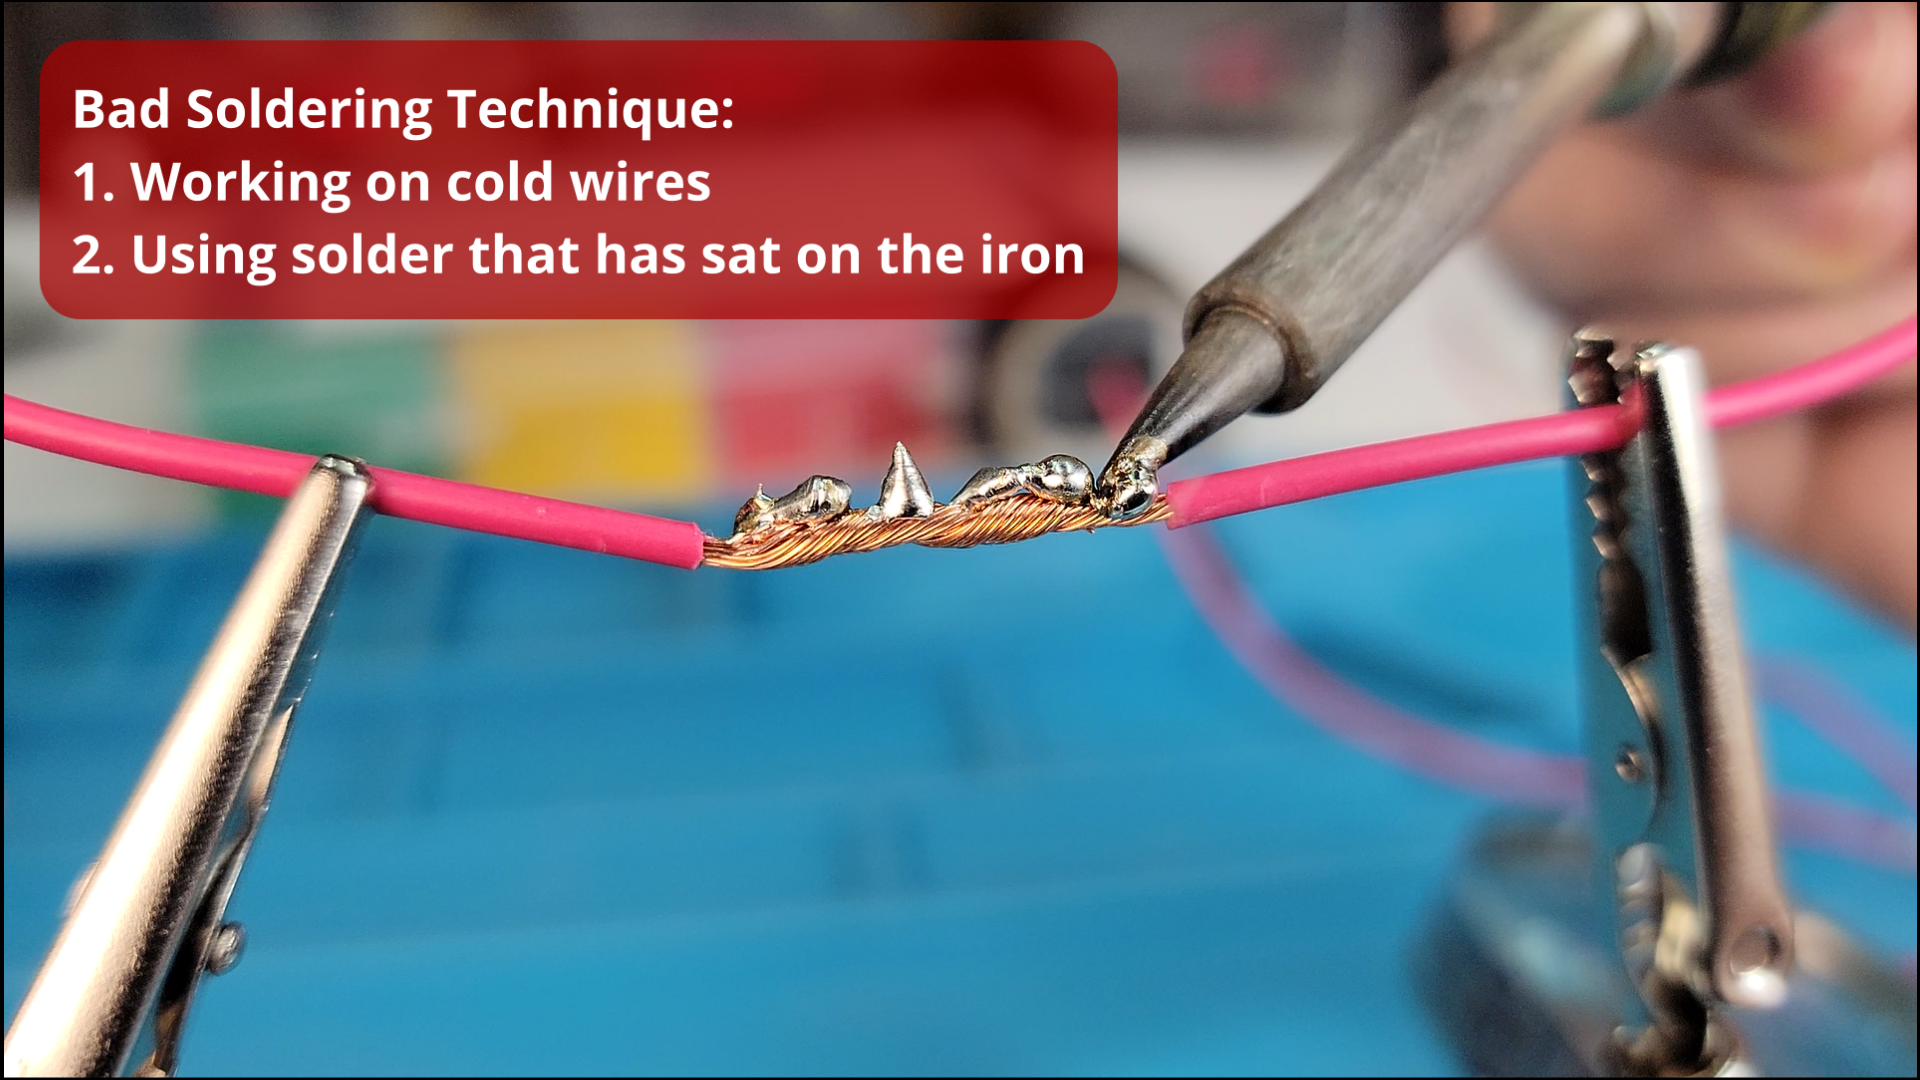
Looking at the image above, it is fairly intuitive that this is a bad solder joint. But what exactly was wrong with this and what are the steps we can take to ensure proper soldering technique?
The first issue was that all the smoke being released while solder sits on the tip of the iron is the flux evaporating. And recall, the entire reason we use flux is to help the solder flow and reduce solder oxidation. It’s not very useful if it all evaporates before we even get to our work surface. Instead of using stale solder that has been sitting on the tip of the iron, we always want to use fresh solder, full of flux, ready to flow.
And the second issue is that when trying to deposit the solder, it solidified immediately because the wires were way too cold. This is known as a cold solder joint. Instead we want to ensure the wires are hot, before adding fresh solder, so that the solder has time to flow in-between the individual wire strands before solidifying.

Step 4: How to Solder
Good soldering technique is all about maximizing heat transfer to the work surface and then bringing in fresh solder, full of flux, that will easily flow through the target. To achieve this, I am going to give you a checklist of 4 steps to ensure you get consistently good results.
- Use the flat edge of the iron for a larger surface area contact and better heat transfer, not just the narrow tip. This can be achieved by holding the iron at a shallow angle but not so much that I accidentally melt the insulation.
- Keep the iron stationary and in the centre of the joint. Apply gentle, firm pressure for effective heat transfer. Don’t try sweeping with the iron because the tip will lose contact as it skips over the wire’s surface. You’re also trying to heat too large of an area all at once.
- This step is the true secret to effective soldering! Add a small ball of solder to the tip of the soldering iron. This isn't for direct application to the wires but to improve heat transfer. The liquid solder's surface tension increases surface area contact with the wires, enhancing heat transfer.
- After heating the work surface using the above three steps, add fresh solder from the opposite side of the wires to where the soldering tip is. This gives the solder a chance to wick in between the strands of wire instead of pooling on the tip of the iron.
Follow these four steps and a good joint is all but guaranteed (I strongly recommend watching the video at the start of this tutorial to see these four steps in action).
As the solder melts, slowly work over the entire length of wires, ensuring complete coverage.

Step 5: Inspect Your Work & Insulate
Once a pair of wires are soldered, I have 4 steps of visually confirming a joint is good:
- Solder should wrap all the way around and in between the wire strands.
- Solder should be applied upto the edge of the insulation, without melting it. If a section is left exposed it will be extremely flexible and easy to break.
- Is there too much solder? If so, remelt it and using a sweeping hook motion, pick the excess solder up with the soldering iron and then brush it off in a brass sponge.
- Are there any wire strands sticking up? If so, we want to smooth them over. Ideally we would do this before soldering by ensuring our twists lay flat, but we can still smooth over spikes with patience and a little bit of pressure.
Once you’re happy with the joint, we will want to protect it from the environment and potential short circuits using a piece of heat shrink tube. I personally find hot air guns to be a little cumbersome, so instead my go to is a lighter. Holding the heat shrink in the blue part of the flame will ensure a clean finish. If you hold it in the orange part of the flame, a layer of soot will be deposited that doesn’t look the prettiest.
Sometimes you can’t slide on insulation after soldering, instead pre-load the heat shrink. But be careful, leave it too close while soldering and the tube may prematurely shrink. It's best to keep it further away or use copper alligator clips that act as heat sinks.


