Introduction: A Tapering Jig
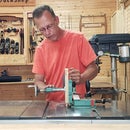
This jig is for creating tapered profiles with your table saw or band saw. An ideal application would be a table or chair leg, but there are many other applications for a tapered profile that this jig works great for. For a better understanding of this jig and the build process I always recommend watching the build video.
Step 1: Step 1
For this jig I used a standard two by four for the main body cutting it down to thirty one inches in length. Once the board was cut to length it required three cuts, two cuts at both the left and right edges of the board removing just enough stock to make the board square and the last cut was to cut out a one inch wide section .
Step 2: Step 2
In one end of the one inch wide piece of stock I cut a notch 3/4 of an inch wide by 1/2 an inch deep, this will be for the stop.
Step 3: Step 3
I then installed a piece of Oak two inches in length and half of an inch in width into the notch using wood glue and two standard wood screws.
Step 4: Step 4
In the two inch wide halve I drilled a hole at 8 3/4 of an inch from one end to except a t-track bold, this is for part of the adjustment hardware. To the bottom side of this hole I created a recessed area so the head of the t-track bolt would be recessed and this is shown in the video. With this completed I created a mortise to except the handle for this jig. But you could attach a handle to this jig in many different ways even something as simple as just using screws, a mortise and tenon is not your only option it is the way I choose.
Step 5: Step 5
For the adjustment armature of this jig I used 1/4" thick Oak. Using my router table I created a slot 5 3/4 of an inch in length, and wide enough for the t-track bolt to fit. After I created the slot I cut the armature to 7 inches in length and 1 inch in width. I then drilled a hole at one end that will be used to attach the armature. I did round over the ends of this armature.
Step 6: Step 6
At this point I installed a butt hinge as shown, connecting the one inch wide halve to the two inch wide half to create the main body of the jig.
Step 7: Step 7
The adjustment armature can be installed at this point. By first installing the T-track bolt then placing the armature over the bolt, the armature can then be screwed down to the one inch wide half of the jig at 4 1/2 inches from the end were the stop is located making sure to predrilled a hole first. This screw should not be tight as to allow the armature to rotate when adjustments are made. After the screw is installed, I installed a washer then a knob on T-track bolt.
Step 8: Step 8
The last two things to do was first install a handle I created from a piece of Oak with a tenon that fits the mortise in the two inch wide halve of the jig with glue. I then installed a screw in the center of the stop that is one inch in length, this screw is a must, it attaches the piece of stock the tapper is being created in to the jig so that it can not jump out of the jig.


