

Introduction: Arduino: CNC Machine / Part 2


Step 1: Patreon

As you may or may not know, I am Kester. I have a YouTube channel that is based on making electronics videos and diy videos and tutorials. As me making lots of videos and putting time and lots of effort and money into producing products and videos, I would like to get some support from my fellow fans to help me keep up with producing more content and projects for you guys. So on behalf, I would like to show you guys Patreon. Patreon helps support fellow DIY'ers and people who need help from the fans and supporters to keep content flowing for their fans to enjoy. So what I'm asking for is a donation from you guys to keep my content going and to make my fans happy by producing more content! Thanks again for all of your support. Be sure to check out my YouTube channel and my Patreon account! Thanks guys!
LINKS: Thanks For All Of The Support Guys!
Step 2: Parts List
You will need the following parts for this project.
(Wood) (L•W•H)- in inches
- 7•7•0.25 Piece of Plywood (Thin Wood)
- 6•0.75•3.5 Wood ( 2 pieces )
- 2 Of The Same Pieces of Wood.
- 1 Belt With Teeth
- 16 Inches Long Metal Rod ( 5/16 of in inch in diameter) ( 2 pieces )
- Epoxy
- 5 Nylon Spacers That Fit Perfectly Around The Metal Rods.
- 2 Washers
- 1 Stepper Motor
- 1 Screw
Step 3: Cut the Wood to the Dimensions

Now cut your wood into the dimensions as shown in the parts list.
-First piece you need to cute is your piece of plywood (thin wood). You need to cut it as 7 inches long by 7 inches wide and 0.25 inches thick.
- Second and third piece of wood (they are the same dimensions) you will need to cut it as 6 inches long by 0.75 inches wide by 3.5 inches tall. *Remember you need 2 pieces!*
Step 4: Sand the Edges

Now to make them smooth, go ahead and sand them down so you don't have any rough edges.
Step 5: Drill the Holes


Now we want the drill holes so that the rods will fit snug into the pieces of wood. Grab the two pieces of wood that are the dimensions 6 inches long by 0.75 inches wide by 3.5 inches tall.
Now we want to mark the holes close to the edge, but not too close. Mark 0.5 inches down from the top of the wood. Make a line so you know where to make your marks.
Now mark 1 inch from the sides to the middle of the piece of wood. Make a cross hatch to show the exact point of where you are drilling.
This is where you will be drilling your holes.
*** Only drill halfway through the wood***
Look at the pictures for a better visualization
Step 6: Put the Rods Into the Holes Just to Make Sure


Put the rods into the holes to make sure everything is good and has a tight fit in the holes. Should look like the one in the picture :)
Step 7: Add the Spacers Underneath the Platform


Now we need to mark where the spacers need to go on the bottom of the platform.
The measurement between to two metal rods is exactly 4 inches, so that means the Spacers on the board need to be 4 inches apart on both sides.
I am adding two Spacers on each side of the board so I can have to max stability on the platform.
I marked first where the rails would be on the platform.
Next I marked 1.5 inches from the edge from the platform so it would create a crosshatch on the rail. This would be where I need to put my spacer at.
Now use your 2 part epoxy and please make sure these spacers are aligned straight and neat ! Now epoxy the spacers onto the board so that they will stay in place.
Let the epoxy cure for about an hour.
Step 8: Put the Board on the Rails


Test the board to see if it's moving fluently and good. Make sure it doesn't stick the the rails.
Step 9: Mark the Holes


Mark The drill holes on the wood. So on the first piece of wood get the piece of wood that has the dimensions of 6 inches long by 0.75 inches wide by 3.5 inches tall. Look at the pictures for help. Get both of these pieces of wood that have to drill holes that hold the rails.
Now what I did was I measured it from the edges. So from the left to the middle was 2.75 inches. And from the right was 2.75 inches also. There is a 0.5 inch gap between these marks.
Now do this to both pieces of wood and drill the holes with a small piece enough for a piece of nylon or fishing line to fit through.
Step 10: Add a Screw to the Bottom Platform


Now you need to add a screw to the bottom platform. This is so the string can be attached to the platform without having the line pulled up. You want the screw to either be on one side of the hole you just drilled or the other. You want to center the screw but please make sure it's on either side of the holes you just drilled so that the line with run straight and flush.
Epoxy the screw to the platform and let it sit for an hour to cure.
Step 11: Make the Spacers


Now what you want to do is make the spacers for the other side of the platform. This is for when the stepper motor on the other side is pulling the platform it will wrap around the spacer on the other side and go back to the stepper motor.
Look at the picture if you need help visualizing it.
Now epoxy these washers to this nylon nut and then we will put it on the board later!
Step 12: Add the Pieces of Wood on the Sides


Add 1 piece of wood to the side that wouldn't have the stepper motor on it. It shall be below the holes so that once you put that nylon spacer for the belt to be on it can run through it smoothly. Now on the side that has the stepper motor on it, depending on what your stepper motor looks like and how you can put it on there, you need to make sure that the rod is even with the holes so that it will spin straight and nicely.
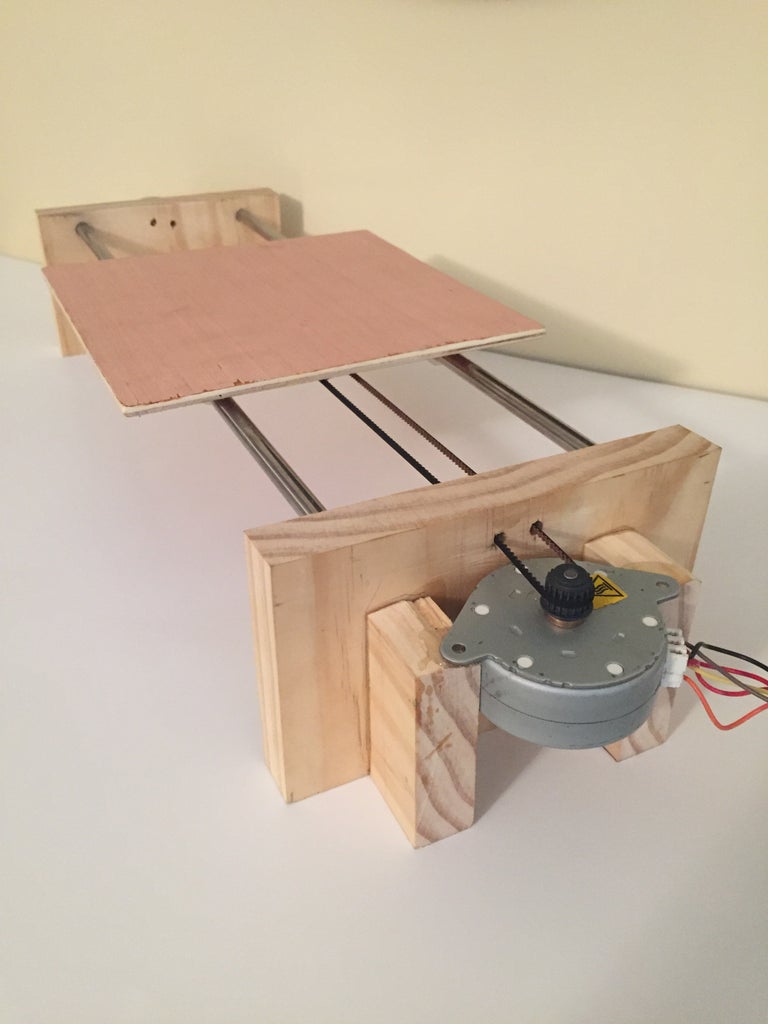
Step 13: Add the Motor

Now I epoxied my stepper motor to the two pieces of wood so that it would not move and it would have a good solid foundation.
Step 14: Add the Belt
Now you want to add the belt. I wrapped the belt around the stepper motor and feed it through the holes and when I got to the platform I glued the belt to the screw with epoxy. The i kept on feeding it through onto the other side of the structure and wrapped it around that nylon spacer and then glued the end of the belt to itself making sure that it is tight so that it wouldn't rattle!!!
Step 15: Done!
Congratulations on getting this far with me as I build my CNC together! I hope you guys enjoyed this Part 2 of this series!. If you are just seeing this project for the first time and haven't seen Part 1, go check it out on my channel! Thanks again guys for all of your support! :)
