

Introduction: Arduino Homework Focus Timer


In this project, I used Arduino Leonardo to create a focus timer for students that often procrastinate while working, this timer can let the students place their phone in this case, and take their phone out when reaching the target focus time. This timer was built using a micro speaker, LED lights, LCD module, and buttons. The time will be projected on the LCD screen. This focus timer is easy to make and use.
Supplies
1. Arduino Leonardo
2. Breadboard
3. Jumper wires
4. One button
5. Three 330k resistor
6. LCD display with 12C module
7. Round Micro Speaker Diameter 28mm 8Ohm 8R 2W for Arduino
8. One shoebox and cardboard
Step 1: Circuit Diagram
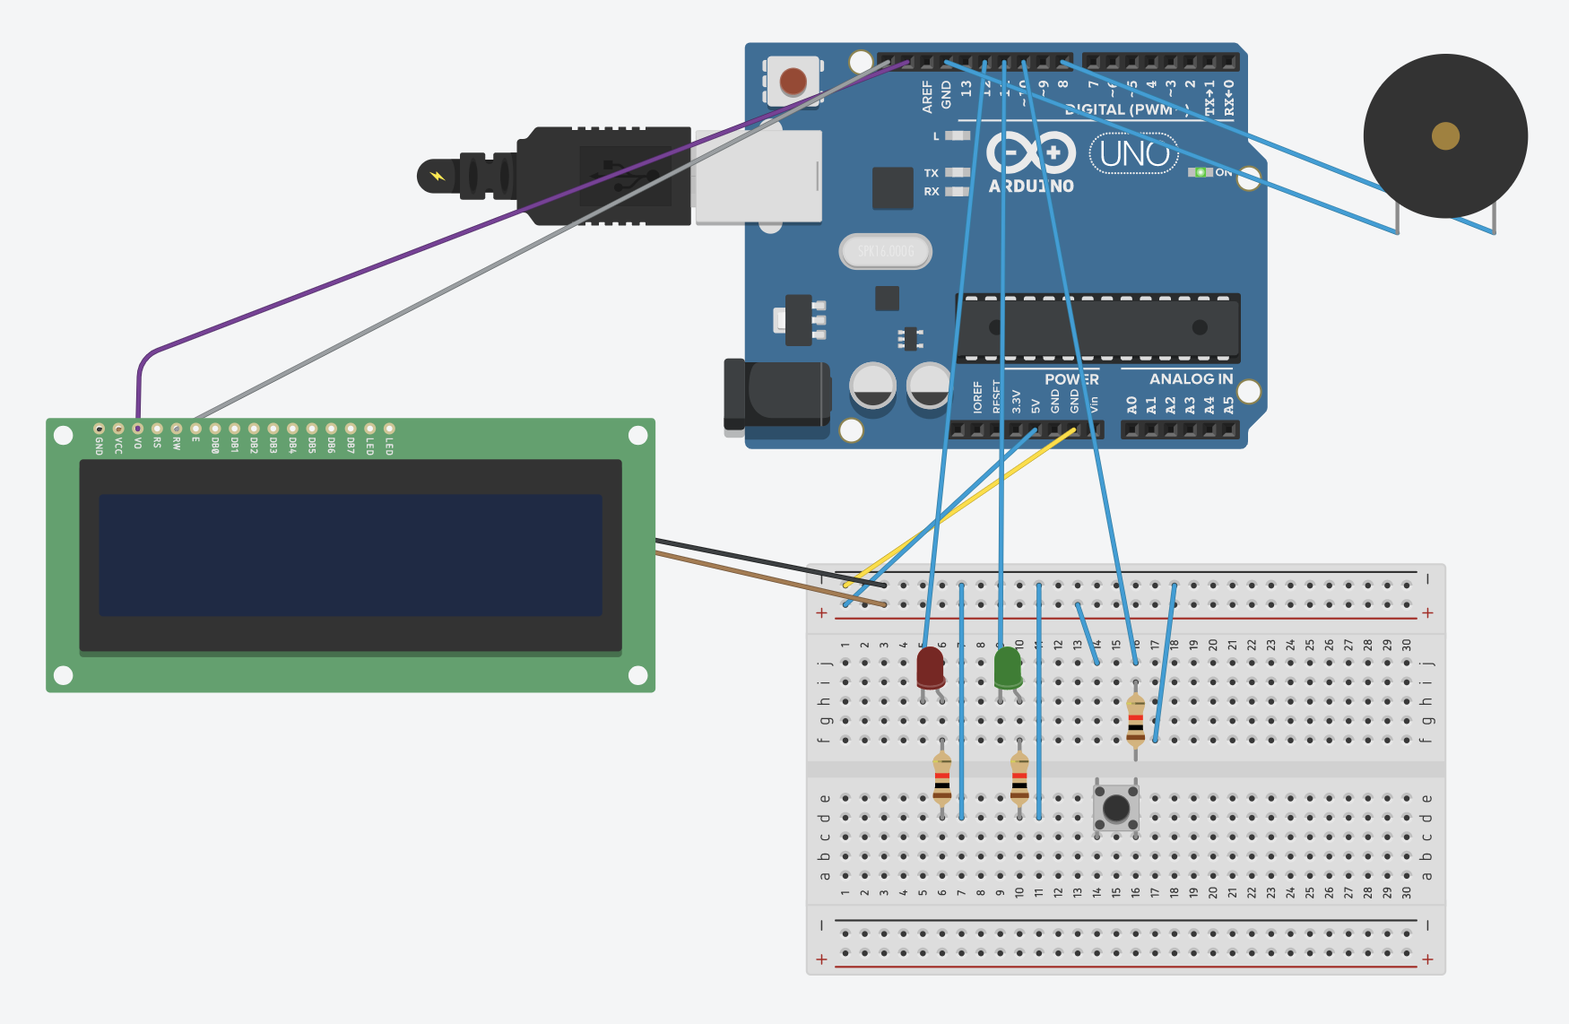
Refer to this diagram as the complete circuit of the timer
Step 2: Connecting the LCD


Connect the LCD to the breadboard using jumper wires, be sure that the positive and negative sides are plugged in correctly. The SDA and SCL must be connected to the Arduino Leonardo at SDA and SDL. Refer to the pictures for details.
Step 3: Connecting the Button

Place the button on the breadboard, and connect two jump wires to it. The button is used for starting and pausing the timer, it should be connected to pin A10. Refer to picture as guidance
Step 4: Connecting the Speaker


Connect the positive and negative strand of the round speaker to the Arduino Leonardo as shown in the picture.
Step 5: Connect the LEDs
Connect the LEDs to the breadboard using jumper wires and resistors, preferably red and green.
Step 6: Codes


Upload the codes by the USB port to your computer, or click the link to view the code.
Attachments

Step 7: You're All DONE! Enjoy Your Timer!
Here is a demo video of what the final product would look like.


