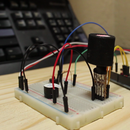
Introduction: Arduino Laser Tripwire
I am going to be making a circuit to detect whether a laser beam has been broken. A laser tripwire.
Step 1: Parts List
We will need the following:
- Some Jumper Wires
- 3 x 10k resistors
- 2 x Photo resistors
- A buttonA Buzzer
- A LaserAn Arduino
- A Breadboard
- and a mirror
- I've also used a separate breadboard for the laser detection circuit. (This helped heaps to position the laser on the photo resistor.)
Step 2: Schematics
The circuit consists of a couple of mini Circuits:
- The laser detection unit
- the buzzer
- the button and
- the laser pointer
Step 3: Laser Detection Circuit
I'm going to start with the Laser detection section of the circuit.
- Grab two jumper wires at first. I have Red one and a Yellow one.
- Place the two jumper wires into 2 separate terminal strips.
- Grab a Photo resistor and connect it to the Red lead and a terminal strip.
- Put the other photo resistor between a different terminal strip and the red lead.
- Connect a 10k resistor from the yellow lead to one of the photo resistors and
- The other 10K resistor between the other photo resistor and the yellow lead.
- Grab two more leads and connect them to each intersection of the photo resistors and 10k resistors. I used Green and Orange jumper wires.
- Connect the Yellow lead to the negative of the bread board and
- The Red to the positive of the breadboard.
- Connect the orange to A0 (The photo resistor connected to this will be the laser detector) and
- The green to A1 (The photo resistor connected to this one will be the ambient light detector)
Step 4: Buzzer
Lets do the buzzer next
- Place the buzzer anywhere on the breadboard.
- Connect a lead between the negative rail and the negative of the buzzer.
- Connect the positive end of the buzzer to pin 3 of the Arduino.
Step 5: The Button
Next up, we are going to make the button section
- Place the button between 2 terminal strips (make sure that there is contact only when the button is pressed between the 2 strips).
- Place the last 10k resistor to one end of the button and a negative pin. I've used a jumper wire to connect it to the ground rail.
- Connect the other end of the button to the positive rail.
- Then connect the intersection of the button and resistor to pin 4 of the arduino.
Step 6: Time for Laser Light!
Lastly lets connect the laser:
- Connect the anode to pin 2 and
- the cathode of the laser to ground.
I've used the pins on the arduino for both of these. I've used a cheap laser that I've "Hacked" by connecting crocodile clips to the spring and the casing with some Velcro holding the button down.
Step 7:
I've written a program to run the Laser Trip Wire
It continually checks to see whether the button is pressed.
If it is pressed we enter the setup mode, if pressed again we enter armed mode.
If we are in setup mode it does the following:
- It outputs the values to the serial port.
- When the light on the photo resistor is bright enough pin 13 lights up. This feature allows one to aim the laser.
In the armed mode it does the following:
- Every 3 seconds it reports via serial communications.
- It checks if the value from the photo resistor dips due to the laser being broken, when the laser beam is broken the Trip mode is started.
In trip mode the tripwire has been "tripped'
- It beeps 3 times and
- the data is sent to the serial portthen returns to the armed mode
Attachments

Participated in the
Microcontroller Contest 2017


