Introduction: Arduino - Robotic Arm Control With a Potentiometer


In this tutorial, we will learn how to use robotic arm control with potentiometer.
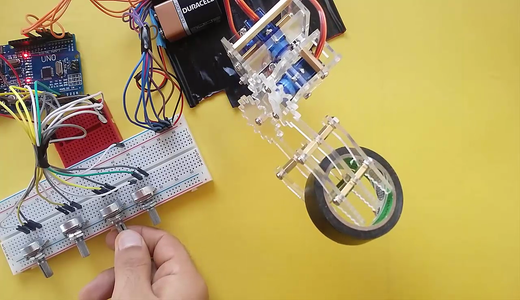
We will control 4 axis robot arm with 4 pcs potentiometer.
We will use external battery / power when doing this.
Step 1: Hardware Required
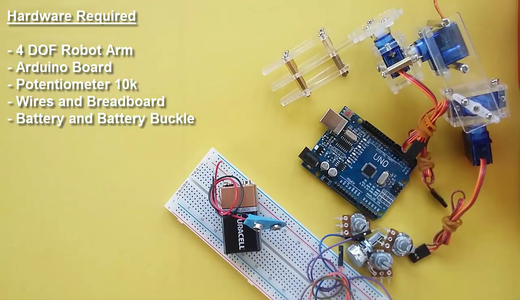
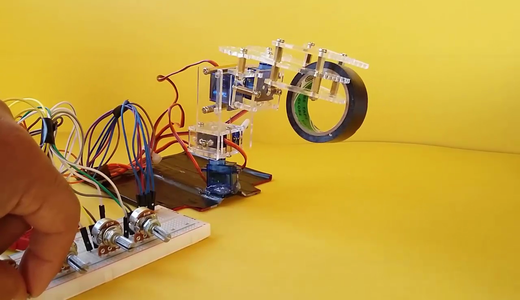
- 4 Axis Robot Arm Kit
- Arduino Board
- 10k Potentiometer 4 pcs
- Battery and Battery Buckle
- Wires and Breadboard
Recommended site to buy the required hardware:
https://www.banggood.com/?p=CS120478587752016125
Step 2: Robot Arm Servo Kit Review
Feature:
Name: DIY robotic arm NO.99
Size: 140 x 80 x 130mm (L x W x H)
Servo: P0090, 180 ° rotation
Usage:
DIY assembling toys, teaching experiments (can be any combination of various forms of machinery, it can be widely installed remote control, a variety of robot car, etc.)
4 DOF Robot Arm Servo Kit -- https://goo.gl/6UZJL6
Step 3: Connections
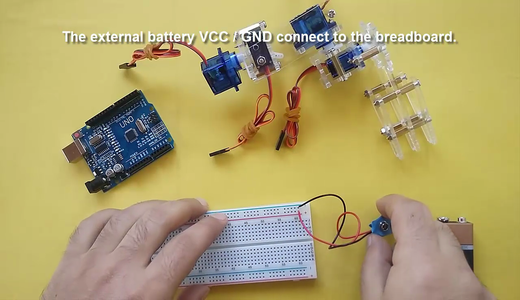


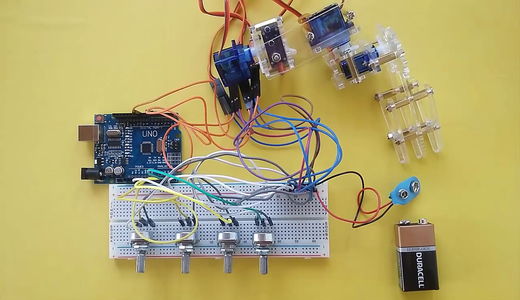
- The external battery VCC / GND connect to the breadboard.
- The Arduino GND connect to the breadboard's GND input
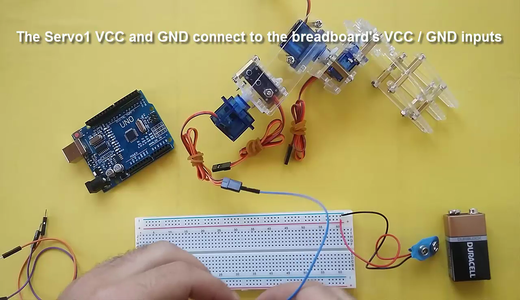
The servo connections we use in this project are as follows;
Orange Input - Signal Input
Red Input - Power Input (VCC)
Brown Input - Ground Input(GND)
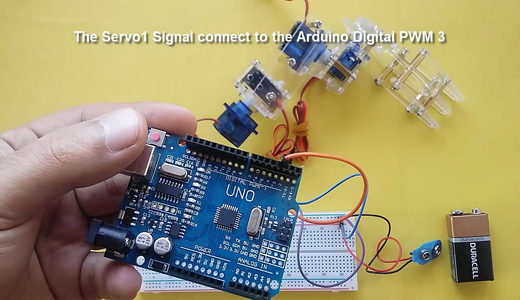
- The Servo1 VCC and GND connect to the breadboard's VCC / GND inputs
- The Servo1 Signal connect to the Arduino Digital PWM 3
- The Servo2 VCC and GND connect to the breadboard's VCC / GND inputs
- The Servo2 Signal connect to the Arduino Digital PWM 5
- The Servo3 VCC and GND connect to the breadboard's VCC / GND inputs
- The Servo3 Signal connect to the Arduino Digital PWM 6
- The Servo4 VCC and GND connect to the breadboard's VCC / GND inputs
- The Servo4 Signal connect to the Arduino Digital PWM 9
The potentiometer connections we use in this project are as follows;
Two outer pins are power (VCC) and ground (GND)
Middle pin is signal pin
- The Potentiometer's one outer pin connect to the breadboard or the Arduino board VCC input
- The Potentiometer's other outer pin connect to the breadboard or the Arduino board GND input
- The Potentiometer's middle pin connect to the Arduino Analog 1-2-3-4 input
Step 4: Code

1) Get the Code (Only Copy and Paste)
2) Add the Servo library
3) Define Servos
4) Define Potentiometers
5) Variable to read the values from the analog pin (potentiometers)
6) Attaches our servos on pins PWM 3-5-6-9 to the servos
7) Reads the value of potentiometers (value between 0 and 1023)
8) Scale it to use it with the servo (value between 0 and 180)
9) Set the servo position according to the scaled value
10) Upload the code