Introduction: Arduino Developing Workshop
Hello,
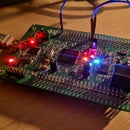
In this instructable I'm going to show you how I work with Arduinos and what is the ideal setup for working on arduino based project.
I recently got a lot of stuff from china for a very small amount of money so i decided to make this instructable about how to make a decent arduino/electronic workshop to take on any project easy.
Step 1: TOOLS
Me as an electronic person, I have a whole workshop in the basement for soldering, woodwork and other electronic projects. But when I work on Arduinos I do it in my own room where my computer for programming is and where I have all of my tools for working with arduino boards.
-Your main computer for programming with a proper USB cable for your Arduino board
-A multimeter
Get yourself a decent multimeter to mesure voltage, RESISTANCE(very usefull) and current. It should mesure mAmps or uAmps as many arduino boards and modules draw a very small amount of current.
-Set of jumper wires
Buy a whole bunch of male-male and female-female jumper wires as you are going to need them all the time and you will probably break some, so buy a lot of them for backup.
-A breadboard with power supply
A breadboard is the main part of your project as it is going to hold the parts while you're prototyping and getting your project up and running. A small variable 3.3 - 5V power supply is very handy and I will show you a picture of it in the next steps.
-An Arduino compatable board
More on the boards in the next steps.
Step 2: ARDUINOS!!!!
You will most likely need an Arduino board. I have a small collection of those but the only one I bought is the Uno on the right and the nano in the top-middle. Others were won by competitions and other events. It's good to always have a choise.
I strongly advise you if you're are staring with arduinost, to buy a GENUINE ARDUINO UNO or NANO to support the project to keep it running . After that you might want to look into some cheaper Chinesse alternatives. I Strongly recommend Arduino Nanos and not Micros and More Unos with switchable 3.3V to 5V logic.
If you want to read more on which arduino to choose, than there are a lot of Instructable out there to help you out.
Step 3: SHIELDS, MODULES, KITS
The main reason why I started making this instructable is because I bought a large amount of items from ebay-China and how are they usefull to ahve them ready for any project. I allways tell people to buy at least 1 more of a total item they need for a project. You never know if the one that you ordered will go bad or you will later need one to prototype. So whenever I decide to make a project, make a list of parts, I allways buy them from china or if I'm in a hurry, from EU, but are more expensive. The deal is, that if you are going to wait for some parts to arrive, why not throw in the basket some more, so you won't need to order them and wait for them to arrive when you decide to make a project. If you don't have any or most of the items I will list, than fell free to save yourself like 50$ and buy these parts as you never know when you are going to need them.
The picture shows my basket for modules and Arduino boards that I have around all the time.
Step 4: MODULES: POWER
You are allways going to need power; in a stand alone project, in an enclosure or just on a breadboard.
If you are prototyping, you should allways have one of these (pic.1). They can supply 5V or 3.3V for any sensor or module you have. It's versatile and a must, that I ran into working with some of 3.3V devices, so I decided to buy it after a lot of frustration.
Next part is for stand alone arduino project away from USB power and connection. You are allways going to need:
-A lipo battery (pic. 2, 3); I recommend these 3.7V 1 cell li-po batteries from 100mAh to 800/1000mAh with mostly using 800, but also 100mAh with only small modules.
-A battery charger (pic. 4); This is my favourite charger. Not only it charges the battery, it also has a low voltage and short circut protection. As for those who don't know, lipo batteries CANNOT be over discharged bellow 2.6V / 3V. If so, the battery might puff and you end up throwing it away. It's a must for putting a project in an enclosure or just for preventive prototyping. Get some of those from ebay. I will link all item / at least their model numbers in a separate section.
-A boost converter(pic. 5); Some of you electronics people might know this phrase. It's a switch mode DC-DC converter, that boosts up voltage. Usually you will see 1 cell li-po/3,7V to 5V like the one in the picture. It takes your battery voltage that goes from 4,2V full to 3/2,8V empty and boosts it up to 5V which is an Arduino working voltage. Most arduino projects might include 3.3V arduino and other devices, so you think you won't need a boost converter. Well, when the battery is at it's fullest, the voltage is too high, and when it' s at its lowest, it's too low. I'm going to use a buck-boost converter(step down-step up) that has a sellectable pin for 3.3V or 5v. And that's not the only reason. Perhaps you are working with sensors or op amps and in some of my cases voltage refferences, that need as steady supply as possible. You don't want that op-amp giving different nubmers at lower voltages. This is a must have, get some of these or buy lipo charger and buck boost converters as the one I'm goning to list in the item list from sparkfun.
Step 5: SENSORS
There is not much to say. There are a lot of sensor out there, so her are some basic that you should have:
-A potentiometer (usually 10k) (pic. 5)
-Temperature, humidity, pressure sensors (weather project applications) (pic. 4)
-Proximity / distance sensor (pic. 1)
-Movement detector (pic. 2)
-soil moisture
These are some of the usuall stuff that I have laying around, but you can allways add something when you buy a part for your project, remember to take 2 / one more.
Step 6: WIRELESS + CUMMUNICATION
I LOVE BLUETOOTH. It's easy, cheap and the best way. I have some RF modules but haven't got a chanse to play with them.
-A BT 4.0 module (pic. 1)
-standard BT 2.0 (pic. 2)
-esp8266 Wi-fi module (pic. 3)
You might also need some logic level converters, if you work with mostly one voltage operating devices and you don't want to fry others. Use these "I2C logic converters" to convert 5V signals to 3.3V signals and
bacwards (pic. 4).
Step 7: DATA COLLECTION, VISUAL PRESENTATION
I recently bought a 20x4 LCD display with I2C converter on the back and I use it more than I was thinking when I placed a bid on it and won it for 2,5$ . Pick these up, the wireing is not messy and you just need NewLcdLibrary. I will show you the use of it in a later instructable, where I will use a 24 bit ADC and it's going to be first instructable for that so stay tuned.
I also use datalogger "uLog" (pic. 2) that collects analog data from 3 channels on a big storage flash IC and when you connect it to a rs232 USB-serial adapter, you can read the data later + IT RUNS ON A 1 cell LIPO.
Step 8: A LITTLE BIT FOR CASE CONSTRUCTION
I recently bought this box of stand-offs fro placing perf boards and arduinos in a case. I showed them in my weather stating project so make sure you watch that too. They are versatile and make sure that the box that you are buying also has longer female-female stand-offs.
Step 9: PART LIST
Step 10: CONCLUSION
I hope you liked my instructable. I made this in between "more interesting" project as a filler as the school is pushing hard with tests. I hope you now know how I do all my projects and how I get everything running without having to buy and wait for the part to arrive. I will also release Instructable on 24 bit ADC so make sure you subscribe to see that one. I haven't seen any special ADC project on Instructables regarding 10, 12, 16 or 24 bit adcs so I hope this will fill in the gap for the people that are interested in it.
Thanx for watching and I will see you in next Instructable.


