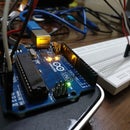
Introduction: Arduino to Node Communication
This instructable is purely for just for a very basic demonstration of how to send and receive data via UART (Serial) between two Arduino compatible boards.
Supplies
Arduino Uno
Node MCU/Arduino Uno/Nano or pretty much any other board with serial capabilities
Step 1: Make the Connections
We are using the Arduino Uno for this example, it will be transmitting the message, 0 and 1 are the serial ports for this board
In serial communication, The TX of one board goes into the RX of the other and vice versa.
The connections are very trivial and can be seen in the picture
Step 2: The Code for the Transmitting Device
//arduino code
void setup() { // put your setup code here, to run once: Serial.begin(9600);
}
void loop() { // put your main code here, to run repeatedly: Serial.println("It is sending"); delay(1000); }
Step 3:
Step 4: Code for the Receiving Device
//node mcu code
void setup() {
// put your setup code here, to run once:
Serial.begin(9600);
}
void loop() {   // put your main code here, to run repeatedly:
if(Serial.available())
{
char a=Serial.read();
Serial.print(a);
if(a=='\n')//meaning it is the next line
{
Serial.println();
}
}
}


