Articulated Utility Arm

32,595

346

34

Introduction: Articulated Utility Arm

About: Hey! Welcome to my Instructables page! I love to create and make stuff and decided why not share to how to make them with everyone!

Hey everyone!

So I finally got around to making an Instructables for a tool that has become super helpful around the shop - The Articulated Utility Arm. It's super simple to make and comes in handy in a plethora of ways. This tool was inspired by my TinkerToys that I had as a child and I'm very happy with how it turned out!

So without further ado, let's get building!

Step 1: Creating the Circular Joints

So to start off I cut out some 3" circles from some scrap oak I had around the shop for a total of 8 circular joints.

Step 2: Cutting Out the Copper Arms

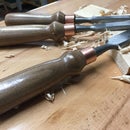
Next I cut out the 1/2" diameter copper pipe 'arm' sections. I measured out three 12" pieces and one 6" piece.

Step 3: Drilling Out Holes for the Bolts

Fortunately, the hole cutting saw uses a drill bit in the center, which made the pivot points in the circular joints for the articulated arm.

Step 4: Drill Out Holes to Connect Wood & Metal

For the next step I took seven of the eight 3" circular joints to the drill press and drilled out a hole on their sides to fit the 1/2" diameter copper arms.

Step 5: Drilling More Holes...

On the remaining circular joint (the eighth one left out from the previous step) I drilled out a hole on it's face (slightly offset from the center) instead of it's side, as this joint will be used as the piece allowing the articulated arm to hang (and rotate) from the ceiling.

Step 6: Hose Holder Attachment

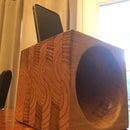
Next I took my jigsaw and cut out another piece of oak scrap in a rough shape for what would become my vacuum holder attachment. Back at the drill press I cut out the opening where the hose end would fit and lastly I took out my Japanese saw and cut a narrow slit to allow the opening some flexibility.

Step 7: Dry Fitting

Next I made sure that everything fit nice and snug before the glue up.

Step 8: Epoxy Time!

So to glue up the pipes and wood together I used a quick setting epoxy, however construction adhesive would work just as well. This was a pretty simple glue up: on each of the 12" copper pipes I glued up a side cut circle joint. Then on the 6" pipe I glued up a side cut circular joint and the lone face cut circular joint.

Step 9: Staging

After that all glued up nicely, I went and did a staging to see how they'd all fit together.

Step 10: Bolting Together

Now I attached all the pieces together using 3" bolts to fit through the tiny holes in the circular joints. I accompanied each bolt with a washer and a wing nut. After it was all assembled I sanded and buffed out the copper pipes to make everything look and felt nice!

*Note*

Later on, I upgraded the wing nuts to oak knobs. This made loosening and tightening the joints a lot easier.

Step 11: Ceiling Attachment

Now to get the articulated arm to hang and swivel from the ceiling, I cut out and made a small section for it to bolt to, similar to how the circular joints bolted together. I marked and drilled out holes for me to attach it to the ceiling, making sure to counter sink where the bolt would go, so it would fit flush with the ceiling once it was hung.

Step 12: Attaching the Articulated Arm to the Ceiling

Now reaching the end I started attaching it to the ceiling! To install the articulated arm I first drilled in the the ceiling attachment to (go figure) the ceiling. I then attached the arm, using a washer and a wing nut to allow me to lock the articulated arm in place when needed. Voila, it's complete!

*Note*

One person suggested gluing sandpaper between the articulated disks for better friction when tightening the joints. This would be an excellent enhancement.

Step 13: Articulated Goodness!

So now you can bend and rotate where ever you need the articulated arm to be, to help you out around the shop or wherever you decide to use this. I've used it a lot so far to help with dust collection while sanding and such, and as well as getting close up shots with a GoPro!

I hope you enjoyed this project and I hope that it'll bring you some good use. Be sure to check out the video for a making of the articulated arm and thank you so much for checking this out!

1 Person Made This Project!

Recommendations

  • For the Home Contest

    For the Home Contest
  • Game Design: Student Design Challenge

    Game Design: Student Design Challenge
  • Big and Small Contest

    Big and Small Contest

34 Comments

0
mntbkrguy
mntbkrguy

5 years ago

As everyone has said this really is a great instructable! I don't know why anyone would complain about it not explaining the uses. the point is there are so many you can come up with yourself. I think with the copper it will make for an awesome steampunk reading light. making a small clamp to hold an inexpensive flashlight reassessed into a block of wood to hide it is how I plan to do it. Again, great job, enter a competition within this!

0
billd6
billd6

5 years ago

Just curious if you used a 3 inch hole saw which would cut the pucks smaller than 3 inches or you used a larger hole saw to yield a 3 inch diameter puck.

0
Jawp
Jawp

6 years ago

Super cool! This project is just something I can use. I was wondering if it would improve stability, if we glued sandpaper in between all the wooden disks? :)

0
WoodPlusMore
WoodPlusMore

Reply 6 years ago

Thank you! Yes putting sandpaper between the wooden disk would definitely help. Someone suggested that and it really helps create better friction between the disk.

0
vfx
vfx

6 years ago

Wooden "C" stand arms like used in the film industry. Really nice. I'd like to make mine as a semi-permant reading lamp in the house. No reason this could not be sand finshed, stained, etc with higher end or industrial knobs to make it a piece of furniture. Mine would be aged in a sort of steampunk style

0
WoodPlusMore
WoodPlusMore

Reply 6 years ago

That's a great idea and this concept could easily be made into a permanent reading lamp! If you get around to making it, would love to see how it turns out!

0
stincup
stincup

6 years ago

Great Idea. I have some scrap EMT electrical conduit laying around that would be perfect for this.

0
WoodPlusMore
WoodPlusMore

Reply 6 years ago

Yeah, that'll work perfectly. I had that copper pipe lying around for the longest and was glad to finally put it to good use!

0
IvanC52
IvanC52

6 years ago

Great idea.

This is just one I should have made.
Can it hold a lamp, it is something you know nothing about?
Thumbs up

0
WoodPlusMore
WoodPlusMore

Reply 6 years ago

I haven't tried holding a lamp with it yet, but it could work. Really just depends on how tight you can make this pivot points so they don't slip. Some one also suggested putting some sandpaper between the pivot points would help with the friction and holding things up. Sorry for the late reply, thanks for checking it out!

0
DavidH864
DavidH864

6 years ago

I made this yesterday in about 1.5 hours. Using a 2" x 4", I cut the pucks with a 3" hole saw that has a 1/4" pilot. I also used 3/4" O/S aluminum conduit for the arms and varied their lengths by about 3" or so so the arms would fold-up tighter. I then used a 3/4" hole saw to cut ring holes in the pucks and was just going to jam them in with a little glue, but when I discovered I didn't have any I ended up securing them all with self-tapping screws. The 1-1/4" knobs I use for adjusting friction came with pre-drilled 1/8" holes, but I couldn't find 1/8" carriage bolts longer than 3" (needed 3-1/4"+) and the knobs weren't threaded anyway so I ended up using 1/4" x 3-1/2" carriage bolts and a 11/16" bit to drill out the knobs so I could install a 1/4" x 20mm threaded insert. It works well, but I may add some springs behind the upper pivots so it wants to retract rather than sag. I would recommend choosing bigger knobs with more grip to those attempting this, a ball valve knob would be perfect. I use it to support a light and some alligator clips as helping hands. Might add a big magnifying glass later. Thank you WoodPlusMore for posting this. Prior to this Indestructible I was using a wall mounted articulating arm I built from Kinex that had a limited 18" radius. This new one now provides nearly a 5' radius and was super easy. Awesome!

0
WoodPlusMore
WoodPlusMore

Reply 6 years ago

Wow that sounds like it went great! Yeah I had to upgrade it recently with some oak knobs to tighten and loosen the pivot points, makes it a lot easier. The magnifying glass would be a great addition to it as well. It was my pleasure to share and am so glad to see it's worked out for you!

0
gcai_fwb
gcai_fwb

6 years ago

Great idea and equally great instructable ! I have all those scraps - now just find the time make the project :)

0
WoodPlusMore
WoodPlusMore

Reply 6 years ago

Awesome! Have fun making it, thanks for checking it out!

0
pbesong
pbesong

6 years ago

Great idea. Would be cool to mount it on a track on the ceiling so it could be used in multiple locations.

0
WoodPlusMore
WoodPlusMore

Reply 6 years ago

An idea similar to this has been rattling around in my brain. Definitely thinking about making this a feature! Thanks for checking it out!

0
kostp2
kostp2

6 years ago

Great project thanks for sharing this, I am going to use this a lot! So I'll put a reciever on the end for different attatchments. Then make attatchments as I need them, getting started today. Thanks again.

0
WoodPlusMore
WoodPlusMore

Reply 6 years ago

That sounds great, good luck and have fun building this! It was my pleasure sharing this!

0
stevecinstrfme
stevecinstrfme

6 years ago

You might want to start off next time by describing what the thing is and what it's used for! I found it incredibly irritating that you went straight into the instructable with "So without further ado, let's get building!" and it seems that you are just assuming that everybody in the world knows what an "articulated utility arm" is and what it does. Hope this is a lesson learned!