Introduction: BASIC LAMP (Customizable, Sustainable Paper Table Lamp)

Video - Introduction of the "basic lamp"
FR : Le projet "Basic lamp" est né d'une idée simple : Concevoir une lampe à poser ayant le moindre impact sur l'environnement. La structure globale de la lampe est composée de papier, un matériau fabuleux lorsque il est géré de manière durable. Malgré une apparence basique sa structure interne complexe lui procure robustesse, stabilité et durabilité. Afin de supprimer, les coûts énergétiques, liés à la fabrication et aux transports, le luminaire est imprimable "à la maison", sur 5 feuilles de papier. Il offre ainsi un large panel de possibilités et de personnalisation.
EN : The project "Basic lamp" was created from a simple idea : Design a table lamp with the least impact on the environment.The overall structure of the lamp is made of paper, a fabulous material when it is managed sustainably. Despite basic appearance, its complex internal structure provides robustness, stability and durability. In order to remove, an energy costs, related to manufacturing and transport, the fixture is printable "at home", on 5 paper. It offers a wide range of possibilities and personalization.
Step 1: VIDEO TUTORIAL
FRANÇAIS :
Obtenir sa "Basic lamp" en 4 étapes :
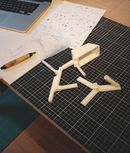
- Télécharger le PDF "DELIGNY BASIC LAMP WHITE" (Plus de lampes)
- Imprimer 5 pages pour fabriquer la lampe
- Découper les différents éléments et coller certaines parties - Assembler
Le procédé de fabrication de la "Basic lamp" dure entre 1h30 à 2h. N'hésitez pas à partager cette expérience avec votre entourage, le temps en sera réduit.
Pour l'élaboration de la lampe vous aurez besoin :
- 5 feuilles de papier recyclé blanc ou couleur de 180g/m2 minimum pour une bonne durabilité et une meilleure qualité finale de la lampe. Format A4 (27cm de hauteur finale) ou A3 (35cm de hauteur finale).
- Un kit électrique pour luminaire complet. Nous conseillons un kit muni d'une douille E14 à vis pour maintenir l'ampoule, un câble électrique, un interrupteur et une prise.
- Une ampoule basse consommation pour minimiser la température et la consommation. Favorisez une ampoule de couleur chaude plutôt que froide.
- Un cutter ou/et des ciseaux
- De la colle en tube.
- Une règle
- Des billes pour ajouter du poids
Pour une séance de fabrication agréable il est conseillé d'avoir :
- Un bon éclairage sur le côté pour un meilleur confort d'utilisation
- Un plan de travail pour découper avec un cutter sans crainte
- Et enfin une bonne musique
ENGLISH :
Get "Basic lamp" in 4 steps:
- Download the PDF "BASIC LAMP WHITE" (More lamps)
- Print 5 pages to make the lamp
- Cut out the different elements and paste some parts - To assemble
The manufacturing process of the "Basic lamp" lasts between 1:30 and 2 hours. Share this experience with your entourage, the time will be reduced.
For the development of the lamp you will need:
- 5 recycled paper white or colored paper of 180g / m2 minimum for durability and final quality of the lamp. Format A4 (27cm final height) or A3 (35cm final height).
- An electrical kit for complete luminaire. We recommend a kit with an E14 screw socket to hold the bulb, an electrical cable, a switch and a plug.
- A energy-efficient lightbulbs to minimize temperature and consumption. Prefers a warm-colored rather than a cold bulb.
- A cutter or / and scissors
- Glue in tube
- A ruler
- Marbles to add weight
For a pleasant manufacturing session it is advisable to have :
- Good mobile lighting for a better user experience
- A worktop for cutting with a cutter without fear
- And finally a good music
Attachments

Step 2: VIDEO TUTORIAL FOR CUSTOMIZATION
Step 3: TUTORIAL WITH PICTURES


PLEASE WATCH VIDEO TUTORIAL HERE (MORE SIMPLE)
- Download the PDF of the lamp
- Cutting the parts
- Be carefull
Attachments
Step 4: TUTORIAL WITH PICTURES PART 2


PLEASE WATCH VIDEO TUTORIAL HERE (MORE SIMPLE)
Forming the base lamp shade :
- Bend part H and I
- Put glue on the positioning zone on H and I
- Glued the two parts between it (H and I)
Forming the base G :
- Put glue on the positioning zone
- Forming a tube
Assembly of the structure
- Assembly A and D together
- Place the electrical system in the structure
- Assembly the structure A and D with E
- Insert marbles
- Assembly the structure A, D and E with C
- Assembly the structure A, D, E and C with G
- Form and place part F for the passage of the power cable
- Assembly the structure A, D, E, C and G with B
- Assembly lampshade to the base
It's done! Enjoy.