Introduction: Battery Charge Reader


Used to read battery charge, then dislpays charge using 3 LED lights on a breadboard connected to an Arduino Uno. 3 Lights On = Above 2/3 charge. 2 Lights = Above 1/3 charge. 1 Light = any charge at all.
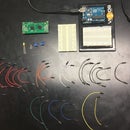
Supplies
1* Arduino Uno (and breadboard)
1* Arduino USB connector
1 * Battery Holder
1* D Cell Battery
2* Aligator Clips with jumper wires
3* 330 OHM Resistor
3* LED
6* Jumper Wires
Step 1: Code
/*
  Reads battery charge, displays charge using 3 LED lights

  The circuit:
   LED 1 connected to digital pin 13 to ground
   LED 2 connected to digital pin 12 to ground
   LED 3 connected to digital pin 8 to ground

   3 330 OHM resistors connected to the LED lights

   Positive charge of battery to analog pin A0
   Negative charge of battery to ground on Arduino
*/


int charge; //variable for charge ammount in battery
float PinNumber; //variable for Arduino pin number

void setup() {
  pinMode(13, OUTPUT); //Sets Pin 13 to Ouput
  pinMode(12, OUTPUT); //Sets Pin 12 to Ouput
  pinMode(8, OUTPUT);  //Sets Pin 8 to Ouput
}

void loop()
{
  check(); /* reads input from battery on pin A0
             and sets as charge value */
  delay(1000); //wait 1 second (1000 milliseconds)

  if (charge >= 0) {
    /* runs statement if the battery has any charge
    */
    PinNumber = 13;
    on(); //turns on first LED light
  }
  else { //otherwise turns off
    PinNumber = 13;
    off(); //turns off first LED light
  }

  if (charge >= 102.3) {
    /*  runs statement if battery charge
                         is equal or above 1/3  */
    PinNumber = 12;
    on(); //turns on second LED light
  }
  else { //otherwise turns off
    PinNumber = 12;
    off(); //turns off second LED light
  }

  if (charge >= 204.6) {
    /*runs statement if battery charge
                         is equal or above 2/3*/
    PinNumber = 8;
    on();  //turns on third LED light
  }
  else { //otherwise turns off
    PinNumber = 8;
    off();  //turns off third LED light
  }
}

void check() {
  charge = analogRead(A0);
}

void on() {
  digitalWrite(PinNumber, HIGH);
}

void off() {
  digitalWrite(PinNumber, LOW);
}
Attachments

Step 2: Circuit


LED 1 connected to digital pin 13 to ground
LED 2 connected to digital pin 12 to ground
LED 3 connected to digital pin 8 to ground
3 330 OHM resistors connected to the LED lights
Positive charge of battery to analog pin A0
Negative charge of battery to ground on Arduino


