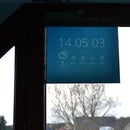
Introduction: Bedside Wakeup Monitor
Waking up is sometimes a difficult thing. I'm not easily awakened by noise neither by the alarm clock.
After a few times to get up late, I thought it was time for a solution. I have found out that i'm awakened quickly by light. Or whether it is sunlight or artificial light doesn't really matter.
The concept is quite simple : mount a monitor on a bedside table and display the weather and time on it.
You need :
- a old (low-end) netbook (Almost any laptop or desktop will work)
- a computer monitor
- a VGA cable
- a power(or reset) switch from a desktop pc
Sorry for my bad english ;)
Step 1: Download and Install the Software
First of all we need a device that provides a video signal to the monitor.
In my case a netbook. I used a Compaq Mini 311c netbook.
The netbook should be preloaded with: Windows 7, Google Chrome, TeamViewer, WOSB (WakeupOnStandBy), AutoHideMouseCursor, Auto Refresh extension and the most important part the Momentum extension from the chrome web store.
You can get the software here :
Google Chrome : https://www.google.nl/chrome/browser/desktop/
TeamViewer : https://www.teamviewer.com
WOSB : http://www.dennisbabkin.com/wosb/
AutoHideMouseCursor : http://download.cnet.com/AutoHideMouseCursor/3000-...
Auto Refresh extension : https://chrome.google.com/webstore/detail/auto-ref...
Momentum Extension : https://chrome.google.com/webstore/detail/momentum...
I DO NOT OWN ANY PART OF THIS SOFTWARE !
ALL CREDIT GOES TO THE RIGHTFUL OWNERS !
Step 2: Setup Momentum
After you have installed the software, you have to configure some things.
First we are going to configure Google Chrome
You have already installed "Auto refresh" and "Momentum" in the first step.
Normally if you open a new tab Momentum should show up (see image).
Follow the on-screen instructions and set it up as you like.
When you are ready you should see something like this (see last image).
Step 3: Setup WOSB
Next we have to set-up WOSB.
You have already installed WOSB in the previous step.
WOSB is going to act as the wake-up timer.
It will wakeup the pc from standby at the time you desire.
Configure WOSB as seen in the image.
This configuration will wakeup the pc at 7 am and will turn the screen on and keep it on and will go back to standby at 8 am. This pattern will repeat itself from monday to friday. You can also create multiple wakup schedules for the days you don't have to wakeup early.
After you have setup WOSB just simply click the start button and it will close to the tray.
Step 4: Setup TeamViewer
If you have installed the pc in the bedside table it can be very difficult to change some software configurations.
Although, there is a simple solution for this problem to fix it.
You have already installed TeamViewer in the first step.
You have to configure it so you can remotely access the pc without any confirmation or permission.
You can set a password in the TeamViewer settings.
Write down the ID and password from the pc or create a TeamViewer account and add the pc to it.
Now you should be able to connect remotely to the pc.
Step 5: Setup AutoHideMouseCursor
You have already downloaded AutoHideMouseCursor in the first step.
You need to unzip the package and open the exe file.
Then click the checkbox "Start with windows" and click " # to-tray"
Step 6: Teardown the Netbook
This step is a bit more difficult.
We need to disassemble the netbook.
I don't have any detail images of the teardown of my netbook because every netbook and notebook is different.
You need to strip down the netbook to it's bare essentials.
Here are the things you need to keep :
- The base enclosure
- Motherboard
- CPU, Heatsink & Fan
- Memory
- HardDisk
- The power button pcb (if your netbook has a button on the motherboard itself then you can skip this part)
- Wifi Adapter
- Wifi antenna (These are often built-in the top of the screen, I used a separate antenna from a desktop PC as you can see at the latest image on top of the HDD cage)
You can probably find an instruction to disassemble your netbook on google.
Step 7: The WakeUp Switch
This switch can wakeup the screen or put it back to standby if it is on.
To connect the switch you need to solder the 2 wires from the switch to the powerbutton of the laptop.
After that you need to change the energy settings on the pc like in the last picture.
Now if you press the switch the pc should wakeup from standby and should be on quickly.
Step 8: Final Setup
In this step we are going complete the whole setup.
First, do a reboot to make sure that there are no programs running you don't need.
Then :
- Open chrome
- If Momentum is already open you are good, if not open a new tab
- Set auto refresh to 15 minutes or more to make sure it refresh the weather at least 2 times per hour (see image)
- Press F11 to enter fullscreen mode
- Press the wakeup switch to test if it goes to standby
- Press it again if it is off, it should turn on in max 10 seconds
- Voila, your wakeup screen is ready to use
- Have a gentle wakeup experience !


