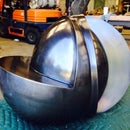
Introduction: Big Stainless Steel Sculpture Part 4
This is the final installment in the Big Stainless Steel Sculpture project. After all was said and done, this piece took about 6 months to design, form, fabricate, and install. This last step covers the installation of the sculpture at the site in San Mateo, CA. If you'd like to check out the prequels, they can be viewed here:
https://www.instructables.com/id/Big-Stainless-Stee...
Step 1: Transporting the Sculpture
This piece ended up measuring almost 18 feet in height and weighed in at about 1,700 pounds so getting it to the site was not trivial. I rented a 24 foot stake bed truck and removed the racks to load the piece with the bridge crane in my studio. We strapped the piece securely and brought all the tools necessary for the installation. If you're not aware, any jackass (yours truly) with a class C drivers license can rent a large truck like the one pictured here, load it with all sorts of crazy stuff, and roll down the road. My advice is to stay clear of said vehicles when possible!
Step 2: Unloading the Scultpure
Dave Vick from ICrane Services met me on site to hoist the piece into position. The sculpture was rigged with a sling through a removable eye bolt I installed in the top of the piece. We attached a tag line to the bottom of the sculpture to minimize swinging as we raised, swung and then lowered the piece onto the concrete footing where it shall live for a long, long time.
Step 3: Placing and Orienting the Sculpture
The steel reinforced concrete footing was poured a month prior to installing the sculpture. Normally, I would cast anchor bolts in the concrete using a pattern from the base plate of the sculpture. In this case, I decided to locate the piece on site so I could fine tune the orientation. We set the sculpture on the footing and while leaving a significant amount of weight on the crane, clocked the piece until the desired orientation was achieved. By the way, that's my friend and colleague, Wayne Shaffer, helping out in the second photo. I have no idea who the rubber necker is in photo #3. On to drilling.
Step 4: Drilling Holes
Drilling into concrete is no fun but it helps if you have a good drill and bit:
https://www.us.hilti.com/medias/sys_master/images/he8/9088804323358/34719_APC_830x515.jpg
We drilled through the holes in the base plate to ensure that that the bolts would be aligned. The engineering specs required 8 holes, each 7/8' dia. x 7 1/2 " deep. Good times. Put your earplugs in and get to work.
Step 5: Prepping the Holes
The light is getting brighter! The holes in the concrete require cleaning before the epoxy is injected to receive the bolts. First, the concrete dust must be blown out of the holes. A compressor is the perfect tool for this job, but I used an old timey hand pump. Next time, I'm using a compressor. Use a brush after blowing out the holes and blow them out one more time to make sure they're clear.
Step 6: Setting the Bolts
The plans required a Hilti Epoxy with a short working time. So, we drilled and cleaned all 8 holes, laid out the bolts, washers and nuts, and prepared to inject the goo. This part of the process is critical: It's important to dispense the mortar into the bottom of the hole and slowly lift the gun as the hole fills to allow air to escape. Insert the bolts immediately after the epoxy has been injected by giving it a 1/4 turn as it's pushed to the bottom of the hole. We screwed the nuts on loosely, cleaned up, and had a beer while we waited 1 hour for the epoxy to cure. Then for the moment of truth: tightening each of the nuts to 100 ft-lbs of torque. We started at 50 ft-lbs, tightened opposing nuts to spread the load on the base plate, and slowly increased the torque until we reached 100. Worked like a charm.
Step 7: Removing the Rigging
Now we just need to remove the rigging so the crane operator can drive away.We rode up in a lift to remove the sling and eyebolt. After the hoist was clear, I inserted a removable stainless plug into a coupling at the top of the piece. If the sculpture needs to be moved for some reason (gasp!), we can take the plug out, thread an eyebolt into place, and rig the piece. I'm hoping this doesn't happen in my lifetime.
Step 8: Done and Done
That's it for now. In short order, construction on the building will be complete and some ground cover plantings will surround the sculpture. I'll have a store bought photo of the piece soon and will include it in this Instructable if you want to check back in.


