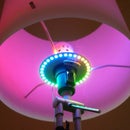
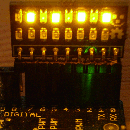
Introduction: Bike Taillight With a Twist
Let's face it. Taillights are boring.
At best they go 'blink blink - look at me! I'm blinking - woohoo' all the time. And they're always red. Very creative. We can do better than that, maybe not much, but still better than just 'blink blink'. I was riding my bike during new year celebrations and people liked it, and not all of them were drunk ;-)
The rest is pretty straight forward: 2x AA cells, boost converter for 5V, some RGB LEDs, the obligatory micro controller, custom printed circuit boards from BatchPCB, perfboard and the usual soldering gear.
Step 1: Main Schematic
Really nothing special. If you know how to wire up an AVR chip on a breadboard or an Arduino on a breadboard, if you like that better, you won't have any problems with this one. I used KICAD for designing the schematic and the printed circuit boards. KICAD is open source and as opposed to eagle, which has a free (as in free of charge) version as well, there are absolutely no limitations in the size of boards you can make. You too get gerber files that work with any fab house you want. E.g. BatchPCB had no problems with them.
In the schematic you'll just find the cpu, the LEDs, a few resistors and capacitors. That's all. There's a few headers too. The boards have an ICSP header for flashing a bootloader and a 6pin header for convenient serial upload. The last 2 headers are mirrored and contain power, I2C and two more GPIO/ADC pins.
3 GPIO pins with 3 current limiting resistors are used to supply current to all 8 anodes of a single color. Individual LEDs are turned on or off using 8 GPIO pins to drive the cathodes. Depending on the type of operation the LEDs are either multiplexed (PWM for more colors) or fully on (higher brightness).
Some info on the packages I used for this board:
- ATmega168-20AU: TQFP32 SMD
- LED: PLCC6 5050 SMD
- Resistors: 0805 SMD
- Capacitors: 0805 SMD, 1206 SMD
Attachments
Step 2: Dealing With the LEDs
I won't go into great detail here, as this has been covered elsewhere numerous times. You just have to make sure you don't exceed the micro controller's maximum output current per pin (about 35mA or so for AVRs). The same is true for the LEDs current. As you can guess from the picture, I used one of the SMD LEDs to figure out the resistor ratio to get well balanced white light. There are three 2k something potentiometers on the other side. That's all. In this case I ended up with resistors ranging from 90 to 110Ω, but that depends on the kind of LED you get. Just use a standard multimeter to determine the LED's forward voltages V_led and you're in business.
Using Ohm's Law, you can calculate the values for current limiting resistors for small LEDs like so:
R = ( V_bat - V_led ) / I_led
I_led should not exceed any current limit of the parts you use. Also this approach is only good for low current applications (maybe up to 100mA) and should not be used for Luxeon or CREE LEDs! The current through LEDs is temperature dependent and a constant current driver should be used.
If you need more info on that topic, wikipedia will have some information. Searching for electrical conductivity of semiconductors (low/high doping etc.) or negative temperature coefficient may be helpful.
I've used 6pin SMD RGB LEDs without commond anything. If you google for them, you'll get many results. The magic words are "SMD, RGB, LED, PLCC6 5050". 5050 are metric dimension for x and y in units of 0.1mm. On ebay you'll find them as well for as low as 50¢ per piece for high volume orders. Packs of 10 currently sell for about 10 bucks. I'd get at least 50 ;-)
Step 3: Backplane & Power Source
The backplane provides power and a common I2C bus to both boards. Each board has 8 RGB LEDs and an ATmega168 mcu running with its internal oscillator at 8MHz. The latter requires synchronization between the boards and/or recalibration of the oscillators. This issue will show up in the code section again.
The schematic for the 5V boost converter was taken from the Maxim MAX756's datasheet without any modification. You can use any other chip you find suitable that can provide about 200mA at 5V. Just make sure the external part count is low. Typically you'll need at least 2 electrolytic capacitors, a Schottky diode and an inductor. The reference design in the datasheet has all the numbers.
I used high quality FR4 (fiber glass) boards for this job. The cheaper rosin based boards may work as well, but they break too easily. I don't want the boards to disintegrate on a bumpy ride.
If you already own a 'MintyBoost', you can use that as well if you can make it fit on your bike.
Step 4: You've Got to Have Some Code!
In high brightness mode the board supports 6 different colors + white. The color is chosen by setting 3 GPIO pins to high or low. That way all eight LEDs can be fully on, but only show the same color.
In PWM mode the color is set by applying a pulse width modulated signal the the 3 GPIO pins and multiplexing the 8 LEDs. This reduces overall brightness, but now individual color control is possible. This is done in the background by an interrupt routine. Basic functions are available for setting the LEDs a certain color value, either using an RGB triplet or a HUE value.
The device is programmed in C using the Arduino IDE for convenience. I've attached the current code I use. Up to date versions are available on my blog. You can browse the GIT repository using the gitweb interface. Many stupid programming mistakes will show up, I'm sure of it ;-)
The second figure illustrates PWM generation. A hardware counter counts from BOTTOM to TOP. Once the counter is larger than a certain number representing a desired color, the output is toggled. Once the counter has reached its TOP value, everything is reset. The perceived brightness of the LED is somewhat proportional to the on-time of the signal. Strictly speaking that's a lie, but easier to understand.
Step 5: See It in Action
Just some preliminary tests. Yes it can do full RGB colors too ;-)
Real world testing. Yes we had some snow, but that was before xmas. Now we have some snow again. But, as usual, during the xmas holidays and new year celebrations all we had was rain. Please ignore me groaning at about mid-video, I'm getting old so squatting gets a bit hard.
Finally some slightly improved effects.
Mission accomplished. Geeky taillights, and illegal where I live too ;-) I'm pretty sure I won't be ignored by sleepy or ignorant motorists anymore. By tuning the timings a bit, you can create pretty annoying effects that are good eye catchers. Especially at night.
As there are 4 GPIO/ADC pins on the boards (2 may be used for building a small I2C network), it should be easy to hook up a push button to trigger all sorts of effects. Hooking up a CdSe photo resistor would work as well.
Total material cost is about 50$. The biggest chunk went into the printed circuit boards. Low volume order penalty as usual.
In analogy to a once widely spread TV commercial for a cell phone company in the US, let me ask you this:
"Can you SEE me now? - Good."
Step 6: Updated Design
I've changed a few things here and there.
Most notably is the addition of a low drop voltage regulator. Now the board can run with anything from 4 to 14V DC. I've also changed the PCB color to yellow and added jumpers to disable auto reset and to bypass the voltage regulator if it's not needed.
Demo code for grabs and assembly instructions. You'll find KiCAD files and a schematic there as well. In case you want one, you can find more info on my blog.
Step 7: Supersized
Step 8: More Light Hack
Step 9: More Updates
The first few seconds of the video show the improvement in the left board.


