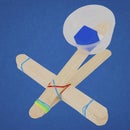
Introduction: Bow and Arrow
A favorite among kids, the bow and arrow is relatively quick to build, and has an incredibly fun payoff. Learn the fundamentals of potential and kinetic energy, as well as how to build strong structures. Read, aim, fire!
You can find the lesson plan, 1-page project sheet, and more project ideas at STEM-Inventions.com
Project Goal: Students build truss-based bow frames that launch weighted straws at least 15 feet.
Design Variables
- Amount of weight in arrow tip
- Length of arrow
- Size of bow frame
- Bow frame design
- Number of rubber bands
- Type of rubber bands
Key Concepts
- Energy transformation is when one kind of energy turns into a different form
- Momentum is the force that causes a moving object to continue to move in the direction it is already going toward
Prep
- Cut glue sticks into various lengths between ½” and 2” (3 pieces per student)
- Set up a designated testing area with target
Safety: Always aim the bow away from people and breakables, even when unloaded.
Supplies
The Engineering Creation Kit has everything you need for this project and many more from STEM Inventions.
- 12 Craft sticks
- 2 craft sticks cut in half
- 5 Craft cubes (Bulk pack)
- 1 Rubber band
- 1 Glue stick for every 4 arrows
- 1 Large straw for every 1 arrow
- Hot glue with safety nozzle
- Masking Tape (Dispenser)
When you make a purchase through these links, I may earn an affiliate commission at zero cost to you.
Step 1: Step-by-Step Video
Watch the video to see how it's built and the science behind it, or keep on reading!
Step 2: The Bow
The purpose of the bow itself is to stretch the rubber band. Having the rubber band stretched out provides a baseline of stored energy. This allows the user to get the most energy out of the rubber band without having to draw it back very far.
The bow will also help guide the arrow's trajectory.
Note that the bow does not work in the same way as a real bow. An actual bow has an inelastic bowstring and a flexible wooden frame. The bow stores energy by bending the wood rather than stretch the bowstring.
Step 3: Reinforcing Trusses + Bowstring Hook
The bow needs to be reinforced in order to support the tension from the rubberband. Adding trusses will strengthen the bow. Explain that trusses are basically triangles that are used to make a structure stronger or sturdier. Trusses work very well because they are easy to make, require minimal resources, and they do not change their shape very easily.
The two craft stick halves at the end of the bow are the bowstring hooks.
Step 4: Attach the Rubberband (bowstring)
Wait for the glue to dry, then loop the rubberband around the half stick and hook it on the other end. If the rubberband slips off, pull it over the top of the craft cubes at the end of the bow.
Finally, use a small piece of tape to bind the rubberband together. This will make it easier to load the arrow and prevent wear and tear on the rubberband.
Step 5: The Arrow
Cut a small slit into the tip of the straw. This will make it easier to insert a 1/4 piece of a glue stick. The glue stick adds weight to the front of the arrow. When the arrow is fired, the extra weight will provide it with momentum, which will help push it through the air. Without it, the air surrounding the arrow will drag against the side of it and quickly slow it down before it can reach a 'fun' distance.
The glue stick does not need to be completely inserted into the straw. Tape it in place.
Wrap a small piece of tape around the back of the straw. Use scissors to cut a nock in the back of the straw. The tape prevents the straw from splintering over time. The nock will make it easier to load the arrow onto the bowstring.
CAUTION: The piece of gluestick at the tip of the arrow may seem rubbery and soft, but it is actually very dense. You may want to glue something soft to the tip such as small crafting pom pom.
Step 6: Fire!
Load the arrow through the center of the bow and place the nock onto the bowstring. Pinch the back of the arrow with one hand while firmly holding the bow in the other. Aim, pull back as much as you want, and release! A well built bow and arrow can easily fire 50 - 70 feet, sometimes more.
Sometimes students are concerned that the bow will break if they pull too hard. The bow design is very sturdy and it should not break under normal use.
Step 7: Safety, Tips and Troubleshooting
REMEMBER! Never allow your students to intentionally point this at another person. Inform your students of a zero-tolerance policy: if they intentionally shoot someone, they will have their bow revoked until the end of class.
- If possible, only allow your students to fire their bows outside.
- If you are confined indoors, set up a target that is at least 15 feet from the firing line. A distance of less than 15 feet is somewhat dangerous because the arrow may ricochet and hit the user. A sheet of cardboard with a small hole in the center makes an excellent target.
- Have students line up and take turns shooting to help prevent accidents.
- If your students need more of a challenge, encourage them to double the size of the bow and use two rubberbands connected with a half-hitch knot. The resulting bow is more powerful if it is built well. However, the bow will require more reinforcement and longer arrows. This may make the bow more prone to breaking, and if the arrows are not made well they will preform worse than a normal-sized bow and arrow.
And as always, encourage your students to experiment with new designs or innovative improvements. Have fun!


