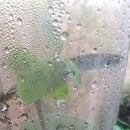
Introduction: Brake Bleeding Bottle
Recently I had the pleasure of replacing the hydraulic clutch slave cylinder on my wife's Mini Cooper, which is worthy of an I'ble in itself (check back later...). Once the new one was installed, it has to have the air bled from the line exactly as it is with hydraulic brake lines. On my first bout of bleeding the line, I kept bumping into my bleeder catch bottle on spilling fluid onto the shop floor. Now ready-made bottles for this are available, but where's the fun in that! (For those who haven't done it, the purged air and old fluid are passed through a tube attached to the bleeder valve and submerged into a container of clean brake fluid. This prevents air from returning into the valve and defeating the purpose of eliminated all air from the hydraulic line. This i'ble is for a handy container for that clean fluid to purge the air bubbles)
Step 1: Short List of Materials and Tools
We compulsively keep things we think may prove useful around our place. I had cleaned and dried a few Gatorade bottles just knowing I could use them somehow. Same for the metal hooks that come on the ends of some bungee cords that had rotted away or broken over the years. The only other item needed is the tubing that squeezes over the bleeder valve and dumps into the catch bottle. For tools, I used a couple of drill bits of appropriate sizes and a bench vise and pliers.
Step 2: Bending the Bungee Hook
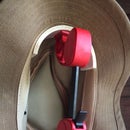
I thought it would be cool to run my tubing through the bottle cap and the spring wrap at the bottom of the bungee hook,which luckily held the tubing snugly, but that would interfere somewhat with hanging the bottle by said hook. A quick trip to the vise and I reversed the direction that the hook faced. Now the hose will run behind the hook wherever I decide to hang it.
Step 3: Drilling the Bottle Cap
I started by drilling the smaller hole approximately the same size as the hook wire slightly offset from center so that the spring thingie would be at the center of the cap. No real measuring, just eyeballed it. Let's not get crazy here....
Then I drilled a larger hole about the size of the outside diameter of my tubing through the center of the cap. The photos above show the test fitting stage before I bent the hook.
Step 4: That's It!...now Get Back to That Clutch or Brake System and Quit Goofing Around...
All that's left is to fill the bottle enough to cover the end of your tubing, hang it somewhere convenient to the component you're bleeding (preferably higher than said part) and lining up your assistant to pump the brakes or clutch as you open and close the bleeder valve. If you really want to make it easy, you can buy or build a pressure bleeding system to bypass the assistant requirement.
Happy wrenching!

Participated in the
Fix It Contest

Participated in the
MacGyver Challenge


