Introduction: CNC Lap Joint
This week’s assignment is using the CNC machine to cut a Lap Joint.
Attachments
Step 1: Making the Baseline in Rhino
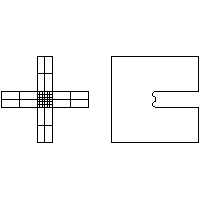
First, I made the baseline of the project in Rhino. The process isn’t too hard, but I learned that since the tool is spinning and making round holes, I need to leave an extra space on the corner to make sure two wooden blocks could tightly lock with each other. The size for each block is 10cm* 10cm. The gap in the middle should be 1.8cm(thickness of the board) * 5cm(but I set to 6cm by mistake, which makes the blocks came across with each other. I’ve already fixed this problem in the photo) the two holes on the corners has a diameter of 6.5 mm.
Another problem I met is when I try to extrude the baseline, it doesn’t form a solid body. Originally Andy suggested that this might because the baseline is not a closed curve, but later on I found that even if I drag a rectangle and try to extrude it, it’s still not a solid body. Finally we found out that the system automatically turn off the solid option of the extruding tool, and the problem has been fixed.
Step 2: Carbide
Then I import the .dxf file into Carbide, I choose Contour and Outside, and here is the simulation(this is the fixed version of 5cm gap, but when I did it for the first time, it was 6cm)
Step 3: CNC Cutting
Then I export the .dxf file from Rhino and import it into the Carbride Creator. In this software I choose the way how CNC is going to cut it, and I left 6 connecting parts to make sure the item will stay on the board. After setting up the basic presets, I export the .nc file and import it into the computer which controls the CNC machine. I fixed the wood on the table and use a device to help CNC detect where the wood board is. Then it begins to work.
Step 4: Final Product
This is the product that CNC prints out. I sand the edge & corner& connecting parts. Since I set the gap into 6 cm rather than 5, they come across with each other.


