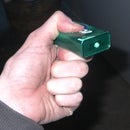
Introduction: Cheapest 6 in 1 Card Reader Ever
A simple mod of the ECS 6 in 1 internal card reader makes it the cheapest external card reader i have ever found...
Usually this internal card reader only works with ECS motherboards but the hacked drivers (included later in the instructable) let it work with any motherboard...!
Usually this internal card reader only works with ECS motherboards but the hacked drivers (included later in the instructable) let it work with any motherboard...!
Step 1: Aquire Parts
The ECS Internal USB 6 in 1 card reader can be bought for next to nothing, alot of shops almost give them away as they are made to work with only ECS motherboards..
I picked mine up from PB Tech in Hamilton, New Zealand for only NZ$5.60 PBTech in NZ... a quick search on google will find many others from as low as US$0.99 on Ebay...
Also required is a male USB plug on some cable... the $2 shop provided this for me plus i get a spare female USB socket for free (the other end of a 1.5m USB extension cable)
Step 2: Open the Card Reader
Remove the 2 small phillips head screws on the underside of the card reader.
The case then splits in two, carefully remove the board from the casing with the faceplate still attached. You can now disconnect the USB wires from the board as there is a nice little plug.
Now cut and strip the wires at about 40mm from the plug (card reader end).
Now take your USB extension cable and lop off the male plug (leave at least 200mm or so of cable but its up to you of course)... now strip those wires....
Step 3: Connect Wires
Now get out your trusty soldering iron and connect up the wires... basically just match red to red, green to green, black to black and white to white....
You dont have to solder if you dont want want too... twisting wires is much cheaper and nastier..!!
Now wrap the connections up individually with insulation tape and then wrap those all together to make it all as compact as possible.
Now make a knot in the USB cable close to the insulation tape bundle.
Step 4: Reassemble
Now time to put it all back together... Mount the board back in the plastic case and snake the wire with the knot in the corner as shown.. this tends to jam the cable in which will allow for a robust exiting cable.
Now fit the base back on and reinstall the screws....
Now fit the base back on and reinstall the screws....
Step 5: Finished
Thats it... you're done... now plug it into your PC and install the hacked drivers which are provided below...
This reader performs like 4 separate drives in windows explorer... excellent and cheap..!!
This reader performs like 4 separate drives in windows explorer... excellent and cheap..!!


