Introduction: Connecting a Linear Actuator to a Control Box


More by the author:


About: Progressive Automations is your primary source for electric linear actuators, motion control systems and automation accessories. For over a decade, we have supplied various industries with top quality automati…
Connecting any electric linear actuator to a control box is a simple process that can take less than a minute. We detail this process step-by-step in this Instructable. If you have any questions, let us know what they are in the comments below.
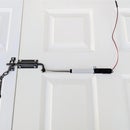
For this Instructable, we are using our PA-14 High Speed Linear Actuators, and one of our wireless control boxes.
For video instructions on this process, visit our YouTube channel here.
For this Instructable, we are using our PA-14 High Speed Linear Actuators, and one of our wireless control boxes.
For video instructions on this process, visit our YouTube channel here.
Step 1: Step One: Stripping the Wires
Start by stripping the wires attached to the linear actuator. Leave enough room, approximately an inch, so the wires can be connected to the control box wires.
Do the same to the wires on the control box. Leave an inch so the wires can be connected together.
You should now have four exposed wires, two from the actuator and two from the control box.
Do the same to the wires on the control box. Leave an inch so the wires can be connected together.
You should now have four exposed wires, two from the actuator and two from the control box.
Step 2: Step Two: Connecting the Wires

Now attach each wire from the control box to each wire on the linear actuator. When connecting, ensure you are attaching the proper wire colors to one another. In this case, the brown and red wires go together, and the yellow and blue wires go together.
Shrink wrap or electrical tape can be used to hold the wires together. This will prevent them from being exposed or getting damaged when the actuator is in use.
Shrink wrap or electrical tape can be used to hold the wires together. This will prevent them from being exposed or getting damaged when the actuator is in use.
Step 3: Step Three: Turn It On!

You should be able to plug in your control box and move your actuators with your wireless control system now. It's as easy as that.
If you have any questions about these instructions, get in contact with us by asking us in the comments below or visiting the Progressive Automations website.
If you have any questions about these instructions, get in contact with us by asking us in the comments below or visiting the Progressive Automations website.