

Introduction: Control TV Using a Touch Remote Using Arduino


Let's see how I made a touch remote using Arduino.
Supplies
Things used in this project
Hardware components
- Arduino UNO×1
- IR receiver (generic)×1
- LED (generic)×1
- Resistor 100 ohm×6
- Jumper wires (generic)×1
Step 1: Touch Remote Using Arduino
In this video, I'll show you the working of the touch remote. This is a fun project. I wished I could control the television using a touch remote. So I decoded my TV remote and used aluminum foil as touch pads. Since many suggested adding an explanation, I had added a voice-over. Hope you like this video. Thank you all!
Step 2: Explanation


Hello friends! Welcome back to another video where I am going to explain my project, touch remote using Arduino. Without any delay let's get started with the components.
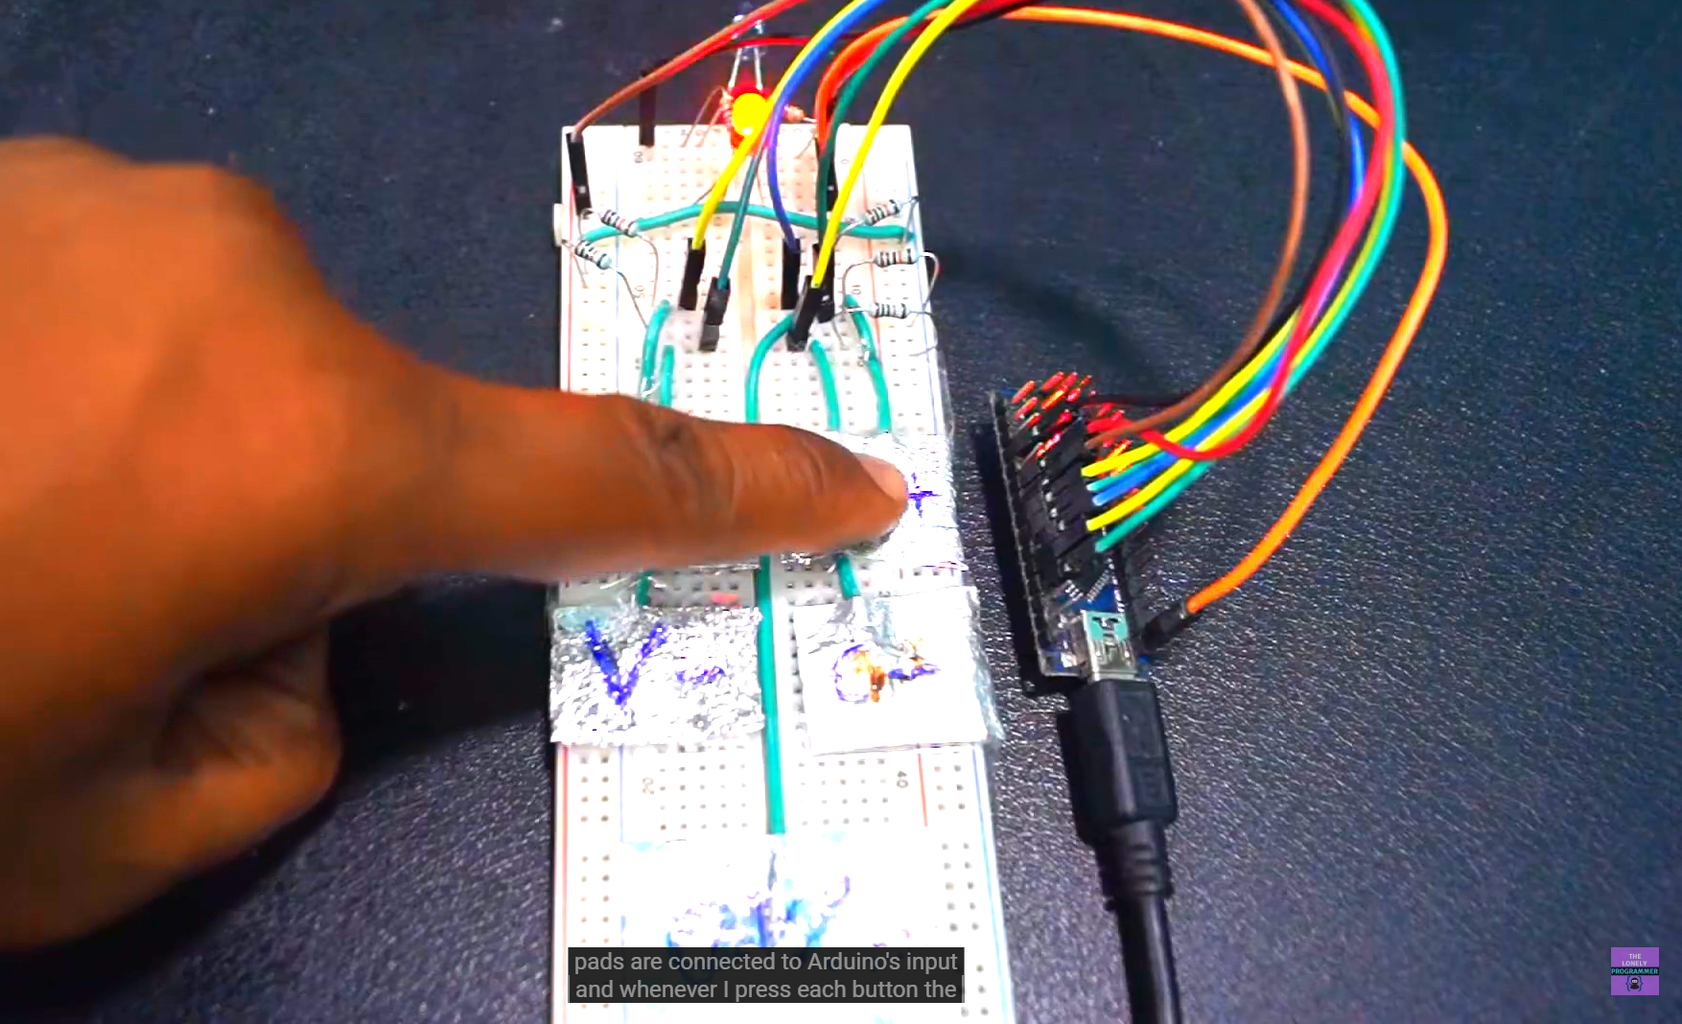
For this circuit, I had used a thin foil of aluminum as a touchpad which can be used as a remote button. For this remote circuit, I had used five touchpads
- a volume up,
- a channel up,
- a volume down,
- a channel down
- and an on/off switch
and IR LED is used to transmit the data to the television and LED to indicate the presence of data transmission and some jumper cables which connect the Arduino and the breadboard.
Now let me show you the buttons which have been made, I had folded the aluminum foil in the shape of a rectangle and each button is connected using wire, each pad is connected to Arduino's input and whenever I press each button the data corresponding to that switch will be sent through the IR transmitter.
As you can see the LED blinks at the delay rate of 40ms and whenever we pressed the button the LED blinks in accordance with the hex value which I have implemented from the remote. Alright, let me show you the remote circuit. Here, for this project, I had used a sony remote. I used the decoding algorithm to map the buttons volume up, volume down, channel up, channel down, and on a touchpad and I had implemented the code in the Arduino.
I have given the inputs applied to the Arduino from the PC using and micro USB cable whenever I press any button, I can see serial data on my monitor. The change of channel or increase or decrease the volume can be
seen at the bottom of the TV screen.
Step 3: Working
We finally did this project successfully. If you faced any issues in building this project, feel free to ask me. Please do suggest new projects that you want me to do next.
Give a thumbs up if it really helped you and do follow my channel for interesting projects. :)
Share this video if you like.
Github - https://github.com/Rahul24-06/
Happy to have you subscribed: https://www.youtube.com/c/rahulkhanna24june?sub_confirmation=1
Participated in the
Arduino Contest


