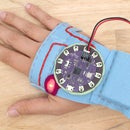
Introduction: Finish the Hi-Collector!
Soft circuits use conductive materials that are not insulated. That's why when you finish creating a circuit, it is sometimes a good idea to cover it up to prevent shorts and to help protect it from weathering over time. There are several ways you can do this.
In this lesson, I go over three different ways to protect a soft circuit and two different ways to diffuse an LED. You will follow along step-by-step as I use a few different methods.
The materials listed in this lesson cover a few methods described in this lesson, not all of them. If another method catches your fancy you will need to get a couple additional materials.
You will learn how to:
+ protect a soft circuit
+ diffuse LEDs with common craft materials
Step 1: Materials
+ Heat 'n' Bond
+ iron
+ felt
+ fabric paint
+ Hi-5 Collector
+ hot glue gun with 1 x glue stick
+ small piece of parchment paper
+ fabric marker
+ pencil
+ penny-size piece of polyester filling (optional)
+ small scrap of white fabric (optional)
+ fusible interfacing (optional)
Step 2: Covering a Circuit: Fusible Interfacing
Fusible interfacing is usually used as structure in collars and button plackets when making clothing. It comes in many weights and can be knitted (stretchy!), woven or non-woven.
Because it's and iron-on material and can be found in any fabric store it makes for a convenient way to cover up exposed circuits. To use it, first identify the side with the adhesive. This is usually the side that feels rough. Draw and cut out a shape that will cover the conductive material you would like to protect. Sometimes interfacing is translucent enough to see the circuit through so you don't have to guess the size and shape of the cover. If you can not see through it, cutting it in strips and building as you go works well.


Step 3: Covering a Circuit: Fabric Paint
There are lots of different kinds of fabric paint out there to try. For this project, I chose the kind you can squeeze from a tube. This is sometimes called "puffy" or "3D" fabric paint. The applicator bottle makes it great for covering a single stitched line which is why it's a great choice for this project.


Step 4: Covering a Circuit: Iron-on Fabric
Heat 'n' Bond is a material I love to use while creating prototypes and it comes in handy when covering wearable electronics. It's a hot-melt adhesive film that can be ironed onto a fabric that you want to become iron-on itself. One side is paper and the other is the adhesive. Before using it you need to identify the adhesive side which is the shiny side.
Heat up an iron to med-high heat. Place the adhesive side down onto the fabric you wish to make iron-on. Place the hot iron on top of the paper and apply heat. Stay there for a second and then slowly move onto the next area. Apply enough heat until the adhesive sticks to the fabric and then let it cool completely. You now have iron-on fabric!
When you are ready to use it simply peel off the paper backing, place the fabric adhesive side down, and iron it down. The paper is useful for drawing designs on before cutting shapes out and ironing.


Step 5: Cover Traces
Now that you have been introduced to three ways you can easily cover your exposed circuits let's apply two of these methods to the Hi-5 Collector.
Covering conductive thread traces will protect them from shorts, abrasion and general weathering over time. What material you choose to cover your traces with will determine what level of protection your circuit will have in those three departments. You material choice will also affect:
+ the thickness of the final project
+ how the fabric drapes after the circuits are covered
+ the overall aesthetic of the project
+ water resistance
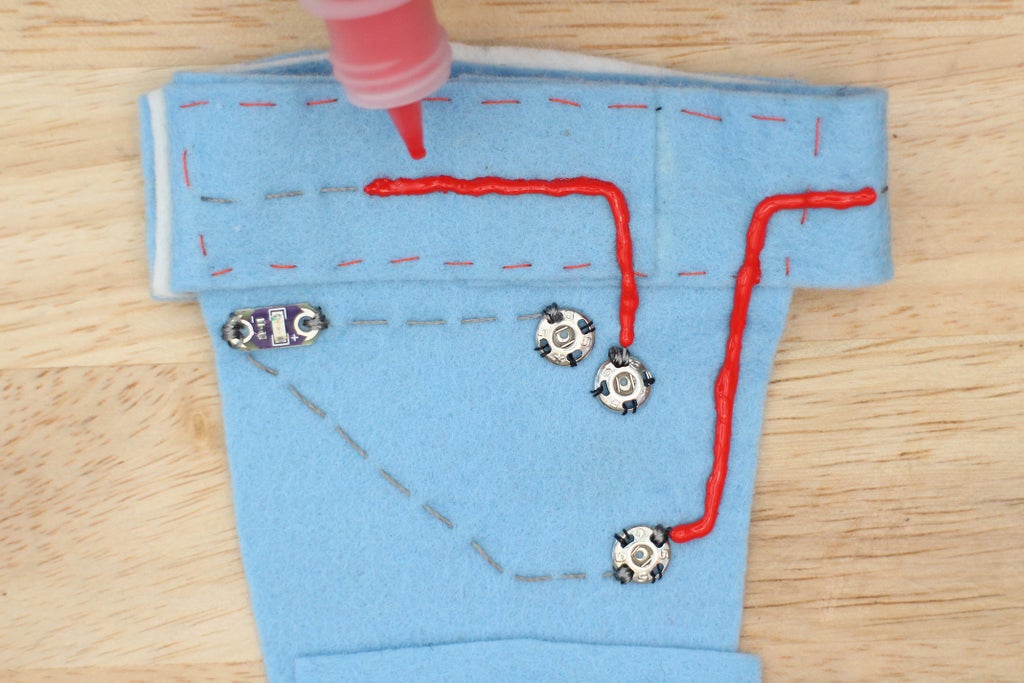
I chose fabric paint for this project because it's light weight and the application bottle makes it very easy to apply to a single stitch line. Blue and red is a favorite color combination of mine, so the fact is was red also lured me in.
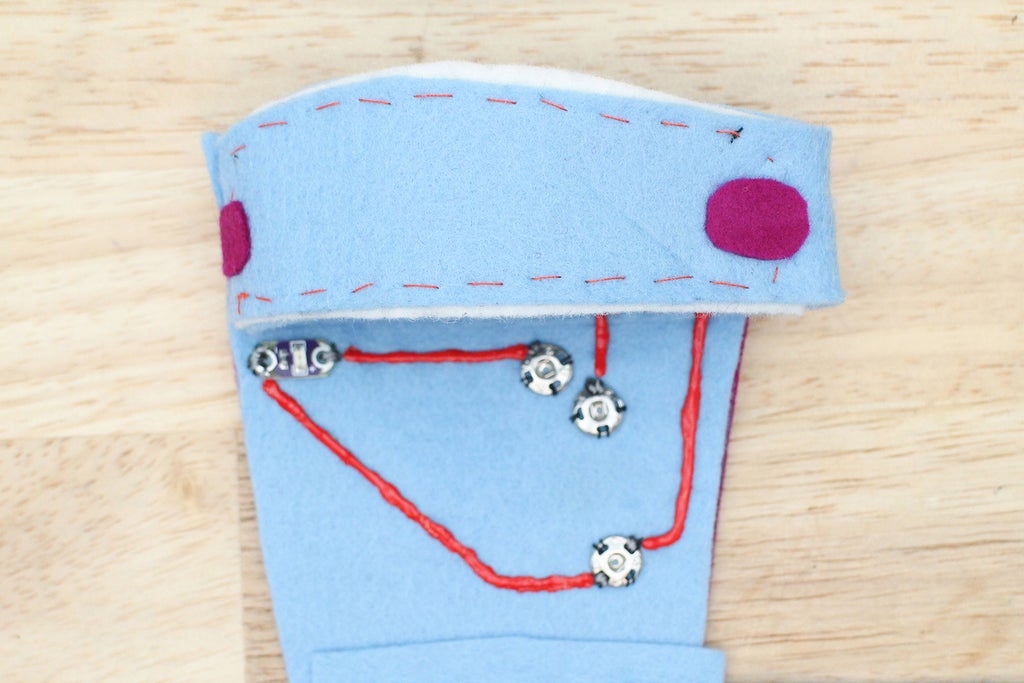
Remove the microcontroller and battery so they are out of the way. It helps to start the paint flow over another piece of fabric. It can start flowing too quick and catch you by surprise which leads to an unsightly blob at the beginning of a line. Take the fabric paint and start drawing over each trace, covering the circuit completely.



Step 6: Cover Inside
You have now covered the front of the circuit, but when using conductive thread you also need to address the back of the circuit where the stitches may have poked through. At this point, the knots are already covered with glue, but if any stitches broke out to the other side you may need to cover those.
If covering a small amount, you can use glue to cover the remaining circuit but we also want the inside, the part that touches the skin, to feel soft. Ironing on a fabric layer will protect any exposed threads and give a soft and even feel when against the skin.
Iron some Heat 'n' Bond to a piece of felt. If you want specific instructions on how to do this, go back to the Covering a Circuit:Iron-on Fabric step in this lesson.


Turn the project inside out. Trace the trapezoid shape (where the circuit is sewn) onto the paper and cut out. You now have a trapezoid shaped iron-on patch! Peel the paper backing off the trapezoid and place it, adhesive side down, on the back of the circuit.


Iron the patch on with the iron set to med-high heat.

Step 7: Finish Covering
Use the iron-on fabric to cover an remaining exposed thread.

Step 8: Diffusing an LED
LEDs are fun to use, but sometimes you want them to go beyond a point of light. To take away hard shadows and lines an LED produces, you can diffuse it. Diffusion is achieved by placing a material on top of an LED that spreads and softens the light, taking it from a point of light to illuminating a larger surface area. You can use many materials, such as silk, acrylic, and flexible polymers. I'm going to show you how to diffuse an LED using two different materials that you can pick up from your local craft store.
Polyester Filling
Also known as Poly-Fil or polyester stuffing. This is the soft fluffy material you use for pillows and stuffed animals. You can also use batting, which is a sheet of polyester or cotton fibers pressed and tangled together to make a lofty sheet. Batting is usually used for quilting and upholstery, but can be pulled apart and used for diffusion as well.
If you put a layer of polyester filling over an LED it does wonders in the diffusion department. Its softness also makes it perfect for wearable projects. If using polyester filling for diffusion, finish it off with a small piece of white fabric. Cut a shape that fits over the amount of filling covering the LED. Sew around the edges of the fabric using a straight stitch to create a soft bubble. To clean up the appearance of the fabric edges cut out a ring of felt and glue that on to cover the raw edges and stitched line.

LED without diffusion.

LED with poly filling.
Hot Glue
Using hot glue is a favorite of mine, yes it's crafty, cheap and can be messy. But when you are making something that is not a product, it can be exactly what you need. This is the method I chose for the final project and will teach you how to do in the next steps.

LED without diffusion.

LED with hot glue.
Step 9: Make a Diffusion Lens
To diffuse the LED with hot glue you make a sort of lens that gets placed on top. There are a couple different ways to make this lens. You can make a separate lens that gets attached to the LED later, or you can hot glue right onto the LED its board.
I will show you how to make a separate lens that gets attached to the LED. You can hot glue right over the LED if you like but if I need to remove it later I find it easier to if it's made separately, then attached.
Plug in your hot glue. Put some parchment paper on top of the LED. When your glue gun is hot, cover the whole LED and a little past the edge all the way around.

Make multiple lens playing with size and shape.

After the hot glue hardens peel the designs off the parchment paper.

Try on the different sizes and choose one that you like. You want one that extends a little past the outer edge of the LED.
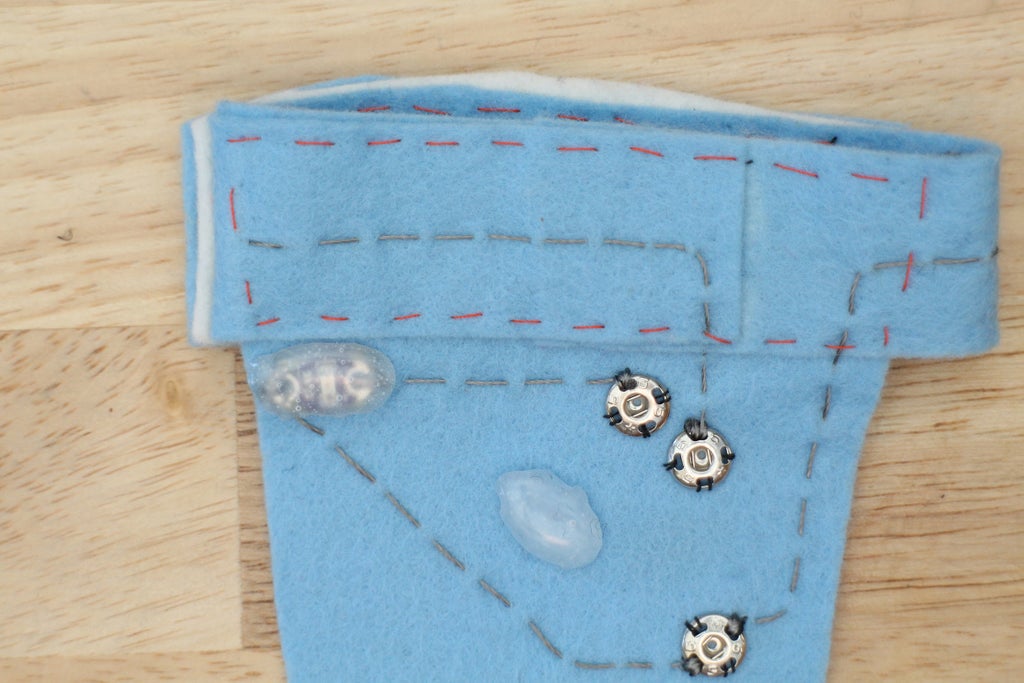
Step 10: Attach Lens
When you put the hot glue lens on top of the LED you will notice a gap between it and the felt. This is easily fixed by hot gluing around the LED board to create a wall for the lens to sit on top of.
Heat up the hot glue gun and put a layer of glue on the felt around the board. One layer should do it. Once the glue hardens, put another thin layer of hot glue down.

Lay the lens on top of the wall and hold down until it hardens.


Step 11: Finishing
The lens may look a little rough around the edges. To clean them up cut an oval ring of felt the same size as the lens. Apply some Fabri-Tac to the back and press it into place. This will give a more finished look to the LED and hot glue lens.


Step 12: Test
Remember to always test after a step of progress has been made! Snap the LilyPad USB on and plug the battery in. Put the mitt on and push the power switch to ON. Give some high-fives to test to see if everything is still working.
Is something not working correctly? Try these things first:
+ Check to see the LilyPad USB is snapped to the correct pins.
+ Charge the battery
+ Connect the board to the Arduino IDE and open the serial window to see if the switch is closing when you give a high-five.
Still having problems? Comment below and we will solve it together!
Step 13: Test Your Knowledge
{
    "id": "quiz-1",
    "question": "What does diffusion do to light?",
    "answers": [
        {
            "title": "spreads and softens",
            "correct": true
        },
        {
            "title": "focuses and sharpens",
            "correct": false
        }
    ],
    "correctNotice": "That's correct",
    "incorrectNotice": "That's incorrect"
}
{
    "id": "quiz-2",
    "question": "Covering a soft circuit can prevent it from creating shorts when the project moves and folds on itself.",
    "answers": [
        {
            "title": "tru",
            "correct": true
        },
        {
            "title": "false",
            "correct": false
        }
    ],
    "correctNotice": "That's correct",
    "incorrectNotice": "That's incorrect"
}
{
    "id": "quiz-3",
    "question": "Heat 'n' Bond can make any heat-friendly fabric iron-on.",
    "answers": [
        {
            "title": "false",
            "correct": false
        },
        {
            "title": "true",
            "correct": true
        }
    ],
    "correctNotice": "That's correct",
    "incorrectNotice": "That's incorrect"
}
Step 14: Wear
Congratulations! You are officially done with the Hi-5 Collector and now you can get out there and start getting your high-fives [insert party popper emoji here]. I hope you have enjoyed building this project. You can now program an Arduino compatible board, sew a running stitch and design soft switches for all kinds of fun actions. You also have all the necessary basic skills that will be applied to the next project and much more to come.
The next lessons will get you back to using the Arduino software. This time, you will learn about analog signals through fading an LED, building a flex sensor and more.
Show off your finished Hi-5 Collector below!


