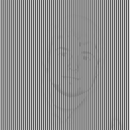
Introduction: Creepy Double Face Illusion
Here is a relatively easy way to to take a photo of yourself or someone else and make it look like two faces in one. I always loved the candlestick illusion. This is my version of it.
Link to candlestick if you haven't seen it before.
http://www.blogcdn.com/www.switched.com/media/2008/09/facevase.jpg
Tools Needed.
Photoshop or some photo editing software.
A front and side view photo of target.
It takes about 20 to 45 min to make.
Link to candlestick if you haven't seen it before.
http://www.blogcdn.com/www.switched.com/media/2008/09/facevase.jpg
Tools Needed.
Photoshop or some photo editing software.
A front and side view photo of target.
It takes about 20 to 45 min to make.
Step 1:
Take two photos one facing the camera (image 1)
and one facing 90° from the camera. (image 2)
Open both photos into one Photoshop file. (image 3)
With the side view layer selected use the quick selection tool to clear the back ground. (image 4)
Use the transform tool to adjust the size of the heads to match. (image 5)
I made the side head a little bigger.
Line up the noses and mouths. (image 6)
Press and hold "Ctrl" and click the side view layer. It should put a dotted line around the side view head. (image 6)
Select the front veiw layer and press the mask button.
Turn off the side view layer. (image 7)
Should look like image 8.
Adjust the mask by using the paint bush with black(to add to the mask) or white (to remove from the mask).
The final mask should look like image 9.
I made 2 versions of this image.
Version 1 is easier, faster, and doesn't make changes to the image. It uses shadows to change the eye. (go to step 2)
Version 2 changes the eye of the front view to the side view. (go to step 3)
Step 2: Version 1
Version 1: Uses the burn tool and shadows to make the face appear to look both ways.
To add shadow: Image > adjustment > levels. Move the blacks to the right to add more shadow. (image 1)
Use burn tool on left side of eye to add even more shadow. (image 2)
Jump to step 4 now.
To add shadow: Image > adjustment > levels. Move the blacks to the right to add more shadow. (image 1)
Use burn tool on left side of eye to add even more shadow. (image 2)
Jump to step 4 now.
Step 3: Version 2
Version 2
Turn the side view layer on.
Use the quick selection tool to select the eye.\
Press the mask button. (image 2)
Scale and line up the eye. (image 3)
Merge the Eye with the front view layer. (image 4)
Use the healing Brush Tool and the clone tool to fix the area around the new eye. To use these tools you need to ALT click the area you want to cone or heal from. Then paint over the area around the new eye. (image 5)
Area around the eye should look like image 6.
Step 4: Done
Google background, add a new layer with a gradent effect, or somthing.
I just googled background and found this image.
Thanks for reading and If you have any questions post a comment or send me a message.
I just googled background and found this image.
Thanks for reading and If you have any questions post a comment or send me a message.


