Introduction: CubeSat and Arduino - Dylan A, Jace R, Melia W, and Sophie S

You could bring the space race right to your own backyard. The next frontier is Mars and we intend to study it! This instructable will walk you through a prototype CubeSat build, which is a 10 cm by 10 cm cube that holds simple sensors to study and learn about planets! Our CubeSat will map out the terrain of Mars. So let’s jump right into it!
Throughout the entire year, our physics class has been progressing our education in space travel. We started off with learning the basics of flight and how to get a self-made (paper airplane) flight mechanism to measure an aspect of flight (distance, loops, height, etc). We then moved on to outer space flight by building water bottle rockets. Through the project, we learned how to get the rocket to go as high as possible and stay in the air for the longest period of time. With this knowledge, we can figure out how to get an object to maintain an orbit around a planet.
The goal for this project was to construct a 10x10x10 cm CubeSat and wire and program an Arduino that we can send to Mars to collect various information of our choosing. Our group chose to use the ultrasonic sensor and color sensor to scan the surface of Mars, using a specific color (pink) to identify the “planet.” We were also tasked with finding/writing functional code that corresponded and operated for each sensor.
Certain constraints meant that the Arduino must not go over 10 cm and have a mass of 1U, and only four weeks were given to work on the project. The limited knowledge of most of our group members means there will be unexpected and difficult problems to troubleshoot. Due to the materials and time available to us, the CubeSat has the potential to break due to the thin plastic used.


Step 1: Materials List - Jace R

This build uses these sensors and arduino parts. The Elegoo UNO is a third party creator of "fake" arduinos, but they work in the exact same way.
Color sensor TCS3200 http://bit.ly/2DcCAlp
HC-SR04 ultrasonic sensor https://amzn.to/2Iu1uAl
MicroSDcard reader https://amzn.to/2Iu1uAl
Elegoo UNO R3 https://amzn.to/2Iu1uAl
Breadboard and a fair amount of m-m wires, f-m wires, hot glue gun, string
Shelves for the inside of the CubSat.
To gather the materials to construct your Cube, you must decide if you want to build it or 3d print it. You can use wood, Popsicle sticks or even LEGOs. Get creative! Just make sure it is strong, durable, and meets the 10 by 10 by 10 cm measurements. If you have access to a 3d printer, search in google for a 1U CubeSat design.Some also come with shelves to be put inside the cube. There are many different designs for you to choose and use.
Once you have everything, you are ready to get started!


Step 2: Safety - Sophie S

3D printing gets very hot once the printing has started because the cable must be heated up in order to be printed onto the desired objects. It is important to be wary when working with the 3D printer. We also used a hot glue gun when placing the stabilizers inside the Arduino to make sure the shelves inside the Arduino stay upright while in motion. Tape and scissors were also used on the creation of our physical CubeSat, most of the building was done by the 3D printer.
Disclaimer
It is very important to practice correct safety procedures. This includes wearing goggles when drilling or in a situation where any debris is flying, using heat protecting gloves are also important while building anything dealing with high temperatures, and making sure electrical cords are away from water. Being aware of surroundings is very important while creating something, no matter how easy the project may seem.
Step 3: Building the Arduino - Dylan A
Step 1
Drawing out a sketch of the idea. Make sure to make it as detailed as you possibly can!
Step 2
Determine the parts needed. Here is the list of the parts we used in this build
Color sensor TCS3200
http://bit.ly/2DcCAlp
HC-SR04 ultrasonic sensor https://amzn.to/2Iu1uAl
MicroSDcard reader https://amzn.to/2Iu1uAl
Elegoo UNO R3 https://amzn.to/2Iu1uAl
A fair amount of m-m wires, f-m wires
Step 3
IPO/pseudo code both needed. These can be found by simply searching through code libraries on the web.
Step 4
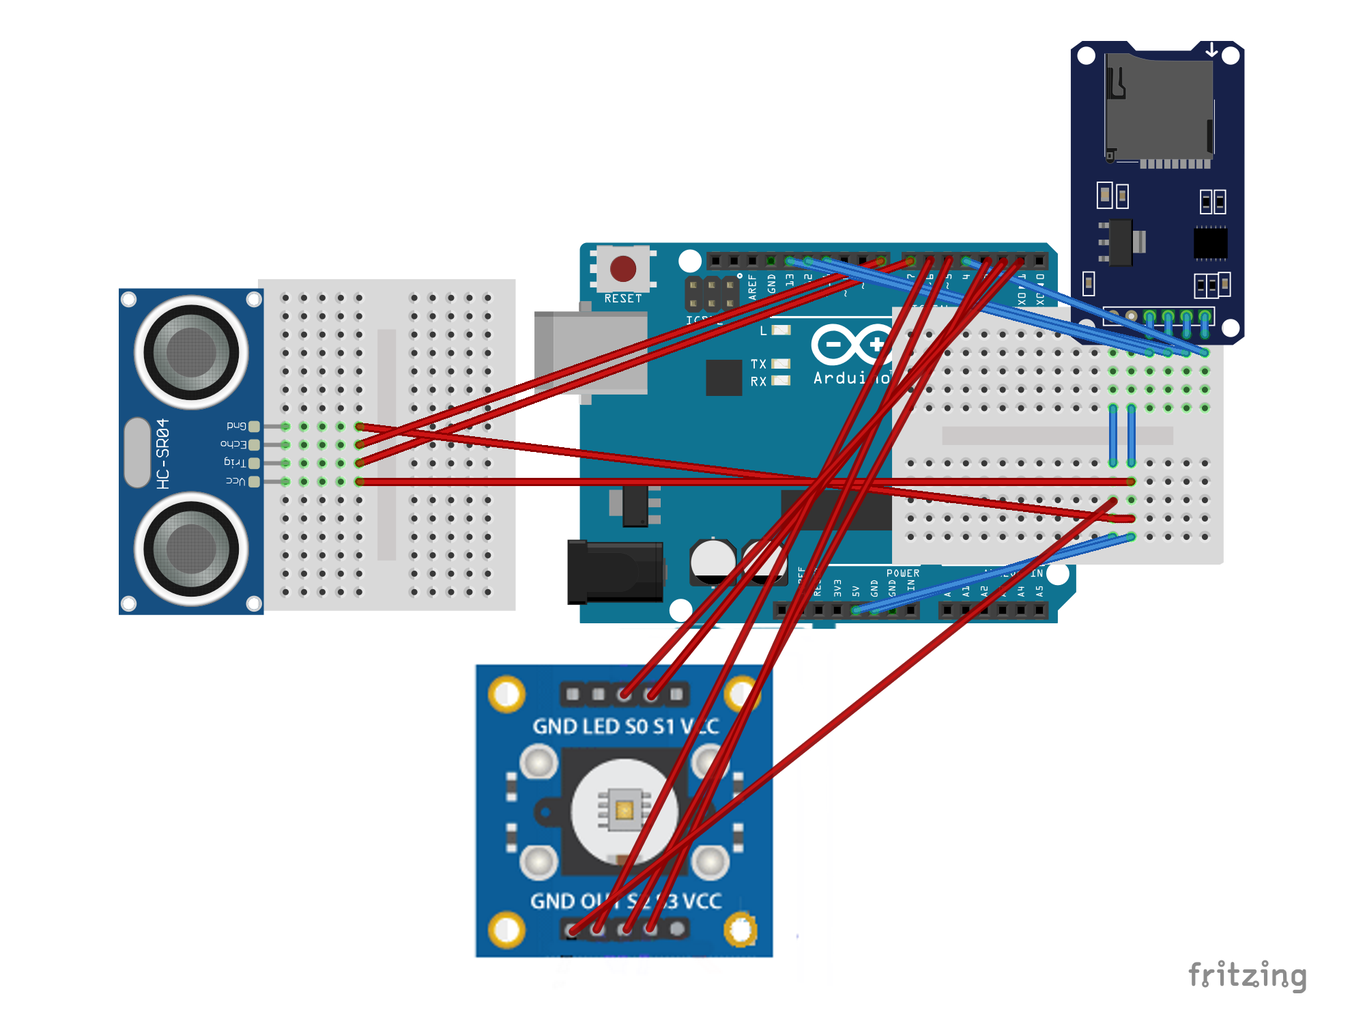
Program with the idea of which electronic port you want to be using. For our color sensor, we used port 7 and 8. For our SD card reader, we used 4, 11, 12, and 14. Finally, for our color sensor, we used ports 1, 2, 3, 5 and 6.
Step 5
Wire to Arduino.
Step 6
Test, did it work? If no, troubleshoot the error (the Arduino software will tell you) and try again. Don't give up!


Step 4: Building the CubeSat - Melia W


Step One
Find a model on the internet (or 3D model/build one yourself). Make sure it is close to 10x10 cm.
Step Two
Print the CubeSat of your choosing; make sure to glue the surface of the printer.
Step Three
Cut off any errant strands of filament left from the 3D printing process.
Step Four
Add shelves using recycled materials (in this case: old robot parts and shelves from another CubeSat design).
Step Five
Hot glue the bottom shelf to the "floor" of the CubeSat and insert (or hot glue) the metal beams into the holes. Then you can slide the other shelf (or shelves) onto the beams.
Step Six
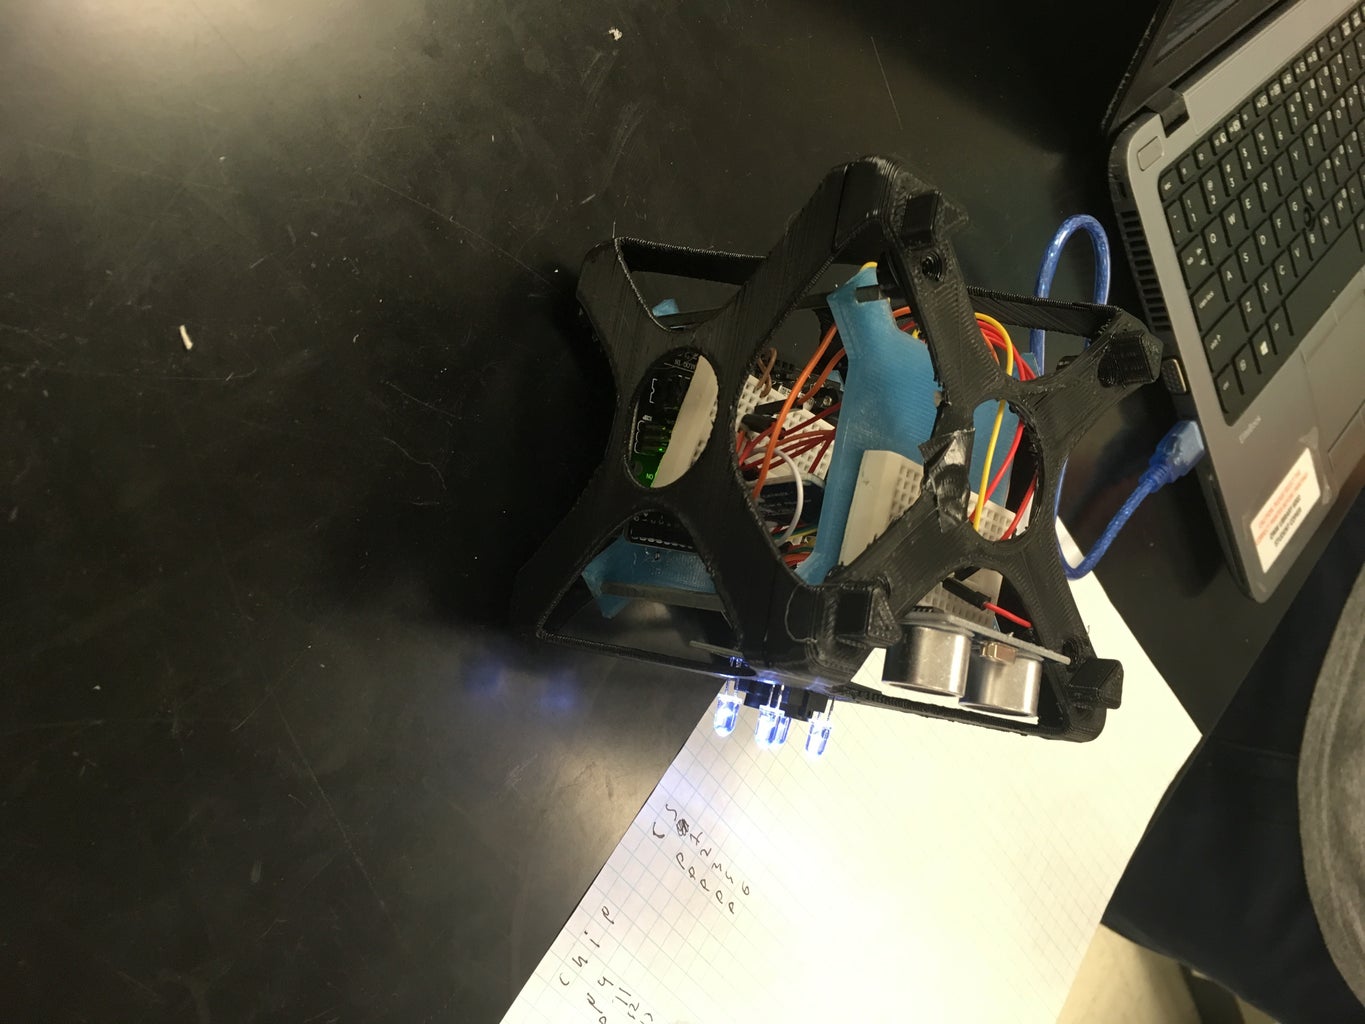
Once you have the Arduino and sensors secured inside the CubeSat, use strong adhesive tape to secure the top.
links used:
Step 5: Code - Dylan A
#include
<sd.h>#include <spi.h></spi.h></sd.h>
File myFile;
// Pins
const int trigPin = 7;
const int echoPin = 8;
// TCS230 or TCS3200 pins wiring to Arduino
#define S0 1
#define S1 2
#define S2 3
#define S3 5
#define sensorOut 6
// Stores frequency read by the photodiodes
int redFrequency = 0;
int greenFrequency = 0;
int blueFrequency = 0;
// Stores the red. green and blue colors
int redColor = 0;
int greenColor = 0;
int blueColor = 0;
/*
 ** MOSI - pin 11
 ** MISO - pin 12
 ** CLK - pin 13
 ** CS - pin 4 (for MKRZero SD: SDCARD_SS_PIN)
CS - pin 4 (for MKRZero SD: SDCARD_SS_PIN)
*/
const unsigned int MAX_DIST = 23200;
void setup() {
  Serial.begin(115200);
myFile = SD.open("output.txt", FILE_WRITE);
// Setting the outputs
  pinMode(S0, OUTPUT);
  pinMode(S1, OUTPUT);
  pinMode(S2, OUTPUT);
  pinMode(S3, OUTPUT);

  pinMode(trigPin, OUTPUT); // Sets the trigPin as an Output
pinMode(echoPin, INPUT); // Sets the echoPin as an Input

  // Setting frequency scaling to 20%
  digitalWrite(S0,HIGH);
  digitalWrite(S1,LOW);
  if (!SD.begin(4)) {
    Serial.println("Card failed, or not present");
    // don't do anything more:
    return;
    while (1);
  }
  Serial.println("card initialized.");
myFile.close(); }
void loop() {
float duration;
float distance;
digitalWrite(trigPin, LOW);
delayMicroseconds(2);
myFile = SD.open("output.txt", FILE_WRITE);
unsigned long t1;
unsigned long t2;
unsigned long pulse_width;
float cm;
float inches;
// Setting RED (R) filtered photodiodes to be read
digitalWrite(S2,LOW);
digitalWrite(S3,LOW);
// Reading the output frequency
redFrequency = pulseIn(sensorOut, LOW);
redColor = map(redFrequency, 70, 120, 255,0);
digitalWrite(S2,HIGH);
digitalWrite(S3,HIGH);
greenFrequency = pulseIn(sensorOut, LOW);
greenColor = map(greenFrequency, 100, 199, 255, 0);
// Setting BLUE (B) filtered photodiodes to be read
digitalWrite(S2,LOW);
digitalWrite(S3,HIGH);
// Reading the output frequency
blueFrequency = pulseIn(sensorOut, LOW);
blueColor = map(blueFrequency, 38, 84, 255, 0);
digitalWrite(trigPin, HIGH);
delayMicroseconds(10);
digitalWrite(trigPin, LOW);duration = pulseIn(echoPin, HIGH);
distance= duration*0.034/2;
myFile.print("Distance: ");
myFile.println(distance);
delay(10);
myFile.close();
}Step 6: Results - Dylan A, Jace R, Melia W, and Sophie S

Results:
The results we got indicate how far away the CubeSat was relative to Mars. We were first 0inches away from Mars, but after we fixed the angle the CubeSat flew at, the sensors were able to pick up data. We averaged around 9inches away from Mars.
Distance: 0.00in
Distance: 0.00in
Distance: 0.00in
Distance: 0.00in
Distance: 0.00in
Distance: 7.95in
Distance: 8.58in
Distance: 9 60in
Distance: 9.37in
Distance: 9.56in
Distance: 13.17in
Distance: 12.01in
In order to collect the data, we had to cover the faux "Mars" with pink papers Once the paper secured, we started our final test. The data was collected towards the end after the CubeSat was moved closer to Mars.
In the data collected, the period (which is how long the CubeSat takes to spin around Mars one time) took 2 seconds, making the frequency 0.5 Hertz. The velocity was 1.50 m/s, the acceleration was 4.68 m/s/s, and the force was 1498.5 N.
We used lots of wave physics because the color sensor is able to pick up on particle light waves. The ultrasonic sensor is using sounds waves (think echolocation) to map out the environment. We also used lots of laws that had to deal with gravity and inertia to sustain orbit. Both the centripetal force and centripetal acceleration ensured that the CubeSat was constantly moving in a circle with an inward acceleration.
With this project, we had a fair share of problems. Many regarding the code and design of the CubeSat. Below are the challenges we encountered, and the methods by which we troubleshoot the issues.
P: The first time the Arduino was turned on we collected data, but the second and third times the Arduino was powered no data was collected.
S: We are programming the Arduino to pick up more shades of pink so we have a variety for the Arduino to be activated by.
P: When the CubeSat is attached to the orbiter, the CubeSat does not stay facing the hypothetical mars, so we would not be collecting any data for half the time.
S: We attach a weight of some sort to the front of the CubeSat so that it forces the Arduino to stay facing Mars.
P: We didn’t have a shelf in the original CubeSat design that we pulled off the internet so we are having a hard time fitting everything into the Arduino.
S: We printed off a shelf to put inside the Arduino, but since it was separate we had to figure out a way to keep it upright inside the Arduino, so we used metal rods and it is pretty stable now.
Our one piece of advice for anyone pursuing an Arduino project is to make sure the CubeSat you build or find online is suitable for the Arduino and sensors you’re using (you may need holes or shelves). Without the proper design, there is no way for the rest of the project to work.
this is the link to our google drive to show the pictures we took during the whole process

Participated in the
Arduino Contest 2019


