Introduction: Cylindrical Square From the Junk Box.
I had a spindle from the tail stock of a large lathe which I used as the basis for an accurate cylindrical square. Although the spindle was hardened it had some wear due to years of use on the lathe. This video shows how I lapped it true and checked it for squareness.
A Cylindrical Square is not an oxymoron, it is a device which is used in conjunction with a surface plate for checking the squareness of an object being inspected for accuracy or compliance with the specified tolerances.
This instructable is entered in the "Reuse" contest because it reuses two items, the main one being the tailstock spindle from an old lathe which forms the cylindrical square, the other being an old bearing housing which I reused as a lap to make the tailstock spindle true enough to be considered good enough to use as a square.
The video above shows all the processes involved.
Supplies
The supplies were minimal but specialised.
1. Lathe tailstock spindle, this is the main item which becomes the cylindrical square, the final object.
2. A bearing housing from the scrap box, this becomes a tool to true the above spindle.
3. A couple of 8 mm bolts.
4. Some grinding paste.
Tools used.
Lathe.
Drill press.
Bandsaw.
Surface plate.
Square angle plate.
Drills and taps.
Step 1: The Real Thing
This shows an example of a typical commercially made cylindrical square.
Step 2: Starting Point
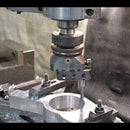
The main photo shows the large tailstock spindle compared to the smaller one of my own lathe. The second photo shows the bearing housing which will be turned into a lap to true up the spindle. The spindle had a diameter of 54 mm and the housing was 50 mm, so the first task was to bore the housing out to fit the spindle.
Step 3: Sizing the Housing
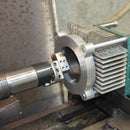
I used a bore gauge to check the internal diameter of the housing during several machining passes. The final size was made to be a nice sliding fit on the spindle. The housing will be split such that it can be opened enough to allow for the grit when lapping.
Step 4: Drilling and Tapping for the Clamping Bolts.
During the lapping process it will be advantageous to be able to adjust the lap as the spindle high spots are lapped down. To achieve this I drilled and tapped holes for two clamping bolts. For rigidity during the drilling and tapping process I performed these operations prior to cutting the split.
Step 5: Slitting the Lap.
I used a bandsaw to firstly cut the main slot to allow for adjusting the diameter of the lap. I then sawed additional slots in the inner ring to create more flexibility to allow the lap to conform better to the spindle and also to provide a reservoir to hold excess lapping compound.
Step 6: Lapping
Micrometer measuring showed that the spindle varied in diameter along its length by only two tenths of a thou. That was due to wear during its previous life on a lathe. Although that is a minimal degree of error I wanted something closer to perfection and that is what the lapping achieved. I ended up with no measurable error over the working length after about 30 minutes of lapping and measuring.
Step 7: Moment of Truth
The next step was to measure is the axis of the cylinder was square to the base. This is best understood by reference to the video in step 1. Basically two opposing faces of the cylinder are checked against a known square by checking for any light gaps between the cylinder and the square used for checking. There was no detectable error, so I was pleased with the result of my work.
Step 8: Finishing Step
The upper part of the cylinder had been subject to some prior grinding and was beyond use as part of a square, so as a final step I used a thin abrasive cutoff wheel to remove the top section as shown above.
Step 9: Conclusion
I took an old tailstock spindle and by careful lapping reused it as a cylindrical square for inspection purposes. As part of the process I also reused a bearing housing as a lap to correct errors in the original spindle. The spindle trued up as well as I hoped and will be a useful addition to my measuring arsenal.
If you found this of interest you may find my Youtube playlist of workshop videos of interest also. Here is the link
https://www.youtube.com/playlist?list=PLyn2snGjYlHwAxRqLijO1hdmUIYO28Def

Participated in the
Reuse Contest


