

Introduction: DIY 100W LED Panel for Photography and Video


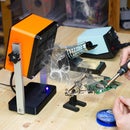

Hi, I'm Giovanni and I do all kinds of electronics projects, such as a robot to make camera moves in videos or a system to open the gate with my cell phone. Today we are building a huge LED panel with almost 100 W. In fact, until now to light the bench where I record my electronics videos I had used a cheap spotlight found at the hardware store. The problem with this light was that it was very harsh and made very sharp shadows, which are often annoying in video. With the new LED panel, on the other hand, I have perfectly even lighting, pure white and very diffuse. Such a light is really good both for those who make videos, and for those who want to have a good light on their desk or their workbench. Definitely the design is a bit strange, but I quite like. But now, let's get started!
To see more details about this project, watch the video on my YouTube channel (it has English subtitles).
Supplies

To make this project I used:
- 5 m, 12 V, 5500 K LED strip with a CRI of above 90
- 12 V 150 W power supply
- 4 "U" shaped 20x10 mm 2 m aluminium profiles
- 16 M4 x 35 mm bolts and nuts
- 9 M6 bolts and nuts
- 4 LED PWM dimmer boards
- 4 2-pin aviation plugs
- 0,5 mm2 wire
- 2x 0,75 mm2 cable
- 3-pin mains power connector with power cable
- 2 M3 screws with nuts
- Steel rope to hang the LED panel
- Heat shrink tube
Tools:
- 3D printer with PLA filament of the color you like
- Soldering iron
- Heat gun
- Hot glue
- Basic hand tools like screwdrivers, wrenches...
Step 1: LED Strips


To make this LED panel I will use a 5 m LED strip. There are really so many kinds of LED strips, from the cheaper ones to the higher quality ones. This particular one is a natural white color 5630 LED strip. The most important thing is that it has a color rendering index, or CRI, of 90. This means that the LEDs emit light of a color very close to white. With the color rendering index you could go even higher, with 95 or 97, but the price would go up.
The LED strip runs on 12 V, so we need a power supply. In this case, I found a 12 V, 150 W power supply. Maybe the power supply is a bit too powerful, but it is always a good idea to not overload a power supply. Since the power supply is connected with the mains voltage, I suggest you buy good quality one that has all the safety features. I connected a cord with a plug to the 230 V terminals on the power supply, and protected the connection with electrical tape. To the output of the power supply I connected the negative and positive of the LED strip. I plugged it in, and the LEDs lit up. After a few minutes I realized a problem: LEDs of this type are very bright, and as a result they get very hot. So I immediately turned them off, but for when we mount them I have to remember that they have to be put on a surface that can dissipate heat, like aluminium.
Step 2: Aluminium Structure


At this point I had to think about the structure of the LED panel. To figure out the how to arrange the LED strip, I taped it to a piece of cardboard. I hung the cardboard from the ceiling and already the LEDs make a really nice light. Of course this is not a permanent solution, as the LEDs produce a lot of heat that has to be dissipated.
From this test I derived the structure of the lamp, which will be made from 4 pieces of 125 cm LED strip (the LED strip is 5 m) mounted on aluminum profiles. So far it all looked simple, so I went to the hardware store and bought 4 2 m aluminum profiles in a double "U" shape (or "E" shape depending on how we look at them). I cut the aluminum profiles to 129 cm, to have some extra space for the connections at both the ends of the LED strips. From the 4 aluminum profiles we have 4 0,7 m pieces remaining, but don't worry, they will be used later in the project.
Then I cut the LED strip into 4 pieces of 125 cm, being careful to cut along the marked lines.
Step 3: PWM Dimmers


To connect the LED strip pieces, I cut pieces of 0.5 mm2 cable. I soldered the wires to the positive and negative contacts of the 4 pieces of LED strip.
Each of the 4 LED strips will have the ability to adjust the brightness independently of the others, and I will use these small PWM controllers to do so. Each board has two terminals for input, to which the power supply is to be connected, and two terminals for output, to which the LEDs are to be connected. With the potentiometer I can adjust the brightness of the LEDs or turn them off completely.
Being able to dim the light of the LED strips is especially useful since these LEDs are very bright. The dimmers that I have used have a very high frequency, so there is no problem with flickering in videos. These dimmer are really cheap, so building them from scratch is not wort it.
Step 4: Gluing the LED Strips


At this point we can put the LED strips on the aluminum profiles. I started 2 cm from the end of the aluminum profile and glued the LEDs with their double-sided adhesive. To keep the LEDs centered on the aluminum profile, I designed a small 3D-printable tool that slides over the aluminium profile while keeping the LED strip centered. This tool made the job much easier, and allowed me to glue all the LEDs perfectly in just a few minutes without having to take any measurement.
Led strip tool
Attachments

Step 5: 3D-printed Joints


Meanwhile, I 3D printed these three parts, which are used both to mount the LED dimmer and to join the 4 LED strips together. These parts are inserted into the ends of the aluminum profile, and before gluing the LEDs I had drilled a hole to secure them.
The part on which the dimmer will be mounted has a space to run the LED wires to the back of it, to keep them completely hidden. I attached this piece to the aluminum profile with an M4 screw and a nut on the other side, thanks to the hexagonal hole in the 3D-printed part. For the other end I made a similar piece, which has a hexagonal space inside to inserted an M6 screw. This screw will be used to hang the lamp, but more about that later. I also inserted this piece onto the aluminum profile and secured it with an M4 screw. Once this piece is on the aluminium profile, the central part of the profile will prevent the M6 screw from falling from its space.
Studio lights ends


Step 6: Electrical Connections


Each lamp will have a two-pin connector to connect the power supply. I mounted the connector in the hole of a little box, also 3D printed. This box has a hexagonal hole on it, into which I put another M6 screw, which will later be used to hang the lamp. I secured the bolt with some hot glue.
I put the dimmer in place by popping the potentiometer out of the hole and screwing it with its nut.
Then I wired the connector to the input of the dimmer, being careful of + and -. Instead of using the screw terminals, I soldered the wires directly under the board, because these small terminals are often low quality and do not hold well. To the output of the PWM controller I connected positive and negative of the LED strip. As you have seen the electronics are quite simple, as we used an already made dimmer board.
Now that I had finished the connections, I put the box with the board inside on the piece I had put on the end of the aluminum profile, and closed it with two M4 screws and nuts

Step 7: Ceiling Mount


After a few days of work I finished the other three lamps as well, so we can think about how to mount the 4 LED strips to the ceiling. Having used 2 m aluminum profiles, I was left with 70 cm pieces. My idea is to use these pieces to join the 4 LED strips together using those screws we put in earlier. First I cut 2 of these pieces of aluminum profile at 55 cm. Then I drilled 6 mm holes every 5 cm on the aluminum profiles. As I drilled the holes in the center, I immediately noticed that the center piece of the aluminum profile was bending. So I cut two pieces of plywood to put into the aluminum profile, with which the holes came out really well, although drilling 22 holes is still quite boring. To make the holes more precise I used a drill press, but if you don't have it you can also use a normal cordless drill.
I inserted the screws for the 4 lamps into the holes in the aluminum profile. To tighten the screws I 3D printed some beautiful knobs (that make everything look more professional) into which I inserted a nut. Having drilled so many holes I can choose how to put the 4 LED strips to get the best lighting possible.
Studio lights knob
Attachments

Step 8: Power Supply


At this point, however, we need to connect the LEDs to the power supply. So I cut 4 pieces of two-pin cable, to which I soldered 2-pin connectors to connect to the lamps.
To connect the power supply to the mains power I used a three-pin connector like the ones that are used on computers.
As always when we make 230 V connections we have to be very careful because it can be very dangerous.
To protect the power supply terminals I 3D printed something similar to a box, with a bracket to mount the power supply on the aluminum profiles.
I mounted the 230 V connector and connected phase, neutral and ground to the power supply.
Then I connected the 4 wires that will go to the LEDs to the positive and negative output terminals of the power supply.
I put the 3D printed piece on the power supply and secured it with two M3 screws, taking advantage of the threaded holes that were in the structure of the power supply.
I also mounted the power supply on the aluminum profiles with another M6 screw, and secured it with a 3D printed knob.
Power supply protection


Step 9: Mounting the LED Panel


I plugged in the power supply and turned on the 4 lamps. Everything worked, so we can mount the whole structure above the workbench. This room has a oblique wooden ceiling, so I hung the lamp with steel cables run through holes I had drilled earlier in the aluminum profiles. Here the power for the lamp is connected directly to a smart relay that is part of the workbench's electrical system. Thanks to the smart relay I can control this light with my smart home.
The light is really perfect for this space, and in the picture you see the difference between the spotlight that was there before and the lamp we just built, which has a much more pure and soft light.
And so I hope you enjoyed this guide and you found it useful. To see more details about this project, watch the video on my YouTube channel (it has English subtitles). Bye!


