Introduction: DIY 3D Rubber Catan Molds
You will need to prepare the various items:
- your original item(s) that you want to prepare molds for
- mold release spray
- hot glue gun w/sticks
- poly-urethane compound Part A and B
- I used Smooth-On ReoFlex 30 (hardness of 30)
- Utility knife(s)
- Mixing container & mixer utensil (not wood) plastic or metal
- digital scale (optimal but not required)
- Modelling Clay
- **A fair bit of time on your hands**
- some sort of holding frame for your items (and a smooth surface to hold onto of)
- minimum 3/8" in all directions, I was working with a 1" spacing because I wanted more durable
Step 1: Decide and Make Your Piece(s)
I decided to make a 3-D version of Settlers of Catan; so I guess I did not really settle on just one piece
- (1 Desert Hex, 1 Wood/Forest Hex, 1 Clay/Brick Hex, 1 Mountain/Mineral Hex, Pasture/Sheep Hex, Fields/Wheat Hex, 8 cities, 10 Settlements, and 16 Roads, and of course a Robber who is stealing the sheep).
- I got blocks of various colours of Femo, Poly Clay, etc. I used mostly colours that were relatively representative of the hexes just for visual appeal. I started with a blank hex from the game set and wrapped it tightly with plastic wrap, then set out warming up a small chunk of the clay in my hands and kneading more and more until I got roughly the correct amount. This makes it a bit easier on the hands as it it quite a tough material (not soft like playdough)
This part is slow and tedious but it pays off; the more accurate your original is before you bake them @ 225'F for 15 minutes per centimetre of thickness the less sanding you have to do.
***The more perfect your original is the less work you will have in the long run once you cast them with plaster, etc.*** (trust me I still spent about 45 minutes on average to shape each hexe and about an hour each of sanding using 80 grit, 240 grit and 600 grit sand paper)
Step 2: Set Up, Carefully!
- Find your smooth flat surface; I used a mirror.
- I also used extra bath towel bars for the frames, and pvc tubing for the hexes. Once I had it all marked out on paper how to lay it out.
- I set it up on the mirror and used a few dots from the hot glue gun to hold it in place (not too much as you want to remove them later)... (the rubber is not cheap so you kinda want to get it right the first time).
- Using tiny bits of modelling clay under your item(s) press them firmly to the mirror and clean up any excess with your knife.
- Take your modelling clay and make little snakes out of it and press it in nicely at any seams as the rubber will leak out.
- Don't be cheap with the modelling clay on the outside of the frame and any places the rubber will leak on the outside.
- Give your items a light consistent spray of the Release spray, too much isn't better (it will actually create funny bubbles in the rubber where it meets your original)
- then about 25-20 minutes later give one extra spray but make sure your last spray is about 15-20 minutes prior to pouring the rubber.
Step 3: Prep the Rubber (stir First)
In my opinion part A looks and stirs like Clear Corn Syrup and Part B is like milky coffee.
- This is the fairly simple part
- Using your digital scale if using measure out equal parts A and B by weight (or volume if possible)
- the scale works best as you have about a 10% leeway of error before it starts messing with the consistency, durability, and shelf-life of your molds
- You mix the 2 parts in a different container (make sure to recover both pails immediately as they are sensitive to humidity in the air.
- Make sure you stir for at least a couple of minutes then another at least. you want the rubber to set properly.
- you do have about 30 minutes pot-time so a few minutes of stirring is in your favour.
- s
Step 4: Pouring the Rubber
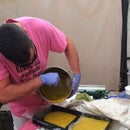
- Slowly pour the liquid in a stream... not on the item but beside it and let the rubber flow on its own as it will cause less weird bubbles and liquids just know how to do their thing.
- Slow and careful.
- If you have something that you can put your items on with slight vibration it may help work any bubbles to the surface. I did not have this problem but it can help.
- After about an hour(ish) it will be firm enough to touch but be patient and let it sit for the 16 recommended hours. (21' Celsius is the optimal temperature to mix, pour, and cure)
- If you want to do a 2-part mold let it set fully and put a new coat of spray (even though you shouldn't need to; I didn't want to risk it) the new liquid rubber will not stick to the cured rubber
Step 5: Reveal Time (16 Hours+ Later)
- Remove the modelling clay from around your molds
- Carefully using your utility knife cut the hot glue dots away.
- Gently bend the new mold and work your way around your item until you are able to pop it out
- At this point you can carefully trim any excess edges of rubber.
Step 6: Problems???
- Unfortunately I did not mix all of the items with a scale at first and had to remake a couple of the rectangular molds again; as I measured by visual amounts in styro cups.
- There was a couple of them that did damage to cure rather than the 16 hours where they should have been very firm they were quite soft for the next 15-20 hours extra.
- 2 of the rectangular ones... not so much... they had to be remade they stayed as a firm jello/jelly-like state.... maybe they will make it over the next several days (doubtful though)
- the positive note - I had just enough extra to make new ones.
- There is a limited shelf life of only a couple months if that once you open the pails. You can extend it some by adding de-oxegenating gas to it also sold by the suppliers; better yet measure carefully and buy only what you need as it is rather expensive in the short term.


