Introduction: DIY MPU-6050 USB Joystick

With Microsoft Flight Simulator 2020, I quickly realized how difficult it is to use keyboard to fly a plan. Searching online, I could not find a reasonable priced joystick to purchase. Most online retailers had them out of stock. The popularity of MS Flight Simulator and COVID 19 pandemic wiped out all the existing joystick stocks. My only option was to build one myself.
Most of the joysticks out there use potentiometers at the base to determine the angles of the joystick and send x and y axis information back to computer. This works well but does complicate the construction of the joystick. and over time. the potentiometers might wear out. Instead of using potentiometers, I decided to go with accelerometer/gyroscope sensor board to send information to computer on the angles of the stick.
With popularity of various Arduino microprocessors and various sensors, the cost of building an Arduino project becomes much more affordable. One of the commonly used accelerometer/gyroscope sensor board is MPU-6050. In Canada, it costs around $7CAN in Amazon. I got mine from eBay shipped from China for a lot less, but the shipping time was like 3 months or longer.
https://www.amazon.ca/Neuftech-MPU-6050-3-Gyroscop...
Any Arduino board would work, but using ATmega32u4 based board will be much simpler, because ATmega32u4 has native HID (Human Interface Device) support. Once the board is programmed, you can use it on any Windows 10 PC and no additional software required. Windows 10 will automatically recognize it as a joystick when the USB is plugged in. (Use of other type Arduino board is too complicated for this simple build project).
I choose Arduino Leonardo board. $17CAN from Amazon.
https://www.amazon.ca/KEYESTUDIO-Leonardo-Developm...
These 2 devices are the main requirements for this project. Other smaller items such as wirings and push buttons are necessary as well. In this project, I only used 2 push buttons for simplicity.
The joystick handle is made from a scrap PVC water pipe. This can be easily substituted with any short rigid pipe.
The base of the joystick is a spring door stop fixed on a piece of wood.
The spring door stop is available from Home Depot for $2.83CAN.
Step 1: Connecting MPU6050 and Push Buttons to Arduino Leonardo Board


Only 4 connections are used on MPU 6050. They are labelled VCC, GND, SCL and SDA.
Connect VCC to 5v or 3.3v on Arduino Leonardo. (MPU 6050 can use either 5v or 3.3v. Doesn't matter)
Connect GND to any GND on Arduino Leonardo.
Connect SCL to SCL on Arduino Leonardo.
Connect SDA to SDA on Arduino Leonardo.
I only use 2 push buttons for this demonstration purpose.
The first push button is used to reset the joystick center.
In this example, one end of the push button is connected to GND and one end to PIN 13.
The second push button is used as a joystick button. In this example, it is connected to PIN 9 and GND.
You can add additional buttons as needed in your project.
Step 2: Building the Joystick Base
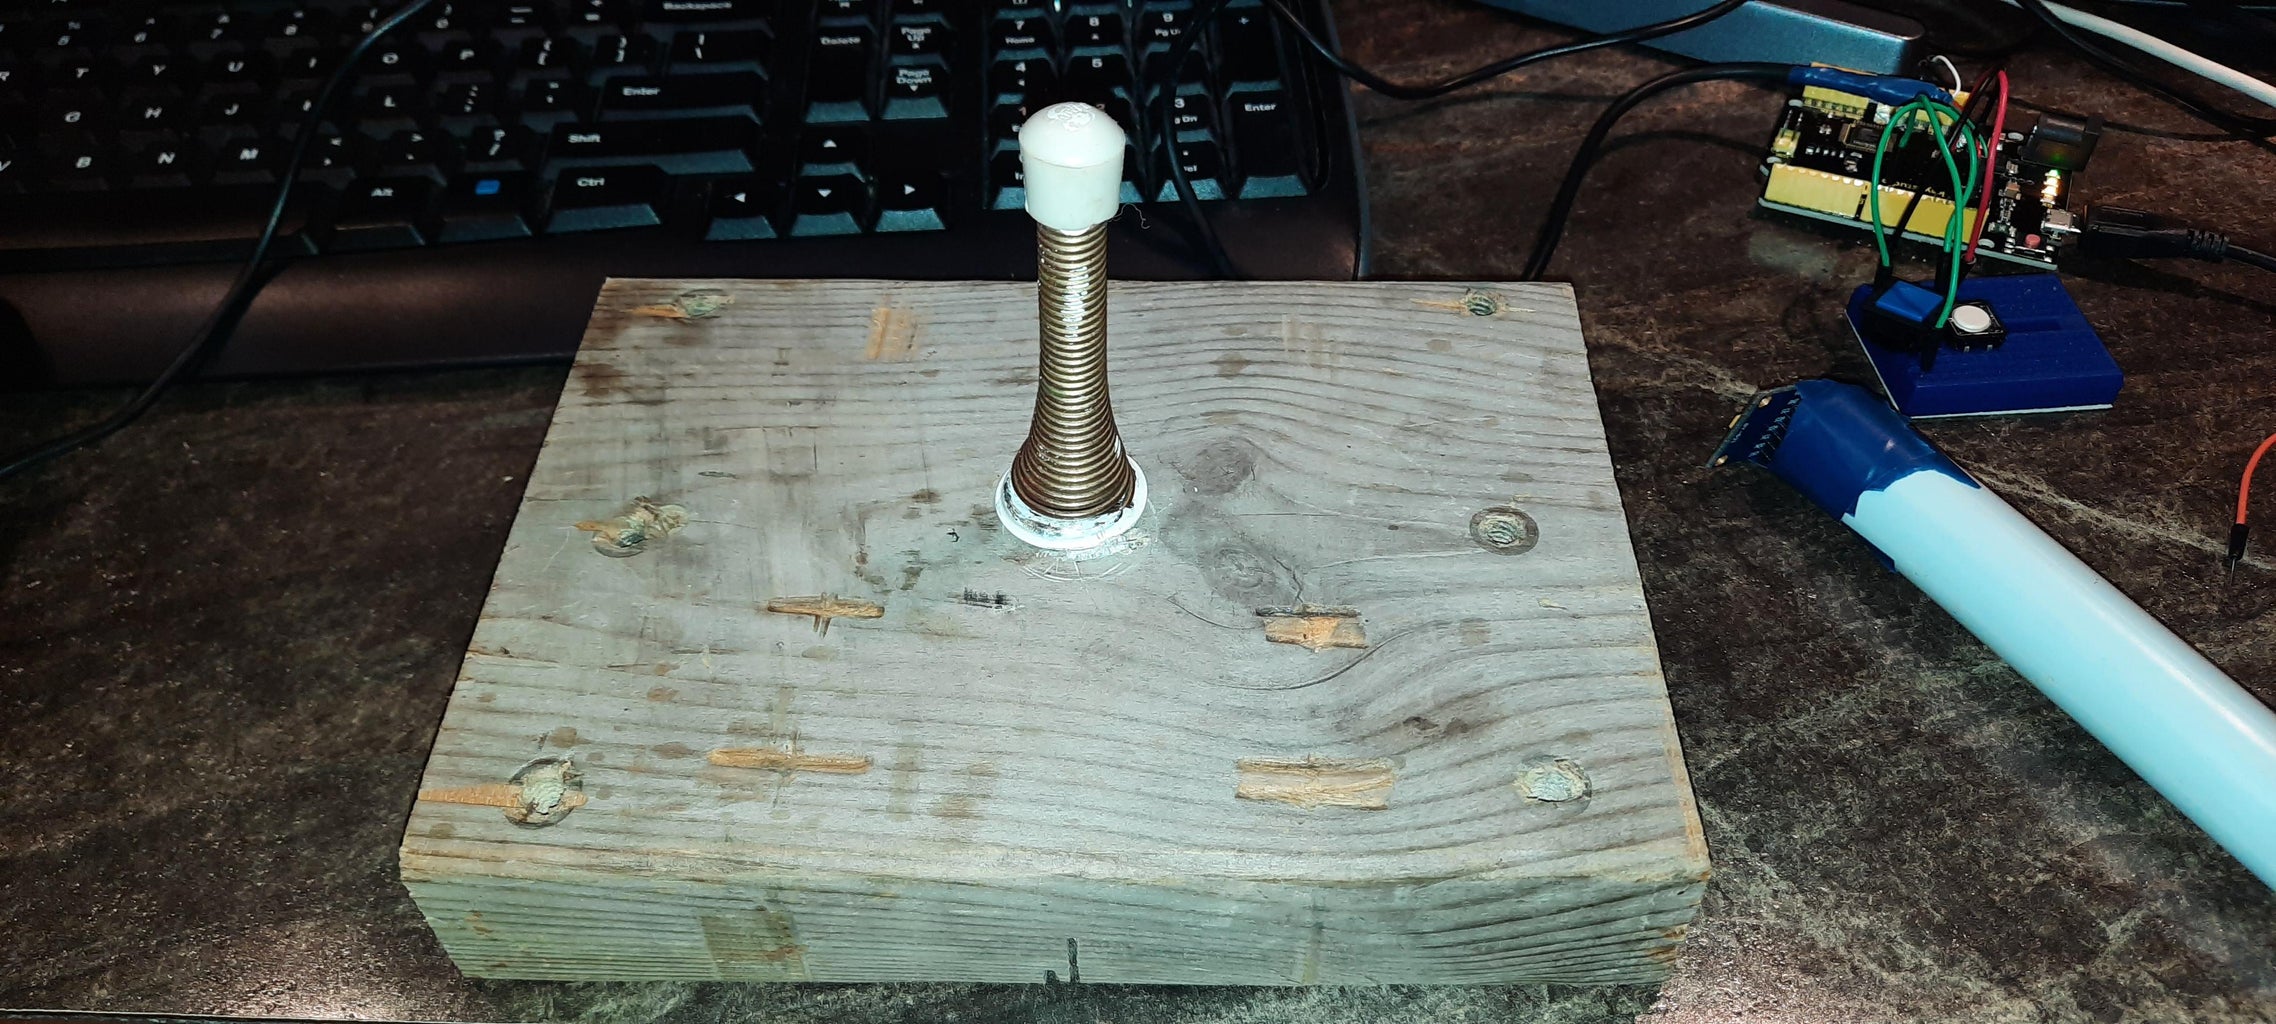


Find a piece of wood block. The heavier the better. It will make the joystick base more stable.
Screw the spring door stopper on the center of the wood block as show in the picture.
Use a piece of short pipe as the joystick handle. I used a scrape PVC pipe. Tread the wire so the accelerometer/gyroscope sensor is sitting on top of the pipe.
Then put the pipe over the spring door stopper. I used electrical tape to tape the sensor on the top.
Step 3: Setup Arduino IDE
Download and install Arduino IDE.
https://www.arduino.cc/en/Main/Software
I used Arduino 1.8.13 for this project. Arduino Web Editor can be used for this project as well.
2 libraries are used.
1. MPU6050_tockn by tockn
https://github.com/Tockn/MPU6050_tockn
or you can find it in "Manage Library" menu.
2. Joystick library by Matthew Heironimus
https://github.com/MHeironimus/ArduinoJoystickLibr...
This one is currently available only from GitHub website.
Click on download Code and Download ZIP. Extract the ZIP file to your Arduino libraries directory.
In my case, it's E:\PinChung\Documents\Arduino\libraries
Step 4: Arduino Program
Load Pin_Joystick.ino onto Arduino IDE and compile and upload to the Leonardo board.
Make sure Arduino Leonardo board is selected and port number is selected to the right COM: under the Tools menu.
I noticed some time, the program could not be uploaded with error code of COM port not available. Pushing the reset button on the Leonardo board a couple times while compiling might help. Also restarting Windows 10 might also help freeing up the COM port.
Once the program is uploaded to the Leonardo board, Windows 10 should automatically detect the Leonardo Joystick. In Windows 10 search bar, type Game Controllers, run Set up USB Game Controllers.
select Leonardo Joystick and click Properties. The joystick movement and the joystick #1 button should be picked up by Windows 10.
If the joystick is not centered, when you let go of it, click on the reset joystick center button we just made. The USB Game Controllers should show the joystick dot in the center. There's is no need to calibrate the joystick in the USB Game Controller program..
Side Note: For those not familiar with Arduino Leonardo, when the device is configured as a joystick, mouse or keyboard, the serial port will not be working. So "Serial.print()" will not work. Also, MPU6050 uses i2c wire library and use SDA and SLC pins. On Leonardo, SDA and SCL take up both PIN 2 and PIN 3, so don't use these 2 pins for anything else.
Attachments

Step 5: Testing Out the Joystick
I tested it out on the Microsoft Flight Simulator 2020 and it works very well. I do have to press the center key sometimes to zero the joystick. MPU6050 sensor value might drift a bit over time.
There are lots of opportunities to expend on the project, such as adding more buttons and adding throttle controls. Hopefully this will inspire other tinkers to explore new ways of making things.


