Introduction: DIY Smart Home Doorbell 2.0 (works With Alexa)
We love smart doorbells! We had a lot of fun making the smart doorbell project last February (link) and it seems the community loved it too (15k views wow!). Today we bring our famous doorbell to the next level, combining the features of the knock doorbell project from 2 years ago (we told you, we REALLY love smart doorbells!) with other cool features that you can mix with your Prota smart hub.
FEATURES
- Knocking-triggered doorbell via a sound sensor
- Old webcam used to take a picture of the guest
- A recorded message ask the guest to wait
- Host is warned by a Telegram message of the arrival of a guest with the snapshot
- Host can reply with pre-recorded messages
- Host can open remotely the door by pressing a button
- All user actions can be voice-triggered with Amazon Alexa, Siri or Google Voice
FOR WHOM
- Disabled persons with limited motricity
- Tech enthusiasts who want to discover more about smart home and automation by doing themselves
- Experienced makers who want to discover an adaptable and easy-to-use solution to avoid hours of coding (all can be set up in 1 hour!)
- DIY project aficionados who can discover a different and exciting side of DIY
All can be done in 1 hour, with not a single tech skills (we explain everything!) and for only $50! We make our best to create projects that are simple to read and understand and easy to replicate, while being adaptable to what you have at home or what are your favorite options.
Enjoy!
Step 1: REQUIRED COMPONENTS
- Raspberry Pi 2 or 3 // ~$25-$35
- 16Gb SD card // ~$9
- 1 paper cup 1 sound sensor // ~$2
- 3 jumper wires Any speaker with AUX cable
- An old webcam An old USB plug
- 1 MicroBot Push // ~$49 ( link)
- Optional: Amazon Alexa and/or a smartphone with Siri or Google Assistant
Step 2: SET UP YOUR PROTA HUB
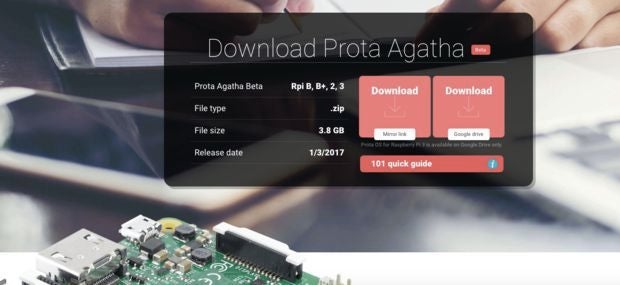
You first need to build the smart hub that will control the automation of your ring bell and connect all devices together. Prota OS for Raspberry Pi is our free smart hub OS which is very easy to install. In no time you will turn your Raspberry Pi into a smart home automation hub!

You can download Prota OS here . Then burn it on the SD card.
We made an easy guide you can follow to set up your Prota Pi.
Alternatively, you can check this Instructables .
Step 3: INSTALL YOUR SOUND SENSOR

If isolated in a paper cup, your sound sensor will be able to detect a knocking without reacting to other surrounding sound in the house. Installing your sound sensor can be done in only few minutes.
Wiring your sensor
Plug jumper wires to the DOUT (digital output), GND (ground) and VCC (voltage).
Plug them to your Raspberry Pi pins as below.


Connecting your sensor
On Prota Space
- Go to App Libraries and download GPIO app
- Open GPIO app
- Click on GPIO 18 and set it to Interrupt // Pull up
- Click on “Set”

Now your Sensor will react to each close-by sound by displaying “Rising interrupt” and “Falling interrupt” on your GPIO interface (as below).

Installing the sensor
Put a sheet with some indication on your door.Tape the sensor behind the door/wall, where the knocking area is located and tape the paper cup on it.

Step 4: INSTALL AND CONNECT THE WEBCAM
- Plug-in the camera’s USB cable to your Raspberry Pi
- Download the Webcam app on your Prota Pi (in App Libraries)
- Open the app to check that the camera is now working (it should start to automatically take screenshots in case of any motion)

You will now need to install the webcam above you door, facing the guests so you can have a clear snapshot of them. The snapshot will be automatically taken when the knocking is detected.
Step 5: SET UP YOUR PRE-RECORDED MESSAGE
The pre-recorded messages will allow you to remotely communicate to your guests.
One pre-recorded message will be played directly after knocking to let the guest know the host is warned. The following ones will depend on various scenario, whether the host is here or not.
Download or record messages
You can easily record messages in mp3 format with your smartphone. Another option, to give your records a more robotic touch, is to use the many voice generator websites that exist.
We chose to use Amazon’s Polly text-to-speech service with a British accent. If you want to use those, you can find the files below.
You can now upload the audio files to your USB stick and plug the stick to any USB plug of your Raspberry Pi.
Connect the speakers
Connect any speaker you have to your Raspberry Pi via a jack cable.

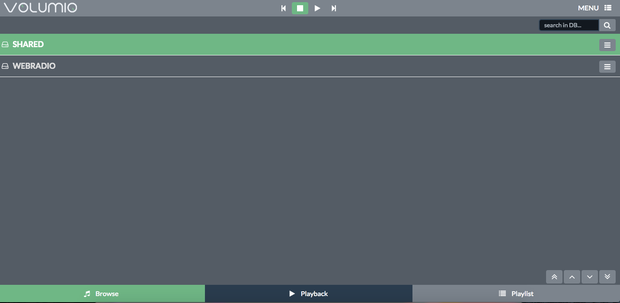
Set up Volumio
The volumio app allows you to play music based on an automation workflow or to start it remotely.
- Go to App Libraries and download Volumio app
- Open Volumio
- Click on the bottom left button “Browse”
- There you will be able to select the songs and radio stations you want to play and/or add to a playlist

The shared folder contains the audio files added on your USB stick.

Create a playlist with your pre-recorded messages. Name them in order 1-2-3-4 etc. so that you can trigger precisely which song to play.
Step 6: SET UP YOUR DOOR OPENER AND TELEGRAM CHAT BOT
Opening your door remotely will depend on the system you have at home. If you have a door lock button, MicroBot Push allows you to remotely open your door when someone is visiting.
Pair and install your MicroBot Push
- Turn on your MicroBot Push
- Go to Prota Space and click on the “Pair now” button from the yellow bar appearing on the homescreen
- Follow the instructions to pair your MicroBot Push
- Install double-sided tape on the bottom and fix your MicroBot Push next to your door lock button
Your MicroBot can be triggered via the Prota Space app or the MicroBot Push app, but you can also connect it to IFTTT to make it triggerable by Amazon Alexa, Siri, Google Voice or through a Telegram Bot.\
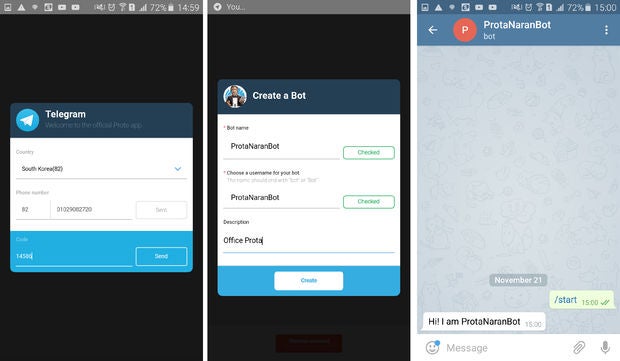
Let set up a Telegram Bot, a virtual assistant that will alert you of an incoming guest, send you their picture and allow you to play your pre-recorded messages and remotely open the door.
- Download Telegram app on your smartphone and create an account
- Download Telegram app on your Prota Pi (in App Libraries)
- Open the Telegram app on Prota and click on “Request Authorization”
- Set a name and username for your bot, then click on "Create"

Your bot is set up.
Step 7: AUTOMATE!
The key part of smart home is to create automation workflows that will connect your devices together according to pre-programmed scenario.
Let’s do that by using two great tools, Stories app (in Prota OS) and IFTTT (If This Then That).
Connect to IFTTT
First, let’s connect your Prota with the IFTTT service.
- In App Libraries, download the IFTTT app. This app has no interface and only handles the link.
- Go to IFTTT (the app or website) and search for “Prota”. Click on connect and select your Prota Pi.
- Search for “MicroBot Push”, click on connect and select your Prota Pi.
Write Storylines
Stories app is the automation tool of your Prota Pi hub that generates workflows in natural language, to make it more accessible to any user.
In Stories app, write the following automation storylines:
- When GPIO18 detects a rising fall [sound detected], Webcam takes a snapshot
Then Volumio Play the volumio
Then Telegram Bot sends message “A guest is at the door” to user
Then Telegram Bot sends the snapshot to user
- When IFTTT applet run, Volumio play next song in the playlist
[this storyline, linked with Amazon Alexa, will play the “Host away” pre-recorded message]
- When IFTTT applet run, MicroBot Push press the button
Then Volumio Play next song in the playlist and Volumio Play next song in the playlist
[this storyline, linked with Amazon Alexa, will play the “Door open” pre-recorded message]
- When IFTTT applet run, Volumio Play next song in the playlist and Volumio Play next song in the playlist and Volumio Play next song in the playlist
[this storyline, linked with Amazon Alexa, will play the “Delivery” pre-recorded message]
- When user send “I’m away” to Telegram bot


Create the following applets


Additional storylines for the chatbot
In case you’d rather use a Telegram Bot (or for when you’re away from your Amazon Echo), use the same storylines as above but replacing “When the IFTTT applet runs” by “When user sends a message to Telegram Bot”, as follow:


You can also replace Amazon Alexa by Google Assistant if you have a compatible smartphone. It’s also possible to use Siri, though a bit more complicated.

Step 8: INSTALL AND USE!
It’s time to test your new smart doorbell and try it in condition!
Prota OS and IFTTT are two very flexible platforms that will allow you to integrate many other smart devices you might have at home. Don’t hesitate to adapt this project to your house’s current setting and to share the result with us!
We hope you enjoyed reading this Instructables and learning more about how to easily turn your house into a smart home with simple and inexpensive tricks.
If you liked it, please support us by “favoriting” it and following us on both Instructables and Twitter.
If you have any question, please use our forum !
BETA PROGRAM
You like Prota OS and want to test our newest apps before their release?
Subscribe your email address here to enroll or get further information on our Beta program.
You like our projects? Make your own!
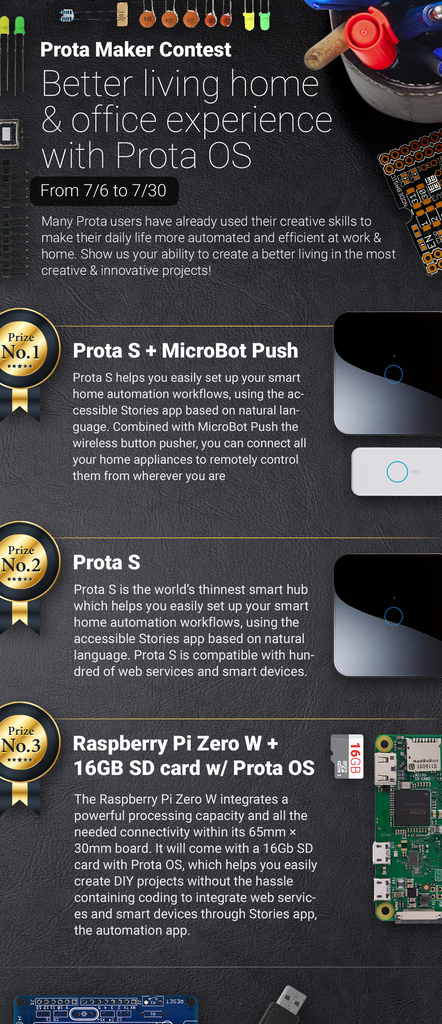
We are currently (and until July 30) running a maker contest. Show us the creative projects you can do with Prota OS and win awesome prizes!
More info here - https://support.prota.info/hc/en-us/community/top...


