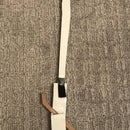
Introduction: Easy Cardboard Darksaber From the Mandalorian
I made a darksaber from Mandalorian out of cardboard. This is a easy 6 steps to make a darksaber from the Mandalorian. There will be a velcro. I will explain later about the velcro. This is easy because I took about one or two hours to build but about a hour to draw it out. You got to be careful to where you put it because it could place it in a wrong spot. I recommend to build it first before you put it together. Hope you enjoy this step.
Make the FORCE be with you
Supplies
Cardboard
Black and gray paint/color pen/pencils
Scissor
Glue (Something to hold the parts/materials together)
Velcro
Step 1: Handle 1,5
This is the first step of making the handle. You must make 2 of this handle. You will be placed the first handle on top and on bottom. That's why it's called "Handle 1,5". Still don't get it? It's like a order. Handle 1 and Handle 5. I made it 15cm high and 4cm wide.
Step 2: Handle 2 - 4
This next step is where you finish your first part of the handle. You need to make 3 of this. I made it 15cm long height, 11cm short height, 6cm to cross and 4cm wide. In the correct order, you must grab the first step then place this steps. This is the order. Handle 1 (first step), handle 2, 3, 4 (this step), handle 5 (first step). Hope you understand.
Step 3: Handle Pt. 2
This is the little handle for the darksaber. This is after the first and second step. You need to make 3 of this. Later group them together. I made it 17cm long height, 14 1/2cm short height, 2cm to connect on the bottom, 3cm to create the little square on top, the other side, 2 1/2 cm. Lastly, to connect the little box was 1cm. It's more easier in the picture probably.
Step 4: Handle Pt. 3
This is the part to connect the handle to the blade. You need 3 of this. I made it 10cm long height, 7cm short height. 5cm on top to connect. On the bottom, I made 1cm for the first and 1 1/2cm for the second. Remember the velcro? You need 2cm by 2cm of velcro then put it where you cut it. Glue the velcro 4cm away. Then cut the extra piece if you want. If not possible to glue the velcro, then you can tape it. If you don't get it, look at the picture. Sorry if it's doesn't look like I write it. I forgot to write it before I took a picture.
Step 5: Sword
This is the last step for the materials. You got to make 3 in order to work. I made the long height 40cm, 25cm on short height 1 and 16 1/2cm on the other short height. Remember the velcro? You need 5 1/2cm by 2cm velcro. Put at the beginning of the sword. About 4 1/2cm then glue the velcro. You can look at the picture to understand more. If you can't glue the velcro, yo ucan tape it.Sorry if some of my stuff is covering it but I will show you the picture to print. You guys can also make it too.
Step 6: Connect
This is what it should look like when you glued together. All the parts except Handle 1 - 5. You must follow the order I said earlier.
Step 7: Final Look
This is my final look about the cardboard darksaber. You can change yours if you wish. You can color, or something. If you want the parts for the pieces, go to the next step. All of the steps and the material is created by myself. I don't know if you can fight or swing the darksaber. I haven't test it yet.
Hope you enjoy this time with me and how to make a cardboard darksaber in the Mandalorian.
Step 8: Parts
Here is some parts you can download then print it. Hope you enjoy these steps. I know I will. When you pull out the velcro, you need to be careful because the velcro could fall out easily. This should take about an hour to cut all the pieces. Then about an hour or an hour to 30 minutes to put together. So about 2 or 3 hours to make this cardboard darksaber.
Hope you enjoy these steps.
Thanks for looking at my design
Bye now now (*^▽^*)┛


