Introduction: Easy Leather U-Lock Holster


Step 1: Things You'll Need

It's not a lot of stuff, just
- some rather thick leather
- 8 rivets / grommets
- something to measure
- a leather hole punch
- an eyelet plier
- a pen
- scissors or something similar to cut leather
Step 2: Measure Twice, Cut Once


Basically you need three pieces: two that fit around your belt and one that holds the lock.
For the two pieces that go around you belt, measure the width of your belt, multiply by 2 and add about 2cm. My belt is 3.5 cm wide, so the small pieces are 9cm long and 3cm wide. The width is up to you, but I figured it would look nice with these dimensions.
For the large piece, you have to measure the width of your lock. It's important that you measure at this part of the lock, since the only think holding it back will be the slightly larger part on top. My lock is 14.5cm wide, the bars of the lock are 1.5cm each and the loops for my belt are 3cm each. So the long piece of leather has to be at least 23.5cm long. But since the lock won't be laying flat but rather on a curved surface (your butt ;) ) I added another 1.5cm, wich turned out pretty well. Personally, I would make it longer than needed, since you will check the length again in Step 5 and it's easier to shorten than to lengthen it.
The width of the long piece is again up to you. I wanted it to be about as wide as my belt, so I made it 3cm wide.
When you figured out your measurements, look at your piece of leather and find the best spot to cut your pieces out of it. I used an old scissor for that and it worked really nice. After cutting your first small piece of leather, fold it (I just pressed the edges really hard) as shown in Picture 4 and slide it on your belt. Does it fit? If it does: well done! If not: too large is no problem, but too short is. ;)
Step 3: Marking and Punching


So after you got your fitting pieces you can start making the holes. I put one folded small piece of leather on the large one and marked where it was laying. Then I just used a normal pen to mark four holes for the grommets / rivets. Make sure that they are not too close to the edge.
Step 4: Marking and Punching II


After you made your holes in the long piece of leather, lay it back on your folded small piece and mark the four holes. Now you know exactly where to punch your small piece of leather so that the grommets / rivets will fit snugly.
Put the first grommet / rivet in and press them with the eyelet plier to secure the first small piece of leather to the large one. Then you can go on with the next three.
Step 5: Finishing It


After you finished the first four grommets / rivets on one side, put the whole thing on your belt and check if the length is alright. If you measured correctly it should either fit or be too long. If it's too long just shorten it.
Now you can repeat the previous steps you made on the other side and you're done.
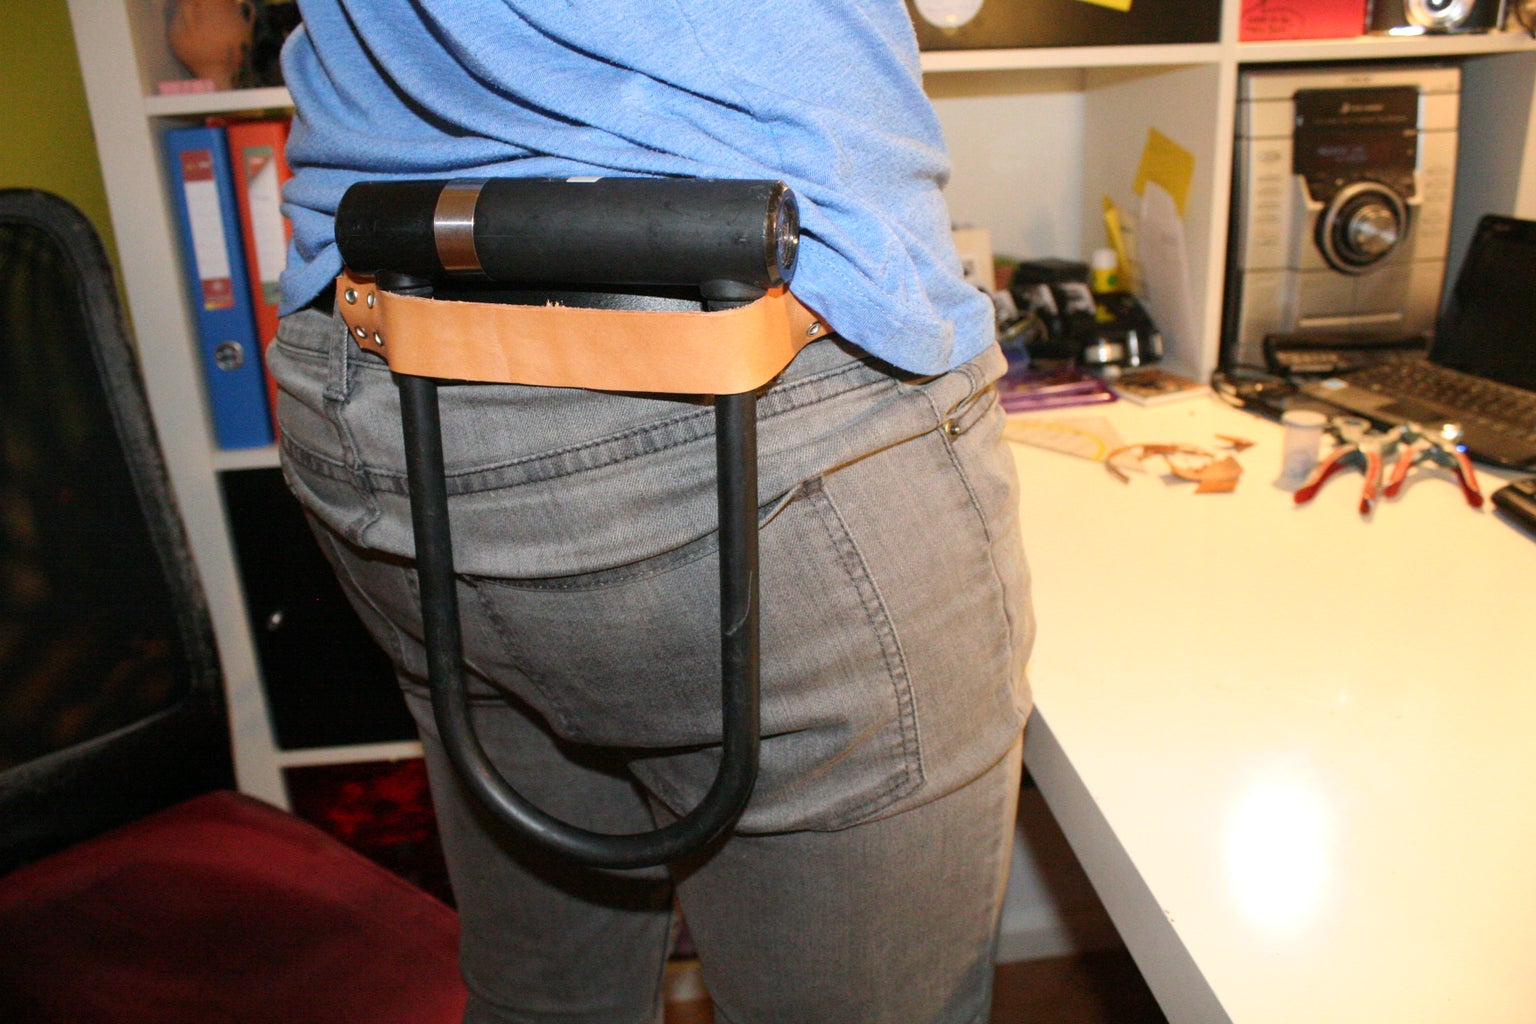
Put it on your belt, enjoy and ride your bike!


