Introduction: Rooster - Protecting and Feeding Your Chickens Automaticly


Who & Why?
Hello there! I'm Lennard Verhaege, student @howest and following MCT. As my final project I'm making a smart chicken coop. The project is called Rooster. I'm making this project to stop the foxes in the neighbourhood from eating my chickens as their breakfast. You could say: "That's easy, just close the chicken hatch at night". But I'm not always home in the evening and can't always be there to open the hatch again in the morning. And why would I do it myself if my Raspberry Pi can do it? ;)
What is Rooster?
Rooster consists of an automatic chicken hatch and feeding system, the main goal of the system is to keep your chickens save and well fed when you can't always look after them. The system can be controlled by an user interface, where you can chose between a manual and automatic mode. The manual mode let's you chose the open, close and feeding times while the automatic mode controlls the hatch based on daylight. The system also keeps track of the temperature, humidity, CO2 values and lightintensity of the past 24h.
Supplies

What will you need to recreate your own smart chicken coop? All the supplies cost me around €200 but you can get it cheaper if you're willing to recycle some parts like the wood and rope. Below you can find a bill of materials, so you can make sure you have everything you need.
Electronics:
- Raspberry Pi
- Raspberry Pi Power Supply
- 2 breadboard Power Supplies (3.3V & 5V)
- 2 stepper motors (ULN2003)
- stepper motors driver boards
- 2 pushbuttons
- 1 powerbutton
- 4 470Ohm restistors
- LCD screen (HD44780 1602 LCD Module)
- 10K Ohm potentiometer
- DHT20 (temp & hum)
- Lightintensity sensor (BH1750)
- TVOC & eCO2 sensor (SGP30)
Materials:
- wood
- woodglue
- a sheet of thin metal
- 2 U-shaped rails
- screws
- some rope
- a counter weight (± 200g)
- silicone
- PVC 80mm pipe
Tools:
- screwdriver
- wood saw
- glue gun
Attachments

Step 1: Settting Things Up

Installing the Pi image:
Keep your Raspberry Pi unplugged during this whole step, until noted otherwise.
- Download the image from this link (it's a big file).
- Unpack the zip-file (prepare enough space, the image is around 8 GB).
- Open win32diskimager.
- Plug in your SD-card.
- Click the file icon en select the image file you just unzipped.
- Choose the device, the name should look like "D:", this can be another letter, but it mostly looks like this.
- When you have selected the right things, you can push the write button. Writing the image can take a few minutes, keep your computer on during the whole process.
- When the writing is done, you click the USB icon on your taskbar, and click on eject (name of SD-card). Then you get a notification, and after that notification you can safely unplug your SD-card.
- When all of this is done, you can plug it in your Raspberry Pi. After that, you can connect your Raspberry Pi to your computer with an Ethernet cable, and you can also plug in the Raspberry Pi power supply.
Connect to the internet:
To use the application, the Pi needs to have internet acces. Here is how you set up wifi on the Raspberry Pi:
- Open VNC viewer.
- Enter the address of your Pi (192.168.168.169).
- The username and password are already made in the image, the username is student, and the password is W8w00rd. You can change this later on.
- When you're logged in, in the top right corner, you can see 2 arrows facing different directions. In the picture you can already see a Wi-Fi logo, that's where the arrows should be. Now click on the 2 arrows, and select your network to log in to your Wi-Fi. After that, your Pi is connected to your Wi-Fi.
- Now you can simply close the VNC viewer tab.
Connecting the database:
Make sure your Raspberry Pi is properly connected to your computer before you start this step.
- Open MySQL Workbench.
- Click on the plus icon to add a new connection.
- Give your connection a useful name.
- Select the method: Standard TCP/IP over SSH.
- Type in the right hostname, with this image it's the same one as in the picture.
- Give your SSH username a name like raspberryPi.
- The next thing you need to do is add a username and password.
- After that, you can click ok, and then your new connection is made.
- Now you can open this connection, but keep in mind, this connection only works when your Raspberry Pi is plugged in and connected to your computer.
Coding from your PC:
Coding directly on the Pi can feel slow and awkward, to install Visual Studio Code op the Pi you need to follow these steps:
- Open Visual Studio Code.
- Click in the bottom left corner on the 2 arrows facing different directions.
- Select connect to host.
- Select Add new host.
- Give in pi@192.168.168.169, and press enter.
- Select the top option, after that the connection has been created.
- Then click again on those arrows, and select the right address.
- Then it'll open, and you have to give up the password.
- When it's done, instead of the arrows you see SSH:192.168.168.169.
I2C on the Raspberry Pi:
In the project I used I2C devices, this is a great way to send and recieve data reliably. It also saves you a lot of wiring because each device only has 2 connections to the PI: serial data & serial clock. To enable I2C you need to follow these steps:
- type sudo raspi-config
- Choose Interface Options and enable I2C.
- Then reboot the Pi.
- sudo reboot
Step 2: Wiring Components


To make everything work together we need wiring, a lot of wiring... Make sure everything is wired exactly like the scheme, that way you wont have any shorts and your electronics wont break.
To make it a bit easier to work with the buttons, you can solder some jumper cabels onto them. That way you can pin them on your breadboard. The same goes with the sensors, you can solder the pins so they can be placed on a breadboard.
Step 3: Storing Data

To store the sensor readings, user data and settings you need a database. This is how I set mine up, I'm using MySQL and an apache 2 server on the Raspberry Pi. To install the database you need the download this file and install it via the MySQL connection on your PC, here's a step by step guide:
- Open MySQL Workbench on your PC
- Connect to your Raspberry Pi
- Go to the adminstration tab and click on Data Import/Restore
- Select Import from Self-Contained File and select the dump file you just downloaded
- Press Start Import
- You now have the database installed on the Pi
The database stores the history of all sensor readings, devices, device types (actuator or sensor), actions (like opening the hatch) and usersettings (for future expansion).
Step 4: Building It - the Hatch


The design: Now that almost everything is set up, you can start making the actual hatch. You will need the wood, glue, screwdriver and a saw. I started of with a 3D drawing in SketchUp to get an idea of how I wanted it to look, I suggest you do the same, that way you dont waste any wood if you make a mistake. You can find my version in the attachments.
Lasercutting: In the attachments you can find my Adobe Illustrator drawing to lasercut the wood. I used 8mm multiplex to get the strenght I need without it being too heavy. After lasercutting, you can paint and glue it together.
Metal: After putting the housing together you need to get the sheet of metal and cut it to 25cm by 30cm, this is the actual hatch.
Wooden plate: Once you've done that you can cut the hole in the wooden plate. Make it 24.5cm by 30cm so you can guide the metal plate between the U-shaped metal profiles. Add some stops at the bottom, that way the metal can't side out of position.
Hatch motor: Now that you have the housing for the hatch you can install the first stepper motor, place it close to the edge. Now the rope won't have to be pulled from a large angle. If your metal is too heavy for the motor you can add a counterweight tho help the motor. As my counterweight I used an old piece of metal and attached it to some rope at the top of the hatch.


Step 5: Building It - the Feeding System


The second part of the build is the feeding system, for this you wil need the PVC, silicone, the saw and a drill for the hole.
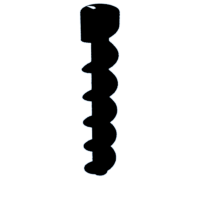
Archimedes' screw: To push the grain out of the pipe, you can use an Archimedes screw. The screw automatically pushes anything forward when it's turned, I used a 3D printer to make mine. In the attachments you can find the 3D model, you only have to change the measurements to fit your PVC piping.
Wooden Plate: For the feeding system you need to drill the size of the diameter of your PVC piping, that way you are sure it wil fit.
The piping: To hold the screw and grain, I used PVC piping, a T-section. Cut the pipe to a length of 20cm (that depends on the length of your screw). Then use the end caps and glue the pipe together with the cap on the backside of the plate and the T-section on the frontside.
The motor: Now that you have the piping and screw fitted in the hole, you can add the 2nd stepper motor. Cut a hole in the end cap of the pipe and fit the stepper motor. Once the motor is in place (you can secure it with screws) you can glue the screw onto the motor. The feeding system is now finished!
Attachments
Step 6: The Code

To make the system work you wil need code, you can find my Github link right here:
Make sure your Raspberry Pi is properly plugged in and connected to your computer before you start this step:
- Open this GitHub link
- Go to Visual Studio Code and click on the branch icon, this will open the source control panel
- Now click on Clone repository, and give in the GitHub link, and press enter
- After that, you can click the file icon to open the explorer tab
- Click on Open folder and find the folder for GitHub. The name should look like in the photo
- Select the right folder, and click on ok. After that, you have to give in the password again
- Congratulations, you now have all the files and codes you need for this project.
Once the repository is cloned you will need to install a virtual environment (venv) and install al the required packages. Make sure you are in the repository you just cloned. Here is a step by step guide for it:
- Open a new terminal
- The first command you enter in the terminal is: python3 -m venv .venv
- The second command you enter is: pip install -r requirements.txt
- Now you have all the packages you need
Step 7: Back & Fronted
Backend
In the code for the backend I used my own classes, this way the app.py (main backend file) won't be cluttered as much. I have classes for all the sensors and actuators. To run multiple things at the same time I used threading, 2 threads: 1 for the sensors and 1 to control the motors. Like this, the sensors will keep working while the motors are turning. You won't have to change anything here but you can if you desire :D.
Frontend
As frontend you can chose whatever you want, I made a simple and userfriendly dashboard and details page. On the dashboard you can controll the 2 motors, change the configuration and see realtime sensor values. To do this I use socket.io and some API endpoints. On the details page you can see the sensor values of the last 24h, there (and on the dashboard) I used Apexcharts to display the graphs. It's an easy way to add nice and clear graphs to your own project.
Step 8: Enjoy Your Work!
If you followed all these steps and did everything correctly, you can enjoy your automated chicken coop. Congrats!


