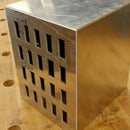
Introduction: Electronics Project Trays
This Instructable is designed for anyone who wants to organize their electronics lab, which is even more important in a communal environment where people share an electronics workshop. I made these for the Electronics Lab at the Pier 9 Creative Workshops at Autodesk.
This short step-by-step guide details how to build project trays, which can hold your LEDs, breadboards, jumper wires and more. As anyone who has ever worked with electronics knows, these bits n' bobs are nearly impossible to organize. This will help solve your problems.
Each tray has a nameplate on the front so that different workshop users can have work-in-progress storage and indicate theirs using a dry-erase marker.
The tray assembly does use both a laser-cutter and 3D printer, so hopefully you can find access to these tools.
The original version of the Electronics Project Trays were designed by Coby Unger and I have taken his version 1 design, modified it, documented the process and have included the McMaster part numbers so anyone can easily make these.
Step 1: Order Things!
There's lots of itty-bitty hardware for assembling the trays. Fortunately, McMaster-Carr has everything we need.
Order from McMaster: Screws, nuts, bolts and washers
Nameplate
2-56 Pan head Machine Screw 3/4"
#2 washers
2-56 nuts
Legs
8-32 Lock Nut, Zinc Plated, 100-pack
#8 oversized washers, 1/2", 100-pack
8-32, Stainless steel, Socket Head Cap Screw, 1 1/2"
Chemical Resistant Rubber Cap, Fits 9/64" OD
Amazon has the dry erase materials you'll need, which we will use for the nameplate. You can get these from other vendors, as well, and I encourage you to support your local crafts store.
Order from Amazon: Dry Erase Materials
Dry Erase Self-Adhesive Sheets, 8 1/2 inches by 11 inches
Fine Tip Dry Erase Markers
Step 2: 3D Print Nameplate
Each tray has a nameplate. I designed these in Fusion 360, which took about 10 minutes to make plus a couple of iterations to get the dimensions and fitting just right.
The STL is downloadable here from this page.
And here is the Fusion 360 model, in case you want to check out the parametric design: http://a360.co/1SxNrnu
I printed these on the Objet 500 printers that we have here at Pier 9, but they will work with any 3D printer.
Attachments
Step 3: Lasercut Trays
The body of the tray consists of two 1/8" sheets of ply that we will bolt together. The top part will create the pocket and the bottom part will be the base.
I've included the Illustrator template for you to work with. Feel free to modify the pockets to suit your needs.
The laser-cutting for each one will take some time and perhaps multiple passes, so make sure you check your settings and do some test cuts before cranking out your project trays.
Attachments
Step 4: Bolt the Two Halves Together
Make sure to properly align the holes for the nameplate. I have on the right side of the project trays.
For the screw, I use a 8-32, stainless steel, socket head cap screw, 1 1/2" long. You can go with zinc-plated if you want to save a few pennies.
Beneath each screw is a #8 oversized washer (1/2"), so that the wood doesn't splinter.
Use a box wrench or pair of pliers to hold the 8-32 lock nut and spin the allen key to firmly tighten the screws on each of the four corners.
Step 5: Cut and Fit Rubber Feet
We want rubber feet on the bottom of each leg, otherwise, you will scuff up desks and tabletop surfaces.
You will have about 3/4" of threaded rod underneath the tray. The rubber caps are a bit too long, so cut the tops off the rubber feet, such that they will be a little shy of 3/4". Then, fit each one on the bottom of the threaded screws.
Step 6: Bolt on Nameplate
This is also easy-peasy.
The 2-56 machine screw (3/4") goes through a #2 washer from the top.
Use a small screwdriver and thread the two screws onto a 2-56 nut at the bottom of the tray. You can use your fingers-as-pliers.
Step 7: Adhere Dry Erase Materials
Cut off nameplate-sized rectangles from the self-adhesive dry-erase sheets and stick them on the nameplate.
I used the scissors-and-eyeballs method because I was lazy but you can use the Xacto-and-ruler technique if you want to be more precise.
Step 8: Done!
This is what they look like, when built.
You can stack them in shelves like so. The name of each user is visible and the trays are easy-to-access and can be brought to your desk or workstation to hold your parts while you work on them.
I hope this was helpful!
Scott Kildall
For more on electronics and other projects, you can find me here:@kildall or www.kildall.com/blog


