Introduction: Finish Wood With Fire | 3 Step How- to


If you're looking to make saw marks pop on your reclaimed wood project, but don't want to sand or add stain. Look no further. Here are 3 easy steps to finish wood with fire like a pro! This is one of my favorite ways to finish reclaimed wood, and I know you'll love it too!
- Sand the Surface
- Burn the surface
- Apply your Finish
Step 1: Sand the Surface


This step is to remove all of the dirt and dust as well as soften the soft grain in the wood. This is where you wont eliminate the saw marks, but will still have a nice smooth surface.I recommend the Makita Brush Sander and/or anAngle Grinder with a Wire Wheel.
Step 2: Burn the Surface


After you remove the heavy dust, its time to color the surface. For this I am using a MAP gas torch but a propane torch works just as well. Lightly go over the surface with the torch. Get close enough that the wood begins to color, but doesn't char. This is important. Charing will flake and create a cloudy and discolored surface. Follow the saw marks for maximum "pop"
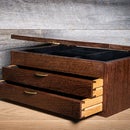
Step 3: Finish the Surface

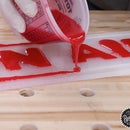
This is the last step. Apply your finish with a sprayer. I use my Graco Ultra Cordless Airless Sprayer but any HVLP system will do. This keeps you from brushing the soot around, if there is any. It seals in the color without wiping it everywhere. It also allows you to keep your paint can clean. Most of us are lazy and tend to contaminate our cans with dirty brushes.
Thank you all so much for checking out this quick and easy tutorial.
If you like these projects and wanna see more check out my website and some more projects here!
Check out some of my reclaimed wood video projects HERE!!!


