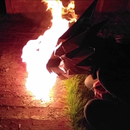
Introduction: Fire Poofer (Butane Flare)
Warning:
This method involves pressurised containers. Do not attempt to follow these instructions if you are not competent in their safe handling and use. Do not attempt anything without suitable PPE. Do not use indoors. Do not use near flammable materials. Do not attach to your person, especially your face.
What you will need:
- Small steel spray paint can
- Two inches of microbore (5mm) copper pipe
- Silicone fuel hose ~1/4"
- Ceramic terminal block
- Nichrome wire
- Li-po battery
- Push to make, micro switch
- A length of two core wire
- Epoxy resin
Step 1: Preperation
Take a spray can, empty it. Ensure it is 100% empty by leaving it overnight with the nozzle taped down. Wear suitable personal protective equipment in case of residual pressure. An angle grinding mask that covers your whole face, with thick leather gloves, sleeves, and apron are recommended. They are all likely to get covered in paint. So don't wear anything you mind getting paint on. Drill a small hole in the base of the can to ensure all pressure is released. Use a can opener to take the bottom off the can. Clean the inside with thinners. Careful of sharp edges, wear cut protective gloves.
Step 2: Flame Chamber, Mounting Fuel Port
Remove nozzle, and drill out valve to one drill bit smaller than the OD of the copper tube. Chamfer the copper tube at the ends. Drift it into place. Mix up some epoxy resin, use to secure pipe in place.
Step 3: Igniter
The Autoignition temperature for Butane is 405°C. The idea is to propel the jet of butane through something that is over that temperature. you could do some maths with the flow rate of butane, specific heat capacity, mass of nichrome coil, specific heat capacity of nichrome, power in, temperature of coil, temperature of butane, so that you can work out what temperature the coil needs to be, so that it is still above 405°C when the butane absorbs heat from it... But instead, just aim for about 1000°C, and shorten it if necessary. The melting point is about 1400°C
Use this calculator to work out how long your wire needs to be, and what thickness with what battery: (http://www.jacobs-online.biz/nichrome/NichromeCalc.html)
Ensure your battery can easily supply the current required.
I did a helical coil. By wrapping it around a paint marker. I know the distance between centres of the ceramic terminal block. this is the coil length. The legs should be as short as possible. The gap between coils should be at least the thickness of a wire. If the coil touches itself, the short might burn out the coil. So give yourself enough spacing. This is a coil wire length calculator: (http://deepfriedneon.com/tesla_f_calchelix.html)
I used ~1mm (19 Gauge) thickness of wire because I was told that the nichrome can be a little fragile when warm. It think it's too thick, thinner would be fine. Then it would pull fewer amps.
I would also probably go for a high voltage electric discharge igniter based on one of these for future units: (https://www.amazon.co.uk/Step-up-Module-High-voltage-Generator-400000V/dp/B00JVK7O18/ref=sr_1_1?ie=UTF8&qid=1473241839&sr=8-1&keywords=400kV)
Step 4: Prep Butane for Testing
Butane lighter refills come with adapters in the lid usually. Grab one of the longer ones. Drill a hole in a piece of material larger than the silicone hose, but smaller than the flange on the adapter. Fit your adapter into the piece of material. Push your silicone fuel hose over the adapter. push the other end over your copper tube.
Step 5: Igniter Testing and Tuning
Clamp your igniter in a vice. Ensure nothing flammable is in the area. Get a fire extinguisher at the ready. With a mate to back you up if things go awry. Make sure you're wearing flame resistant clothing.
Turn on the igniter, wait for it to get up to temperature. spray a jet of Butane across the coil.
If it doesn't ignite, and the coil has reached maximum temperature, reduce the coil length or increase voltage. It should be somewhere between orange and yellow in glow colour.
If it burns out, the wire is either too thin and flimsy, or you shortened it/upped the voltage too much.
Step 6: Mount Igniter
Use epoxy resin to glue the ceramic terminal block to the inside of the spray paint can. You will have to drill/slot the can for the wires to get in. Make sure there are no shorts before leaving it to dry.
Step 7: Test It
Hold the can in a vice, ensure you have the correct PPE and safety protocols in place. Warm up your coil. Spray your butane. Check it still flares up.
Step 8: Use It
The can will get warm during use. Too hot for tape or standard adhesives. The only way to mount it is via mechanical retention, or a high temperature adhesive such as epoxy resin.
This unit is only designed for short bursts. Sustained flames will eventually make the adhesive fail, and it will fall apart.

Participated in the
Brave the Elements 2016


