Introduction: Fun + Educational: How to Make a Test Tube Stand at Home?


Every human is a born scientist and as they grow older they keep experimenting with something or the other, whether its blowing bubbles in the bathwater when a kid, or a research project in organic chemistry being at high school! But for some, Science is a bit frightening. What if students are educated to do science in a fun way? By training them on different experiments at their comfort by using stuff one may probably have lying around the house!
Experiments can be interesting when you use real laboratory like equipment. Whether you plan to make a cabbage pH indicator or do an analysis of a protein at home with your test tubes, all you need is a test tube stand so the tubes remains steady! Let's learn how to make a 'Test Tube Stand' at home which can ignite a science enthusiast to conduct a lot other science experiments, in a fun way!
Supplies
For making the stand: 1 Ice Cream Stick, 1 Foam brick, 1 Test Tube, A short wire of approx 5 cm.
Background Setup: 1 ruler, 1 pen, A Pointed object [Scissor or Needle]
Step 1: Make a Hole in Ice-cream Stick

1. Using a pen & ruler, mark the center of the ice-cream stick
2. Using a pointed object, make a hole of 0.2 cm around the mark. [Sometimes Scissors are not that powerful, use a needle to make the hole].
Step 2: Make a Wire Loop to Hold Test Tube

1. Wind the wire around the test tube in such a way, 2 wire ends comes out of it [See the short clip, to understand more better].
2. Remove the test tube slowly from the wire loop without disturbing the loop formed. [See the image].

Step 3: Make a Wide Hole in the Foam for the Base of Test Tube Stand


1. As done in Step 1, repeat the process for this step as well:
- Using a pen & ruler, mark the center of the Foam
- Using a pointed object, make a hole of the size of "ice-cream stick width" around the mark. [Sometimes Scissors are not that powerful, use a needle to make the hole and then use scissors to cut and make a proper hole].
2. Insert the ice-cream stick in the Foam hole to see if the stick is getting fit.
Step 4: Assembly of Test Tube Stand


Now that the basic setup is done, let's start the integration of steps.
1. Pass the loose ends of the wire in the hole created in the ice-cream stick.
2. Loop the extra wire ends behind the stick vertically.
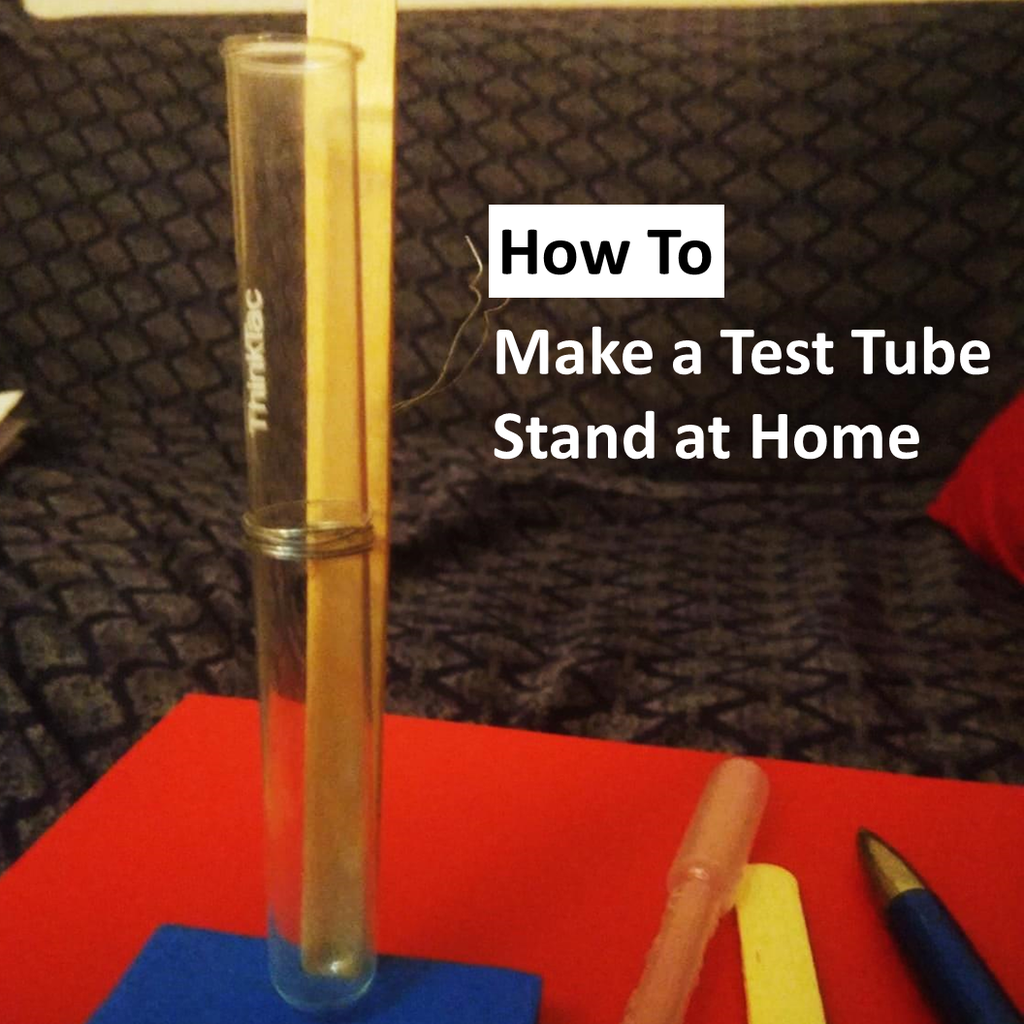
Step 5: Hurray, Its (almost) Done!

1. Place the ice cream stick with the wire loop on it, inside the Foam hole.
2. Place the Test tube in the wire loop.

Participated in the
Remix Contest


