Introduction: Google Nexus 7: First Thoughts.
People are saying the palmtops and the touchpads are the new desktop. I sort of agree and disagree with that comment. You will have to pry the desktop out of my hand, but I have no problem using a pad. The new arm processor is taking over in the IT World where the I386 aka x86 based systems are beginning to disappear. All the devices shown in the picture are either arm based or arm based derivatives. A whole network of devices within two feet of each other. (Nslu2 running Debian linux, Airlink101 router running dd-wrt, Raspberry Pi running debian linux, and finally the Google Nexus 7 runnng Android.
The Google nexus 7 (2012) is what we are going to look at in bit of detail. Compared to the mainframe computers of the 1970's, it is a magic carpet device. What's next?
Step 1: First Thing, You Have to Have Is a Stand....
Anytime you have access to a touchpad, palmpad, or the like you have to have your own personal stand to show off your new computing tool. There are many many home made stands that you can choose from Instructables.com has quite a few itself. Whichever one you pick will definitely allow your enoyment of the unit to multiply.
Step 2: You Have Logged Into Your Unit and Changed Your Password, Now What?
Your Nexus 7 is pretty much useless unless at this point. Something you do not want to hear, but the good news is that you can connect it to at least your own home network if you have a router that supports wifi. In fact you will probably want a router that paritions out any wifi devices for the security of the network. Many of your nicer routers do have the ability to set this up easily. Consult your router's manual for details. If you do not have a router with those capabilities, you can use a two router set up to accomplish the same thing.
The next thing you want to consider is what speed will you connect to the network. If you have only one or two wifi devices, then there is no need to go out and spend a lot of money to upgrade your network to N. G (what most routers support) will work just fine, A whole new technology is coming out for wireless that will make existing equipment per se obsolete.
Security in connecting to the wireless network is also important. http://homekb.cisco.com/Cisco2/ukp.aspx?pid=80&vw=1&articleid=19073 has a primer on how to get started with wireless security. Again It will vary from router to router on how to best set everything up. Check the manuals for sure.
Step 3: What Can We Use With the Nexus 7?
As I said, per se you can not use the machine alone. You if you are connected to the internet you can do all kinds of things such as watch videos, listen to music, play games, and of course access the internet. The internet will do a sort of heavy lifting for all that you want to do. Your Nexus 7 is a sort of portable thin client.
You can get software that will let your Nexus 7 act as a stand alone device. The Google play store is a good starting point, You will know that the applications made available there will be at least to some degree be tested and free of any possible issues. Before you know it your Nexus 7 be filled with all kinds of goodies. This is when having the 32 gigabye model can be most important. You will want to be frugal at some point as to what you download.
Step 4: Your Own Internet Cloud?
One thing I have done in our instructables is try to show you how you can be your own self sustaining network with instructables like https://www.instructables.com/id/Uses-for-your-own-private-cloud/. This means you are not dependent on the internet for the software applications that you might want to use. Plus it is fun to do your own web site. You could even do something as simple as a blog with the very inexpensive Raspberry Pi (https://www.instructables.com/id/Raspberry-Pi-simple-blog-server/). This is a great job for older computers that otherwise may seem to be of no use. Home automation control via Nexus 7 is a really awesome way to integrate the server and the Nexus 7.
You can also use a server to provide video and music access. In fact there is an android app for the mythtv (computer based dvr) server. (https://www.instructables.com/id/Setting-up-a-computer-based-DVR-with-Mythtv-for-l/). Sometimes you may just want to listen to music. Fortunately that can be done on an older computer too running software known as Firefly. It is available for t he major operating system platforms. In the second picture My Nexus 7 is running an app from the play store that supports the Daap protocol much like itunes uses. Where is the music coming from? It is coming from the NSLU2 in the upper leftand corner of the second picture. (https://www.instructables.com/id/Give-your-Cisco-Linksys-NSLU2-some-muscle-part-1/). The Raspberry Pi can also easily do run the same software when running linux.
Yes there are lots of games also. I like to play the old text adventure games. So we have an application of the server to do that too. (https://www.instructables.com/id/Installing-Zork-and-the-zmachine-on-your-web-serve/).
Step 5: Using the Nexus Server As an Admin Tool.
One term that has been used for a long time is called "sneaker support". That means you have as an administrator run around to any computer that is having issues or even just to do maintenance. If you can access a system remotely, then, you do not have to run around in your sneakers to support it. Remote control!!
For nix based systems you can get what is called a secure shell (aka ssh) application to access those systems remotely via the command line. This is one of my most favorite tools for use not only with a Nexus 7, but with any computer I might be using at the time.
Need to see the desktop of a remote machine, no problem as there are remote desktop viewers also. You can access a machine as if you were sitting right in front of the monitor on that system.
There are also some programs available from the play store that will allow you to do some packet sniffing where it is legal to do so. The latest sourcetrunk has some thoughts on that. (http://www.sourcetrunk.com/node/160)
Step 6: Watch Your Linux Boxes.
Remotely access the MSWindows boxes can easily be access with rdp clients, What many people do not know is you can also do it with linux boxes that are running a gui and xrdp. To enable xrdp:
$ sudo apt-get install xrdp
No need to run linux such as ubuntu on the tablet now. Will admit though as much as I do not like the unity interface, it might be an advantage here. This also works for connecting to the Raspberry Pi!!
Step 7: Where Do You Attach Anything?
One of the sensitive issues with me about the Android platform is that you have to have the power of the computer gods so to speak to have full access to your Nexus 7. To get full acess to the Nexus 7, you have to do what is known as "root" the device. Root is the equivalent of Administrator on MSWindows based systems. As root or administrator you are the super user of the equipment. In actuallity, You try to avoid being superuser for security reasons. I am not going to get into rooting the device, because how to do it depends on what time it is. (newer versions of the Android os come out all the time and getting root is not standard).
Why did I say that? Most machines allow you to use external storage devices such as thumb drives and portable hard drives very easily. Not so on android devices unless you have root rights. I understand why, but it still kinds of disappoints me. You have to do everything over the network an at times file exchange. of data is Inconvenient.
That leads to the question, in fact how do you connect anything to the Nexus 7? Suprisingly there is a special usb cable called an OTG (on-the go) cable that will allow you to attach hardware such as keyboards, mice, thumbdrives (with root access), printers, cameras and etc. Most local retailers at least where I live do not carry the cable. I ask retorically Why? You can get the cable on-line fr the major internet retailers for a nominal price. You actually can make your own otg cable without cutting open a cable as some you tube videos suggest. It can be done without all the cable surgery, (update: Fry's now carries the cable).
Almost forgot, Using a wireless based device at some locations is prohibited. You can use the OTG cable to attach a usb to ethernet adapter to connect to their local network. Except for the power drain, I like the security of not have to use wireless.
One thing you might also consider is an automotive power adapter.
Step 8: Otg Hack.
Notice: do this at your own risk. Get a professional to help if you are the least bit unsure how to do it. We are not responcible for and and all issues. Do not do this on the cable that works with the charger!!!!!!! Use a separate cable.
Step 9: Mythtv Android Client.
Step 10: How to Void Your Warranty!
Step 11: Getting Files.
Now it is time to think out of the box. Well if I can download files from a web page without root, why can I not do that with a web server of my own? But how to do it. Alhough I do have an Apache web server set up, what about the times when it may not be available. Aha! The quickie web server (see links below) can be the answer. So I copied the files where I wanted to serve the files to the Nexus 7. then made sure they were there.
$ ls -al
total 284
-rwxr-xr-x 1 www-data www-data 16533 2013-02-05 11:11 file1.exe
-rwxr-xr-x 1 www-data www-data 16533 2013-02-06 10:11 file2.exe
-rwxr-xr-x 1 www-data www-data 37213 2013-02-05 11:11 file3.exe
-rwxr-xr-x 1 www-data www-data 212 2013-02-06 10:28 index.html
-rwxr-xr-x 1 www-data www-data 194309 2013-02-05 11:11 qbasic.exe
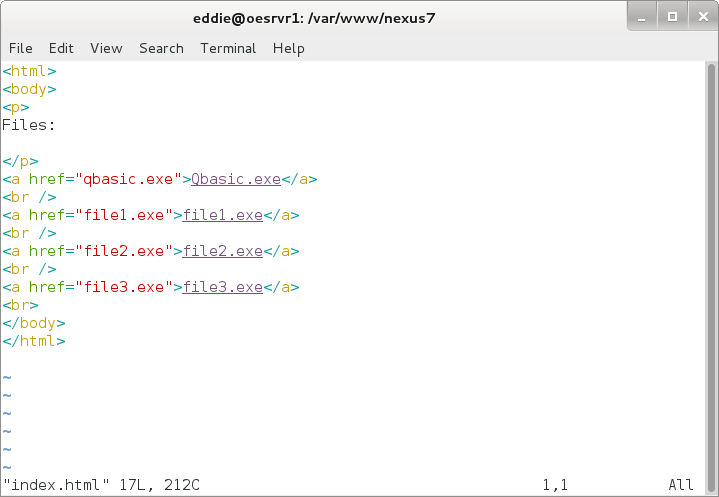
Did not have to, but I made a simple table of contents or index.html That way it was clear what I really wanted to download. A good idea especially if you have a lot of files in the directory.
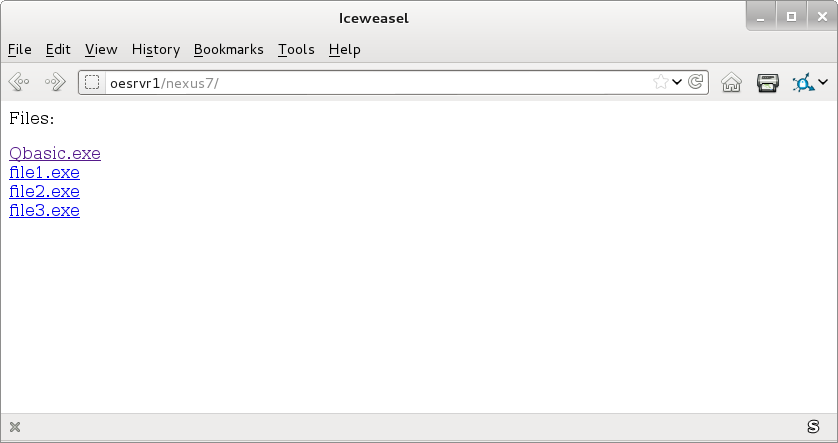
Now to download the files. So I pointed the web browser to oesrvr1/nexus7 if I was using the apache web server.
Just lick on the link... (if using a regular browser, it might look like this:
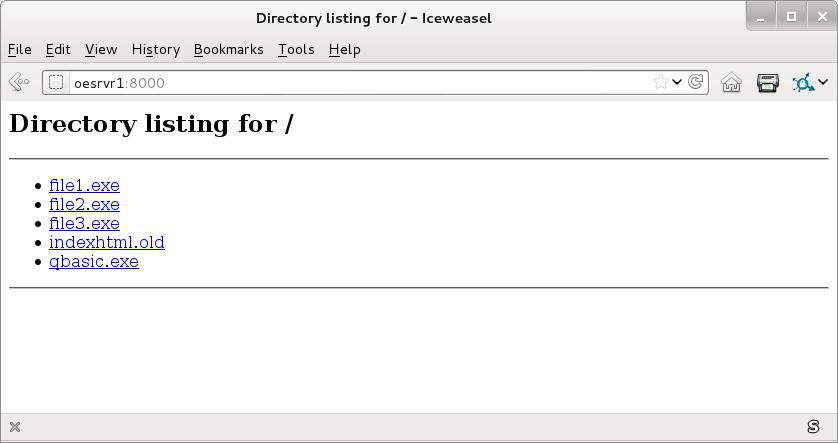
If you are using the quickie python web server without the index.html, it might look something like this. (You would connect to a port (8000) instead of the directory.)
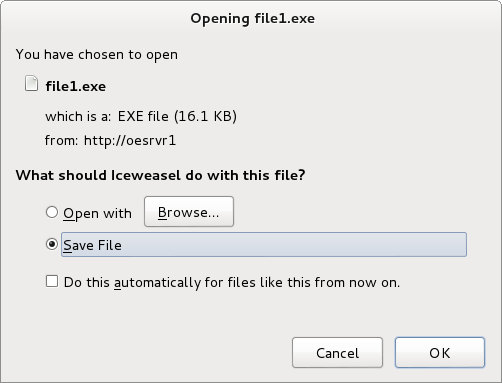
Obviuously this is not a secure method of transferring files. But on your own private network, that should not be an issue if you are careful. The files were easily transfered to the Nexus 7 and I am happily using them now. Did not have to purchase a special app or worry about how to connect to the Nexus 7 with hardware. Which leaves me to say, If you have one or more computers, having a web server just just as important as having a flashlight for emergencies.
Update:
Under linux gmtp will connect directly to the Nexus 7
Using MTP on Debian Linux to transfer files from the command line
# HOWTO Mount Nexus or MTP Device in Debian or Ubuntu
# Install MTP and its tools:
sudo apt-get install mtpfs mtp-tools
# Create a mountpoint:
sudo mkdir -p -m 777 /mnt/nexus
# Install mod fuse (or permanent in /etc/modules):
sudo modprobe fuse
# Plugin your Nexus
# Ignore the "New Device found" notification
# Mount the device manually instead:
mtpfs /mnt/nexus
# Open your favourite file manager and go to /mnt/nexus and transfer files
# When finished, don't forget to dismount the device:
sudo umount /mnt/nexus
---------------------------------------------
Linux quickie web server
https://www.instructables.com/id/Quicky-web-server-for-linux/
Windows XP quickie web server
https://www.instructables.com/id/Quicky-web-server-for-MSWindows-XP/
Mto on XP (use at your own risk as I have not tried this.)\
http://forum.xda-developers.com/showthread.php?t=2012786
http://forum.xda-developers.com/showthread.php?t=1934306http://forum.xda-developers.com/showthread.php?t=1934306
Step 12: Touchpad Megaphone.
Want to increase the sound volume of your touch pad or the like? This is for units that have the speaker on the bottom of the unit. Try this neat trick. Take a length of about seven inches of one inch diameter pvc pipe. Your size may vary, Most hardware stores carry pvc pipe, but you might have to get a long piece just to make a short piece. I had about a two foot long piece already, Cut a groove in the pipe just wide enough to insert your pad. You probably do not want it too tight. You will also need two elbows. I just used right hand elbows as they were a lot cheaper than the slight angled ones. Press the two elbows on each end. Get your music going on your touch pad and insert it. You should more than twice the volume without using any kind of electronics!!
Then there is the updated version..
Step 13: The End? Maybe Maybe Not?
Hopefully I have given you enough to make you curious about the Nexus 7 as well as any Android device. A Nexus 7 laptop in the works? Stay tuned....
Note: I do not work for Google or any company that is even remotely involved with the Nexus 7 or Android.
Step 14: Stand Accessory.
Experimental palmtop stand in progress. I could get real fancy with this if I wanted to. Did a light stain of the base using tea and the the liquid from soaking steel wool in vinegar.
Step 15: Develop Your Own Software Without the Android Development System.
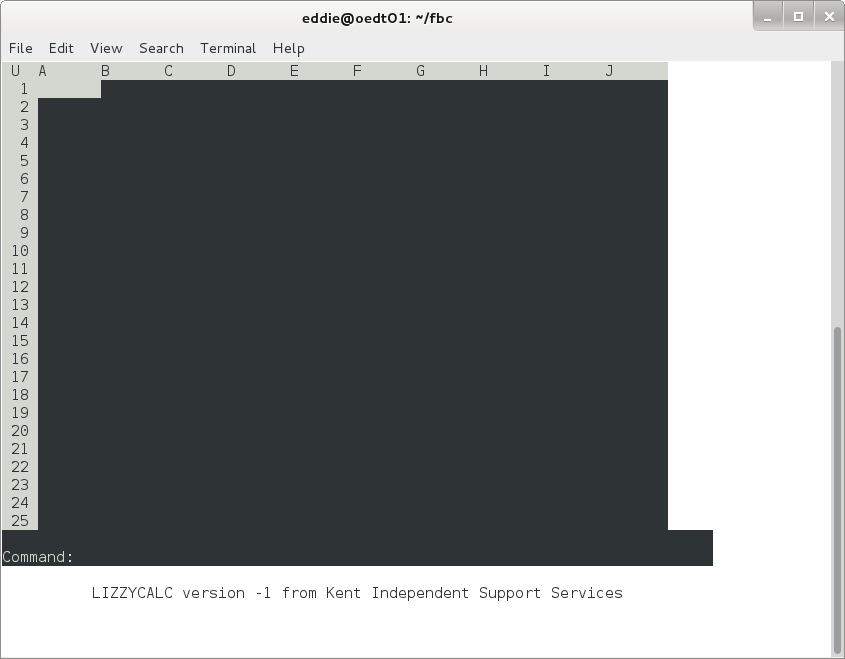
Bad picture, but I ported my little spreadsheet to the Nexus 7 without using the Android development package. Actually I loaded a dos emulator and installed Qbasic. Now I can use all the programs I have written such as a spreadsheet, database, editor, and etc.
Step 16: Your First Android Application.
Step 17: Nexus 7 Direct Connect to Arduino.
Want to hook your Nexus 7 directly to your arduino, then all you need is a OTG cable and a standard usb cable. Get the free (at this time) Usb(terminal app from the playtore and install it.You will want to set the arduino serial port and the nexus 7 both the the same speed. We use 9600. The android hhas an ide app for Android, but I have not tested it yet.
Have fun.
Code to test the connect from the arduibo to the Nexus 7.
<code>
void setup() {
// put your setup code here, to run once:
Serial.begin(9600);
}
void loop() {
// put your main code here, to run repeatedly:
Serial.println("This is a test");
delay(1000);
}
</code>
Step 18: Usb Charging Cable.
Connecting your phone or other computing device to an unknown usb port could get your device hacked. Protect yourself with a usb condom so data lines do not get connected to a nefarious host while charging. getting an usb extender cable from the dollar store is the easiest way to statt making one.
Step 19: Pc Emulator.
Limbo is a PC Emulator (x86) based on QEMU. You can now run Debian or DSL Linux on your Android device without root. Ssh, X Server, ftp, vnc, samba, vpn, mysql clients, gcc, java, perl, python right on your Android device.Not tried this yet, but it looks very interesting


