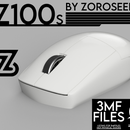
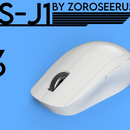
Introduction: HK Gaming Sirius-M Wireless Mod (G305)
These are the orientations that I print the pieces in. Remember to use supports on the rechargeable battery holder. Typically I use eSun PLA+ so I don't know about other filament types.
I've printed this on an Ender 3 and Prusa Mini. I print with pretty close to the supplied 0.2mm Standard profiles so I'm not going to post my full profiles, but I would enable "print thin walls".
You need to cut the front screw holes so I would work under the assumption that this is not reversible unless you keep it together a new way once they're cut.
Supplies
Supplies: Patience
Basic troubleshooting steps
-Sirius-M
-G305
-3D Printer or Printed pieces
-STL Files Link: https://www.etsy.com/listing/951516184/hk-gaming-s...
-Etsy Shop for prints: https://www.etsy.com/shop/ZoroSeerus
-Screwdriver
-Flush cutters / cutting instrument
-Tape
-AAA Battery
Cables I use: https://www.amazon.com/gp/product/B07RHVNFQ6
Battery I use: https://www.amazon.com/gp/product/B07RHVNFQ6
-There are likely multiple combinations of chargers and batteries that work. These are the ones I use. The battery matters less than the connector since they'll only vary in weight and battery life. If you get a different battery make sure it's 1.5v. Video demonstration of rechargeability:
Step 1: Necessary Cuts
There are a lot of cuts to be made. Do it carefully and look at the images.
Be very careful once the cuts are done that you don't put a ton of force down toward the front. There is a very thin connection point by the plungers. I definitely broke mine at some point when I was making different ways to hold the front in place. I glued it back together but I'd suggest you avoid breaking it.
Step 2: Setting Up the Battery
Be careful with the ends of the battery wires. You can tear them off in which case you'll have to resolder the connection.
If you're using the rechargeable battery then plug in the magnetic micro-usb charging tip. Orientation for the battery and their holders are shown in the photos. Unplug everything and put the battery into position. For the rechargeable battery you'll want to tape the connection to the open end. I also typically add a piece of tape around the holder reaching under the pcb. The holder is small and thin like this so it can fit in all of the mice I've made mods for. For example, if it were longer and fully surrounded the battery, it would run into the internal wall and not fit.
Step 3: Putting the PCB Into Place
Use the three circled PCB screw mounts.
The front will slide down into the slot in accompanying spot in the front. There is an opening under that you'll want to push something small up when you want to open the mouse for some reaosn. The front will be difficult to separate otherwise.
Step 4: Switches
Screw the M1/2 switches in.
Slide the side buttons switches down and into place.
Everything should be aligned to match the final picture.
Step 5: Putting It Together
Make sure the side buttons don't move out of place while putting it together. Recall you cut some of their support so they're a little loose until the top and bottom are fully connected.
Slide the front down in it's slot.
Flip it over and hold it together. Screw in the back two long screws. Now toss some feet on and you're done.


