Introduction: Hand Tilt Controlled Car Using Arduino


Hi, everyone this is my first instructables so be a little understanding. pls post ur suggestions for future instructables.I am trying to document every single step out their for the beginners who want to get started with building there own bots but have idea on how to start. this is a simple tutorial wherein i'll guide u through the simple steps to make rc car that can be controlled using your hand movements.
THINGS REQUIRED :
ARDUINO UNO or any other arduino will work just fine.
two or three axis accelerometer ( i used a adxl 335 ).
motor driver typically a L293D.
a servo motor (optional).
a old rc car or u can make ur own with two motors.
some jumper cables.
TOOLS REQUIRED :
soldering iron
solder
power supply for the arduino as well as for the motors.
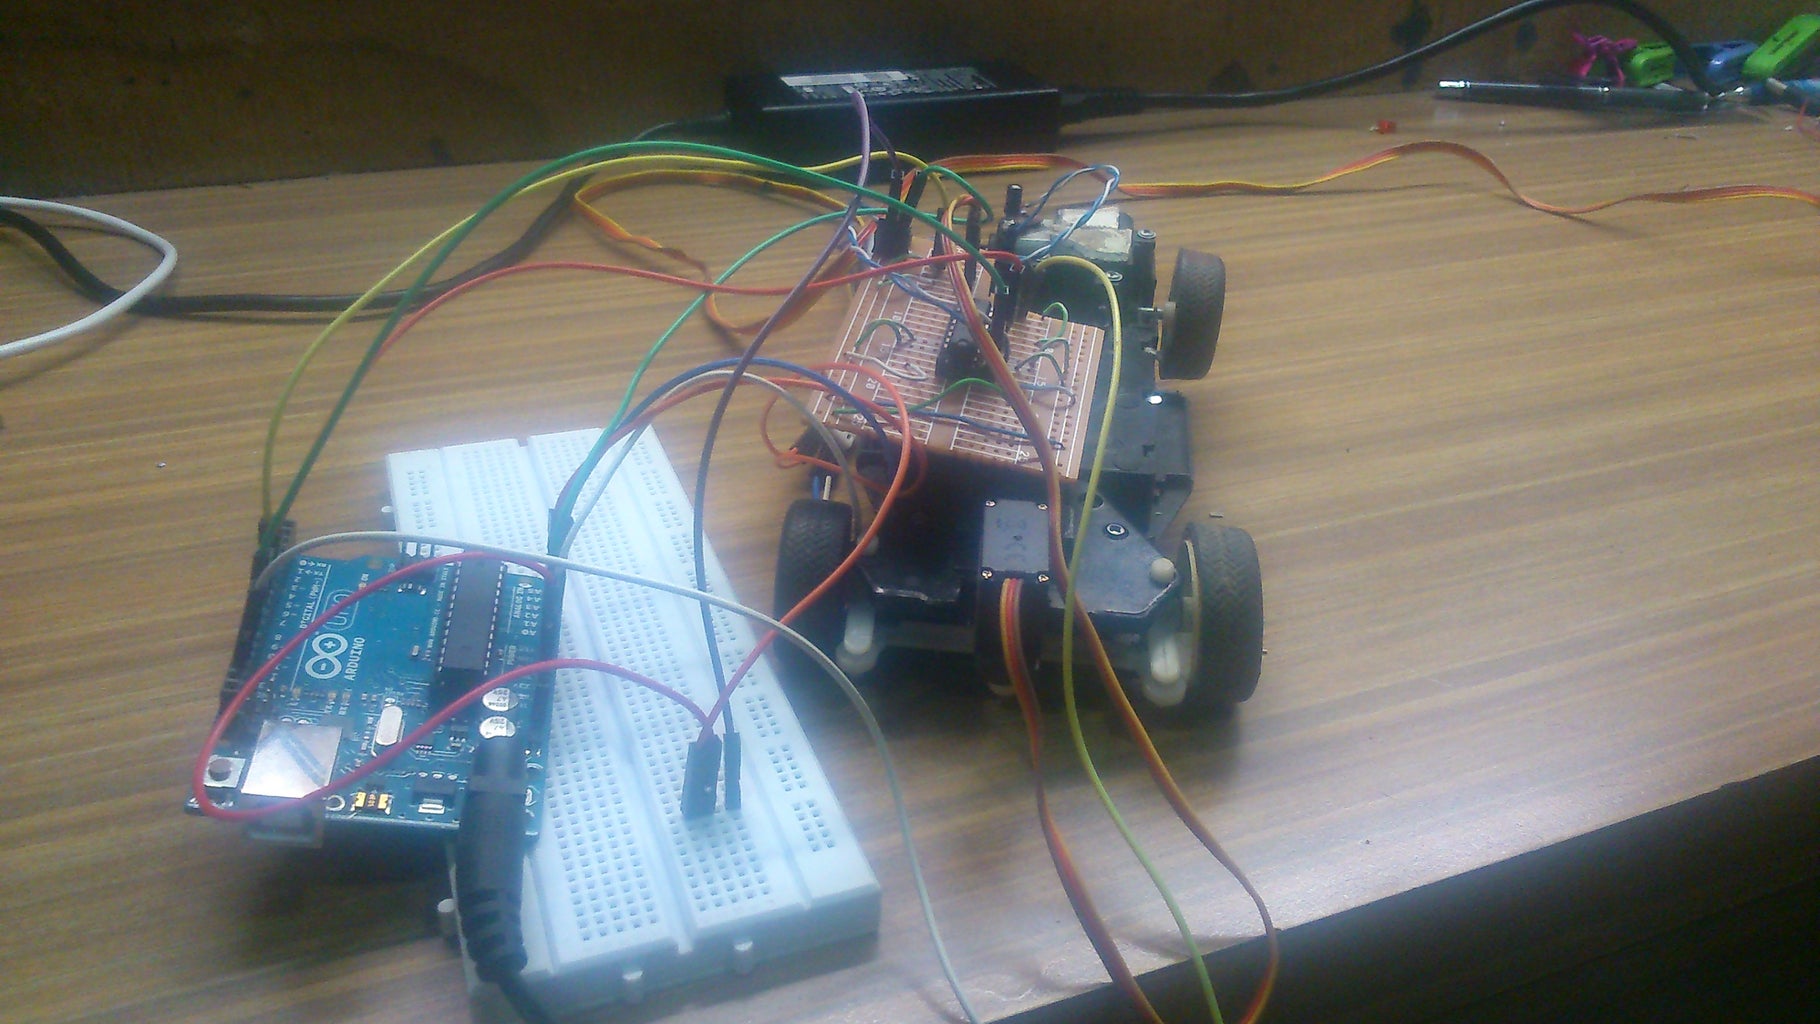
Step 1: HARDWARE


Firstly get an old rc car and strip it down completely and get all the old wires and circuit board remove. Only leave the motors on. I have removed the front motor and replace it with a servo for accurate results . The swap was pretty simple and a easy task.
Now take a proto board nd solder a 16 pin ic holder for the motor driver .
wire the rest of the circuit on the protoboard as shown in the diagram.
connect the input 1 from the L293D to pin 10 on arduino
connect the input 2 from L293D to pin 9 on arduino.
also solder a three pin header onto the protoboard for the servo.the first pin connected to ground , 2nd to vcc and 3rd to data ( pin 7 on arduino).
Step 2: THE GLOVE PART.


To make the module tat is to be attached to the hand.
Take another small protoboard and solder the accelerometer on it. solder wires through all those pins except for the zpin .
Now connect the the vcc+ pin on the accelerometer to the vcc pin on the arduino.
x pin on accelerometer to analog pin A3.
y pin on accelerometer to analog pin A2.
GND on accelerometer to GND on arduino.
Step 3: POWERING THE WHOLE SETUP :
Im using a 9v 1 amp dc power suppy to power both my arduino as well as the motors. You can also use a seperate power supply for the arduino. As for the servo it takes up power from the arduino directly.
Step 4: Code :
I have attached the code. if it doesnt work properly then its because ur accelerometer doesnt give the same values as mine . then all u gotta do is plug ur arduino into the computer run the code and open the serial monitor and check the values you get and replace those values with mine.
Attachments

Step 5:
Have fun with your rc car.. and if u like this tutorial add it to your favorite.....cheers !!!!

Participated in the
Remote Control Contest


