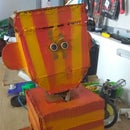
Introduction: HinDer Humanoid In-door Explorer Robot
Here, we are sharing, the entire journey of making an indoor navigation robot for our makerspace. The part-1 deals with the multiple prototypes built using breadboard and robot chassis. The part 2 shows how our hinder got its humanoid structure.
What is its purpose?
Suppose you have bought yourself a new luxurious house and you have guests visiting your place for the party you are throwing up tonight .what if you have someone guide your guests and showcase your new house to them while you handle with your long list of visitors.
No worries! HinDeR will do that for you. Ever imagined that a robot of this kind could replace you and make things simpler for you.
That’s what HinDeR is made for.
Hardware Requirements:
- Arduino Uno R3
- HCSR-04 ultrasonic sensor (x 2)
- LN-293D Motor Driver
- SG90 Servo Motor
- 16 x 2 LCD
- Infrared sensor
- 12V DC Motor (x 2)
- Soldering Iron
- Chassis ,
- wheels (x 2),
- castor wheel
Stationery items
- Glue gun
- Adhesive glue
- Thick cardboard
- Cutter
- Tape
Step 1: Prototype Version 1.0
Features
- Obstacle avoiding functionality
- LCD display
- Chassis constructed
In our prototype version 1.0 .we assembled our motors wheels and built our chassis.
Also there is a LCD to display message and make HinDeR interactive.
Obstacle avoiding functionality was incorporated with the use of one ultrasonic sensor on the front mounted on a servo motor to give it a rotating neck like feature.
Step 2: Prototype Version 1.1
Features
- Follow me functionality
It is necessary for HinDeR to keep a check whether the visitor is following him or not, because it is the human tendency to get distracted easily.
In case the visitor is off track, HinDeR will stop and wait for the visitor to further continue onto its journey. We have made use of another ultrasonic sensor on the rear end of chassis.
Step 3: Prototype Version 1.2
In V1.2 we have improvised on the looks of HinDeR.
Unlike the previous versions we have made use of 3D printed cases to enclose our 2 ultrasonic sensors .
Step 4: Prototype Version 1.3
Challenge
Throughout the previous version V1.0 V1.1 and V1.2, the challenge that remained was the use of so many wires which was messy, voluminous and didn’t give the bot a tidy look.
Solution
In V1.3 we decided to structure out a humanoid robot shape.
This gave rise to our concept of humanoid bot. Choosing to build the bot on a bigger size ruled out the problem of messy and voluminous connections of wire as we could now keep the connection inside a structured body which is hidden from the outer world.
The building of humaoind shape, along with steps, is explained in "Part-2" of the instructable.
Hope you liked it.

Participated in the
Makerspace Contest 2017


