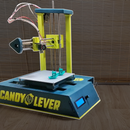
Introduction: Homemade CNC V-Carving
I made an instructable a month back about my homemade cnc. It's cheap, it's usefull, it's easy enough to make and it's a lot of fun!
So after i figured out how things work in the cnc machining aspect, it was time to experiment a bit more.
I mounted a 500w router on the z-axis,made a quick(or not too quick!) internet research and decided to engrave decorative flourish pattern. V-carving style! It's much faster than 3d milling the design. The whole g-code file took about 20 minutes to excecute, and thats because my feedrates were considerbly small. Better safe than sorry.
I roughly hand-planed a pine board to use, but it was mostly to get rid of the surface dirt it had gathered during times. I didnt pay too much attention to get it square so it ended up with a high spot in the middle.( left and right sides 0.2 mm lower than the center of the board on the z-axis). So the carve progressively faded to the sides as the tool was cutting air! After the first run i decided to run the code one more, homing a bit lower (0.3mm) but when it was about to carve what it missed before, i had a connection problem!( I'm thinking that it has something to do with the 15 ft data cable i used to connect the mchine with my computer!). The piece looked satisfyingly good for a first attempt, plus it was getting late and that little router of mine can be very loud! So i decided to call it a day.
After some research, the software i used to do this is called F-engrave. Simple, free , reliable and highly recommended.
Let's see the video above and then go make one. It's highly satysfying!
Thanks for watching. It really helps!
See you next time...


